Part 5 - Gear Placement
An introduction to protecting cracks

You must still be aware of how all the gear works and especially in larger cracks be confident in using Friends as they will come into their own for making fast progress. However, you must be aware of the implications of how much gear to take and how liberally to use it, see the 'Crack Gear Dilemma' below. In addition, it's a great idea to practice lots of gear placing at ground level before you even get onto routes. A confident climber will often be one that knows their gear placements...
The Crack Gear Dilemma
This could also be termed the "over-gearing dilemma." When you are faced with a route where you can place almost limitless amounts of gear it's very hard to resist doing so! We've seen this often in beginner crack climbers and experienced this process when we first started. Placing too much gear often slows progress, clogs up the crack and tires you out. One of the secrets to crack climbing (as we imply in the film) is to be aware of the gear that you need to take and place it in such a way that it doesn't compromise progress. Obviously this is an art and like everything it takes time to master, but some basic steps can be followed:
Look before you leap – If possible, look at the route or pitch before you start to climb and try to slim your rack down to the essentials – if it's fairly obvious that if it's a finger crack don't carry a Friend 4. If you start with less gear, then you will naturally try to place less gear. It is a fine line though, so experiment with this process on routes within your grade to start with.
Below, not above – When crack climbing, the temptation is to place gear as far above your head as possible. This gives you more confidence, but unfortunately will lead to a multitude of problems. Placing gear above your head means firstly, you can't see exactly how good the placement is and also you can't see if you are putting it into the best available handhold. Secondly you have to pull the rope up further to clip (slow and tiring), and finally the rope, once clipped, also blocks handholds. The solution to this is (as we show on the video) to place gear in between your hands and feet; you can see what you're doing, it's easier to clip and leaves the next section of crack free for your hands.
Don't be a jam blocker – As we imply above, one of the difficulties with crack climbing is that sometimes the constrictions that make the best handhold also make the best gear placements – but obviously if you block a handhold with a piece of gear you can't use it!! As discussed earlier, try to place the gear below your hands, or use alternative sizes of protection that will not compromise the jams you are hoping to use.
Intelligent racking - Finally, when starting out it's worth thinking about how and when you are going to be placing gear. This means you should put some effort into looking at your system of racking gear. Although this is a subject in itself, one simple tip would be to say if you are more dextrous and confident with one hand it may be good to rack the gear you're most likely to use on the side of your harness that allows you to use that hand to place the gear.

The Gear
Rocks + Other Nuts
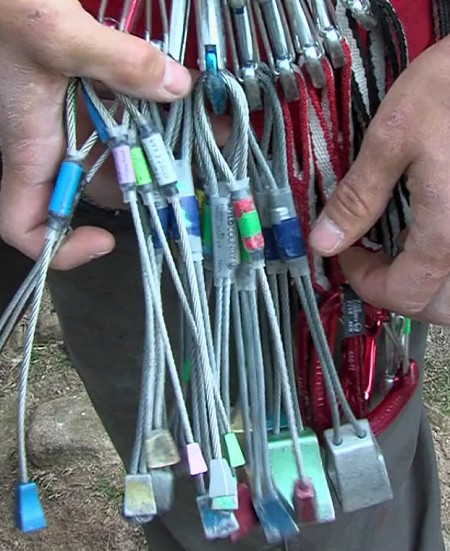
The advantage of nuts is that they are very light for their size and less complex in their placement – a 'bomber nut' is a big psychological asset for any grade of climber. Most people starting out crack climbing on less steep cracks are placing nuts in slightly less strenuous positions and will find that both Rockcentric type nuts and big Rocks will come in very useful. The slight disadvantage with nuts is that they are tricky to place in almost parallel cracks and can be a bit slower than placing a Friend.
Camming devices
Friends are the backbone of a crack climber's rack and the more recent invention of micro Friends added another powerful weapon to the armoury too. The reason Friends changed climbing and are so suitable for cracks is that their mechanical spring loaded action makes them the only type of gear that functions well in parallel placements.
Friends are not simply a one stop solution and as with all gear care, time and skill is needed to get the best out of them. Some of our top tips would be:
1. Place Friends where you can see them – especially with smaller Friends and micro Friends. It's very important that all the cams are touching the rock and that they are in slots which are suitable i.e. that don't have odd rugosities which could mean that the placement can change if the Friend is wobbled or moved. If you can't see where you are placing them you can never be sure how good the placement is.
2. Direction of loading - Always try to place Friends so that their stem is angled in the direction of the anticipated load if a fall is taken.
3. Don't over cam - If possible try to place friends in the centre of their range – they will be easier to remove and this also gives a degree of flexibility if for some reason the Friend is moved. However, the beauty of Wild Country Friends is that with a constant cam angle they can be placed at their limits and still perform.
A good tip would be to download and read Wild Country's 'Cam Book' which talks about the intricacies of Friends and explains about how they work and how to place them: Cam Book
We have put together an overview of gear for each size of crack here: Crack School Gear

