


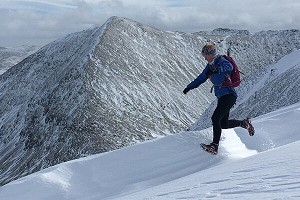
The Winter season may be drawing to a close, but following warnings from the BMC and MCofS, and constant reminders from the Mountain Rescue Services following recent rescue call-outs, conditions remain harsh in mountain areas and some extra navigation tips certainly won't go amiss! Rich Parker MIC aka 'Murko Fuzz' gives us his top tips.
Nb. For more on this topic see also the recent article Navigation in Poor Visibility from Mountain Training course provider and Lake District Fell Top Conditions Assessor Graham Uney.
Some time in the early Noughties: Jamie and I were wading south to be collected by a Northern Corrie for climbing. Nothing was visible other than ourselves and the opaque white, until a phantom loomed into being across our path. It was a young man; ice axes, helmet and rope strapped to the outside of his pack.
“Alright mate?” he said. “Do you guys know where anything is?”
 © BMC
© BMC
Some years later two men lost their lives close to that same place. I don’t know the exact circumstances of their desperate situation, but they were close to shelter and safety. The weather and the visibility made it so hard for them that they couldn’t make it.
Navigation is not the only factor in getting in and out of the mountains in one piece, but it’s a pretty fundamental one, and very, very important. You don’t have to be a wizard, just be able to find what you’re after and then get home, or at a minimum get off the mountain, so here is a run down of techniques and strategies for winter navigation.
We all navigate every day without even realising it. Getting to the toilet in a dark house without hitting the wall or falling over the dog is navigation. So is finding the mayonnaise in the supermarket, sensory clues provided by our surroundings that help us find what we want.
For us as climbers and mountaineers looking at the landscape and understanding where we are is simple navigation, looking at a map and being able to relate it to the landscape and thereby understand our position is another form and slightly more sophisticated than that is taking a bearing from the map using a compass and following it over the ground.
What do we need?
A map of the correct area (you don’t want to end up in the Daily Mail) and a compass that works is the minimum, an altimeter is an extremely useful aid and smartphone mapping is a great luxury which is pretty cheap and fairly reliable these days.
The Compass
This should be a baseplate type, long enough to take meaningful measurements from the map. The Silva Expedition has scales for 1:25k, 1:40k and 1;50k maps.
 © MTT
© MTT
The Map
Most of the UK maps of mountain areas are produced by either the Ordnance Survey or Harveys and come in a range of scales. 1:25k provides a good level of detail which can make understanding small features easier. On the other hand 1:50k covers a larger area, 1:40k being a fair compromise.
The big difference is between the producers. OS 1:25k can be rather ‘cluttered’ by a high level of detail in topographical features such as rocks and scree. The Harveys product is very clean and user friendly, with one slight quirk: the contour intervals are spaced at 15 metres as opposed to 10 metres. Apparently OS hold the rights to 10 m contour intervals. One bright spark recently suggested to me that perhaps they should have tried to get away with 10.01 metre intervals?
On behalf of the BMC, Harveys have been producing the 1:40k Mountain Map range which is a really good compromise. It’s printed on waterproof paper, although after just a few folds the veneer breaks down so it will still need to be protected inside a waterproof case.
The Altimeter
What’s the point of knowing how high you are in the British mountains? Well, picture the scene: you’re walking up a featureless uniform gradient in poor visibility, tricky to identify your position, but if you know your height then the contours on the map will reveal whereabouts you are. One caveat with this is that due to the chaotic British weather and the fluctuations in atmospheric pressure the altimeter will have to be regularly checked at ‘known points’, for example the car park, a col or a summit.
The smartphone mapping app:
Viewranger and Memory Map are two such apps that provide on screen OS maps and all the usual GPS unit capabilities such as directions to way points and tracking. It’s important to ensure that whatever you use caches the map downloads onto your device so that they can still be viewed outwith a signal area.
Such gizmos are brilliant for location confirmation but also as a measuring tool which allows you to conveniently establish your speed over different types of ground, which is handy as we’ll see later.
These are definitely the more unreliable of the common navigational instruments due to battery life and any number of other technical gremlins. Batteries don’t like the cold and even a full one can be reduced to sluggish hypothermia by sitting switched off in the lid of a winter rucksack.
Keep your phone in a pocket close to your torso and keep it alive with your warmth! Airplane Mode will also save you battery life as your device is not wasting energy hunting for sketchy mobile signals.
Smartphones and compasses do not like each other — try and introduce them for a couple of seconds and see what happens! There is anecdotal evidence that prolonged proximity to a phone can depolarise a compass so keep them a good 30 cm apart.
Where to put my map and compass?
If they get stashed inside a rucksack lid they’re not going to get used as often as they should, be aware that maintaining your position is way easier than trying to relocate. Keep your map in a pocket, you can make it small by peeling off the cardboard cover, printing a section from map software or even chopping out the bits that you’re not likely to visit! Waterproof cases such as Ortlieb, sandwich bags or laminating film will keep your map from turning into paper mache.
Have your compass tied to a zip toggle on your jacket or trousers so that the wind can’t steal it. Take care though because as well as phones other gizmos and metal objects such as central locking key fobs will effect the magnetism.
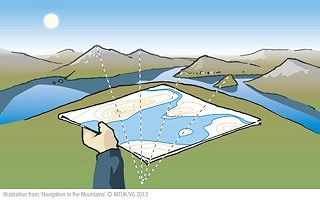
What’s on the map?
All sorts of features drawn all over the place! The most reliable information the map can give us are the contour lines which are not going to change any time soon. Other stuff like roads, tracks, forests, streams and pylons can all change or disappear. The trouble with contours is that they are a bit tricky to interpret, so practise is essential.
Planning
Preparation is absolutely half the battle!
An entrance strategy
From which point do we leave the car park? Walking out from the Cas car park and ending up in the ski lift queue is not cool.
Are there any path junctions that might be buried?
Are there rivers or buried streams to cross?
What will be a safe approach and will we need to walk on a bearing if we lose visibility?
An exit strategy
What will be a safe way off and if conditions change will it still be safe? Remember that slopes can become loaded with snow in a matter of hours.
How will we break our descent down into legs and what will our bearings be?
Are there any gully mouths to avoid?
Have alternative plans.
During this process winter hazards should be considered. For example buried streams, cornices and of course avalanche prone slopes.
Setting the map
This is recommended as it assists our spatial awareness of the surroundings, even if they are merely hinted at in the claggy distance. Set the map by lining up visible features with the same features represented on the map or aligning the compass needle with the northing lines on the map.
If I use a cropped section of map how do I know which way is north? When the writing is the correct way up to read then north is at the top of the sheet.
 © MTT
© MTT
Off we go!
When following a navigational leg consider the following 5 Ds:
Distance.
How far to the intended destination?
Direction.
What is the bearing?
Description.
What we see or feel on the way and what will the destination be like?
Duration.
How long will this take?
Dangers.
Are there any hazards on the way?
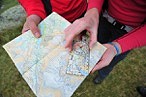
Establishing direction might simply be a case of a quick confirmation bearing to set you off in the right direction, or it may be that you’re going to have to walk for some distance whilst regularly looking at the compass to check your bearing.
To take a bearing from the map firstly make yourself as comfortable and stable as you can, get your mates to huddle around you to create some shelter, perhaps kneel down (proposal style) and use your thigh as a table top to rest your map on.
Line the edge of the compass between your start point and your finish point with the direction of travel arrow pointing in the direction you are travelling.
Turn the compass housing so that the orienting lines and arrow are parallel with any adjacent northing lines on the map, make sure the orienting arrow is pointing north (see 180 degree error).
Read the bearing number from the compass housing where it meets the direction of travel arrow.
You can now follow the bearing.
Hold the compass flat in your hand, slightly away from you and at 90 degrees to your torso.
Shuffle around until the compass needle floats directly over the top of the orienting arrow.
The direction of travel arrow, and therefore you, will be pointing in the direction of the bearing. When walking like this obviously the needle will waggle all over the place, try your best to keep it ‘averaged’ over the orienting arrow.
Calculating distance travelled over the ground can be tricky but with practise can be remarkably accurate.
There are two principle methods:
Pacing, counting the number of double paces taken to travel 100 metres. For this you have to have experience of your pacing over a variety of terrain, conditions and gradients. Lots of experimenting required in order to develop this knowledge! For example my left foot hits the ground 62 times on firm snow and a level gradient, on steeper or rougher ground this may rise to well over 100.
This method becomes less accurate over awkward or very steep terrain.
Timing, requires you to be able to estimate how fast you are travelling, so again requires some practice. Using the Distance = Speed x Time equation you can calculate the how long you will take to cover a measured distance. For example in a situation where I expect to travel at a brisk clip of 4 Km/h I will cover 200 metres in 3 minutes, so even if my destination is featureless I will know when I have arrived.
Of course adjustments will have to be made to allow for going uphill or for difficult conditions.
 © BMC
© BMC
A note on magnetic declination
All of the northing lines on the map are parallel so point to a slightly different north. Magnetic declination is the difference between magnetic north, which your compass needle points to, and grid north which is indicated by the northing lines on the map.
The difference between grid north and magnetic north in the Cairngorms is about 2 degrees at this time, but for everyday sensible navigation I ignore it (shock horror)!
For me a typical winter nav leg in poor visibility will go a bit like this:
- Set the map.
- Estimate the required bearing so as to avoid the dreaded 180 degree error (see next section).
- Take the bearing from the map with my compass.
- Measure the distance to my destination using the appropriate measuring scale.
- Decide if I’m going to pace this distance or time it or both.
- Identify something on the map that I can use as a cut-off feature, that could be a change in slope or an altitude reading, amongst others.
- If I’m part of a group agree to share the tasks or have people check as we go.

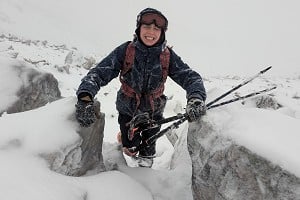
© Al Halewood
Things to watch out for!
180 error. This happens when south is mistaken for north on the map whilst taking a bearing — remember which way the writing points! If the bearing is anticipated before applying the compass then this should be avoided.
Cross winds. These can insidiously cause you to drift off course. Being aware can help prevent this.
Walking across slopes. The tendency is to drift downhill over time, again check it and make sure it doesn’t happen.
Sheer disorientation! This can feel quite spooky and often happens after a stop, particularly if turning around or bending over a rucksack in poor vis. When you then take your bearing it points in a direction that just feels completely wrong! If this happens do check that nothing is interfering with your compass, perhaps get a friend to check on his or hers. Other than that trust your compass! It's a scientific instrument!
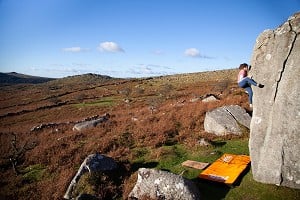
Tips
Or in trendy vernacular perhaps I could call these Nav Hacks!
If you can’t see anything to sight on for a bearing use your mate! All you need is a bit of
“left a bit — right a bit”.
Keeps legs short (I don’t mean kneel down) break the journey into manageable chunks of a few hundred metres at a time, provided that there are clearly defined features to facilitate this. Human navigation will always include an error, we are not machines, so shorter legs will keep the effect of this error to a minimum.
Edges can be useful as ‘hand rail’ features that you can follow. Of course edges in winter are often corniced and hard to see and therefore hazardous.
A rope of known length can also be used to measure distance, simply leapfrogging between two people.
Perception of slope features can be almost impossible in a whiteout so a bit of rope flicked downhill can give some definition and tell you if that thing in front of you is a big drop or a small drift!
Use a smartphone app to confirm your position in serious places, such as Aonach Mor in Lochaber, where there is not much space to go wrong on either side!
When night nav’ing in a blizzard hold your torch in your hand out to one side rather than on your head, you won’t get dazzled by light reflecting from snowflakes.

© Al Halewood
WTF are we?
What happens if it all goes a bit pear shaped and you don’t know where you are and you don’t have available to you a GPS unit or smartphone.
First off don’t panic! So many times this situation arises when people are tired, stressed and late. Take a short time out and perhaps have a snack which will pep you up and help you concentrate, consider your situation.
Then go through this process:
What did we see on the way?
Consider the following,
Distance, Direction and Terrain from last known point.
What can we see around us?
Gather as many features as you can that you may be able to identify on your map. You can take a bearing down a slope to discover its exact aspect which you can then apply to the map with a compass. This combined with an altimeter reading can be very effective.
What can we see if we walk further?
Make a really big mark in the snow or build a snow cairn before you start off. With a group form an extended line, with spacing at the limit of visibility to search for features. That means eyes over a lot of ground! Measure the distance from your mark so that you can retrace steps if necessary, remember that footprints can get blown over in a matter of minutes.
Resection.
This requires some visibility. Take a bearing on visible features and then plot them on to the map. A minimum of two can then be used to triangulate your position.
If all else fails.
Try and head to any large feature that you can see in the hope that you can identify it on the map.
If all else really fails!
Can you survive a wait for better visibility, or daylight? If you’re not sure about that then perhaps it’s time to call for a rescue. Legend has it that in the Glencoe MRT Walter Elliott spoke to a lost group who had an early model mobile phone. Walter had a little think and then the conversation went something like this:
Walter in his thick, second language, highland english:
“If you look to your right is there a stunted rowan tree?”
“Er…. yes.”
“And about a hundred and fifty feet beyond that is there a big boulder with moss on one side?”
“Actually yes.”
“Go directly down hill from that boulder until you get to a stream, follow the stream down all the way to the road. One of the boys will pick you up.”
It could be that simple….
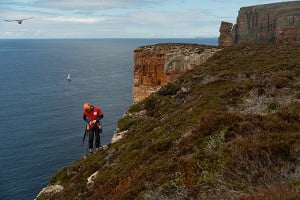
Or…. you could choose to go out when it’s like this; pick your battles!

© Rich Parker
UKC Articles and Gear Reviews by Rich W Parker
- On The Ropes: will Rope Access work for me? 26 Nov, 2014
- Accident in Afghanistan: Head Injury at 5400m 20 Jan, 2014


Comments