11m.
Rockfax Description
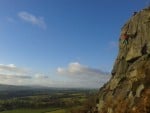
The chimney finishing on the right. © Rockfax
Feedback
| User | Date | Notes | ||
|---|---|---|---|---|
| Malcolm Townsley | 28 Sep, 2021 |
Show βeta
βeta: The bottom chockstone is large (at least 1/2 tonne) and is only held in by a thin edge which is showing signs of flakeing. Exercise caution as you have to use this to gain access to the upper chimney, especially early season after a cold winter. Make sure the belayer is well out to the right and no one is below you. The bottom chockstone can be avoided by climbing the broken chimney 2m right and traversing left above the chockstone to access the nice climbing on the second half of the route. A couple of the chockstones higher up are also loose and are best avoided by bridging up the edge of the chimney. | βeta? | |
|
Show beta
βeta: The bottom chockstone is large (at least 1/2 tonne) and is only held in by a thin edge which is showing signs of flakeing. Exercise caution as you have to use this to gain access to the upper chimney, especially early season after a cold winter. Make sure the belayer is well out to the right and no one is below you. The bottom chockstone can be avoided by climbing the broken chimney 2m right and traversing left above the chockstone to access the nice climbing on the second half of the route. A couple of the chockstones higher up are also loose and are best avoided by bridging up the edge of the chimney. |
||||
Logged Ascents
9 users have logged this
Guidebooks for Attermire Scar
Not all climbs appear in all guidebooks

Please Login to view more details on the logged ascents
Route of Interest
Eastby Buttress
Grade: VD ***
(Eastby Crag)