

Get Out On Rock is a collaboration between Neil Gresham (top-level climber and Britain foremost coach) and Libby Peter (experienced Mountain Guide and climbing Instructor). It brings you the very latest in rock climbing skills and techniques and provides instruction and inspiration whether you're venturing onto rock for the first time or getting more adventurous with your climbing.
The DVD is available from: Libby Peter's Website

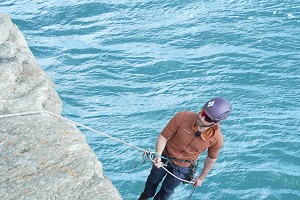
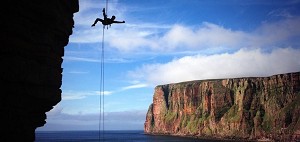
© Mike Robertson
If abseiling terrifies you well that's no bad thing and you're certainly not alone. A healthy paranoia about all the things that could possibly go wrong will help you remember to triple check everything before you launch off. On many crags abseiling is an optional means of descent, in other words you can elect to walk around instead, but eventually you'll end up on a sea-cliff that you can only access by abseil, so you may as well embrace it now.
Rigging a fixed abseil
First choice is to take an extra rope to the crag to use just for the abseil so it remains there while you climb. You don't have any worries about the ropes not pulling down after you and it also provides a lifeline if you need to escape. Most folk use one of their old climbing ropes but in an ideal world you'll use a static or pre-stretched rope to minimise the stretch and scary see-sawing action across the edge.
Rigging the abseil is really simple, either create a central point with slings as shown below left:
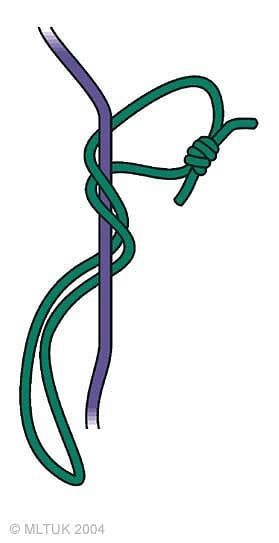
Or use the end of the rope to equalise the anchors as shown below right: Note that you don't need any fancy knots to do this, an alpine butterfly works well but an overhand is just as effective.
- For tips on equalsing anchors see my other UKC Article and Video.

© MLTUK |

© MLTUK |
You can view the whole abseil set up in this film clip:
VIDEO: First Steps; First abseil
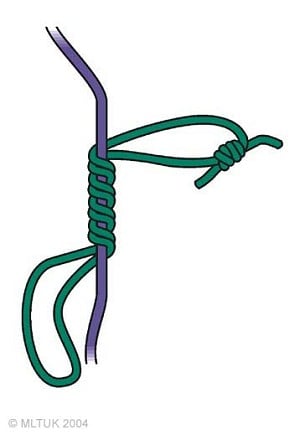
 © MLTUK
If you don't have the luxury of a separate abseil rope or you're getting back down off a climb you'll need a retrievable abseil so you can pull the ropes down afterwards. This can be set up with a single rope in which case you'd find the middle of the rope.
If you have two ropes they are tied together using an overhand knot and set up as shown here:
Looking after yourself
It doesn't make any sense to abseil without some sort of back-up system. If you let go of the rope (for whatever reason) you'll start plummeting at such a rate it'd be very difficult, if not impossible, to grab the rope again
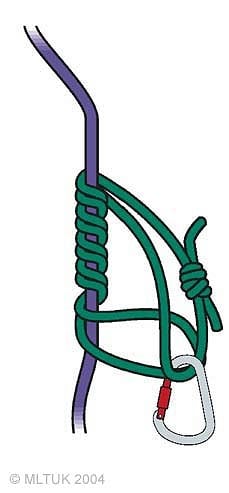
Just to reinforce the back-up system shown in the film clip you can see the most commonly used system again here. It uses a French prusik on the rope below the abseil device and clipped to the leg loop of your harness.

© Mike Robertson |

© Mike Robertson |
The crucial thing is to be sure the prusik can't get too close to the belay device or it'll be knocked open and won't grab the rope.
French Prusik tips
When tying the French prusik start with the knot of the loop out the way at the top.
Make the wraps neat so they don't overlap each other. Four or five wraps are normally enough but this will depend on the comparative thickness of rope and prusik cord.
Make sure the two ends are the same length when you clip them into the krab.
© MLTUK |
© MLTUK |
© MLTUK |
 © MLTUK
If you find yourself taking someone else through their first abseil you might want to consider setting up a safety rope which you can operate from above. You could set it up like a top-rope belay and that works fine or you could use the system shown in this diagram.
The releasable abseil rope is optional and only really necessary if you're setting up a group abseil but the Italian hitch safety rope system is very quick to set up and smooth to operate.
And Finally
Don't be an abseil accidents statistic; always always go through an abseil checklist:
- Check anchor is solid
- Check rope is attached securely to anchor
- Check belay device is on correct section of rope
- Check belay device is attached to central loop of harness
- Check harness is done up correctly
- Check prusik is biting

UKC Articles and Gear Reviews by Libby Peter
- VIDEO: How to Protect Traverses 24 May, 2010
- VIDEO: Double ropes ? what, when, why, where and how! 5 May, 2010
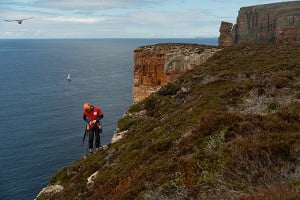
- Surviving Sea-cliff Adventures 8 Apr, 2010
- VIDEO: How to equalise anchors at a belay 12 Mar, 2010
- VIDEO: How To Rig a Top Rope 3 Mar, 2010


Comments