Training to Part 3
The future articles in the series will be aimed at climbers operating at higher levels, increasing as the series progresses.
In the previous article, we looked mainly at balance techniques for use on the wall, such as Egyptians, drop knees and flagging. All of these techniques are mainly focused on keeping the climber in balance to avoid stressing the arms too much.
In this piece we will look at some more subtle techniques for use on more specialist types of walls such as corners, arêtes and slabs. The training focus of this article will be on bouldering and how to build your sessions specifically around strengthening the areas you are weak at. We will also take the first step into looking at tactics at the wall and how we can improve our performance mentally as well as physically.
Following from previous articles, I am going to introduce an imaginary character, someone who this article is best suited to.
Occupation: Imaginary Character
Been climbing for: 6-12 months; 1-3 days a week
Personal Bio: I find it hard climbing on the really unusual panels at the wall and really struggle to find the correct body position whilst climbing on slabs and corners outdoors. I am struggling to climb routes efficiently and often make many mistakes first time on a route. I feel that my endurance sometimes lets me down as well and I struggle to climb for long periods of time, usually after the first hour I am gone! What do I need to do?
Movement Skills – Slabs, Arêtes and Corners
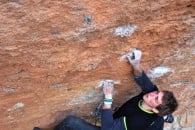
In the climbing wall or at the crag, these three features are by far the most feared. The reasons for this are simple, they tend to be awkward, obscure and holdless! If you are new to climbing on these types of walls, you will find them hard. These are funnily enough also the first walls we as climbers encounter when we start to climb, so why is it that as we improve as climbers, we forget how to climb on them? It's simple, most modern climbers climb indoors and thus will improve physically far quicker than technically. It's very rare that you get harder routes on these features indoors simply because modern climbing gyms have far more spectacular walls such as roofs and overhangs to have the hardest climbs on, however, when we go outdoors, unless we are lucky enough to live on the continent, we very rarely come across steep jug pulling routes and instead are faced with gnarly vertical test pieces, slopey holdless arêtes and corners as well as blank slabs.
The best way to improve on these types of walls is simply to climb on them more, but we also need an idea of the techniques required, so let's take a look at them:
Slabs
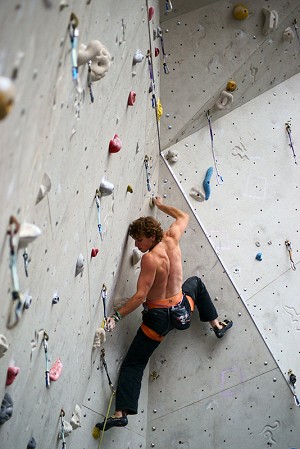
Slabs are anything less steep than a vertical wall. As the wall leans back, it becomes more apparent to the climber that gravity becomes less of an issue since most of the weight is now distributed through your feet rather than your arms, it's therefore essential that you have perfect footwork on slabs. As discussed in Article No.1, your toe, inner and outer edge are incredibly important parts of the climbing shoe, and these should be the main ones used on slabs.
Also, as discussed in Article No.2, the use of the 'rock-over' is an essential movement skill for slabs. Slabs in essence are the simplest of walls to climb on (please don't hurt me grit lovers), there is not a massive amount you have to learn in the way of technical skills (far more needs to be learned for steeper climbs), however, a lot comes down to your own innate ability to balance your body and weight your feet enough without them slipping.
Corners
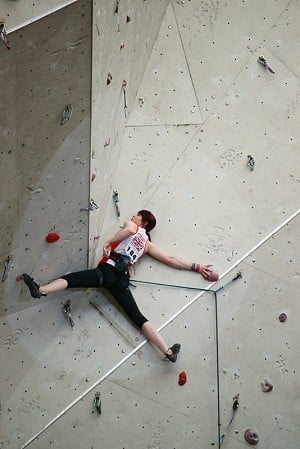
Corners are where two side walls meet (imagine the corner of a room, inside your house). Corners are another feature of the indoor and outdoor climbing world often feared by many a climber. Specialist techniques for corners are bridging and palming. Bridging is basically the act of placing each of your feet on the two connecting sides of the corner. This technique immediately creates a bridge from one to the other (hence the name) and will displace most weight from arms to legs and in a lot of circumstances allows you to gain no hands rests!
Palming is encountered mostly during bridging and is simply the act of placing your hand or palms on the wall to help you step up your feet as you ascend the corner.
A good thing to work on is the adjustment of palm and foot placements as you move up the corner i.e. wider stance or palm positions? Bigger steps or smaller steps? On the hardest corners, there will be almost no sign of any visible hand or foot holds and friction will rest mainly on the amount of pressure given from your feet. Note: Your foot won't slip if adequate force is applied in the right direction, so work on this as opposed to how hard you pull up on your arms!
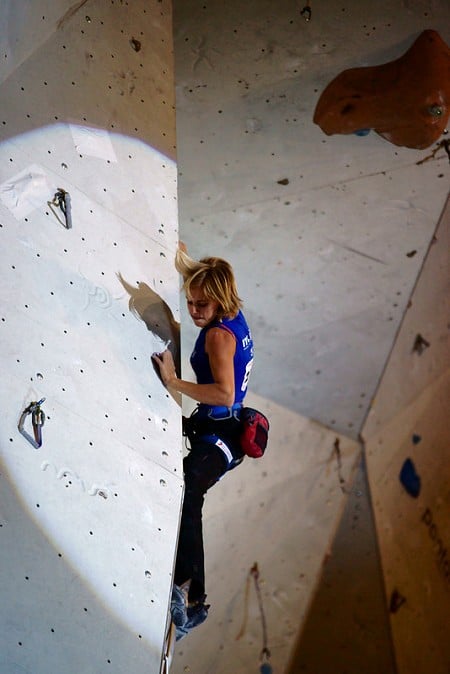
Arêtes are essentially the opposite of corners i.e. they stick out (imagine to walls meeting on the outside of your house). They are horrendously balancy, generally have no distinct hand or foot holds apart from the actual feature itself and they are scary to fall off!
The main technique required for arêtes is lay backing, however specific foot placements, hand placements and hip positioning are all essential skills necessary to climb them. Lay backing is the act of climbing a flake or arête where you primarily use the same feature for both your hands and feet. Because these features are generally linear in shape, you can come across a lot of difficulties with balance; this is where foot, hand and hip positioning come in.
When trying to climb arêtes, practice where you place your hands opposed to your feet i.e. how far apart they are. Also, play about with positioning of your feet to minimize the forces caused when making moves e.g. a badly positioned foot can cause more of a swing when you re-position it to make the next move. A well-placed foot won't have this effect and instead will allow you to continually ascend without any displaced force.
Now we've had a look at these new styles of climbing, how do we improve at them?
As I always say, experience is the way forward. The best way to learn is to get on them, so if you're at the wall climbing, seek out these features and attempt to climb them. All walls in the country have them, it does become apparent that as you improve your grade, the number of hard climbs on these features lessens, so you may have to be more creative by making your own problems/routes up or just get outdoors and experience the real thing.
Building your own Problems
Bouldering is one of the best ways to train technique. Because you don't need a belayer it is much easier to do on your own, but also, at most indoor climbing walls, there is usually a lot of holds on the wall giving any climber with a bit of imagination the freedom to build their own personal boulder problems specific to themselves.
If you feel you are struggling with arêtes, seek out an arête at your local bouldering wall and play around with using different handholds and foot holds up the feature. If you think that you are bad on slabs, look for some slabby boulders and practice climbing on them.
Experience is essential for learning, but so is failing. In order to learn from your mistakes you first have to make them, so rather than just pottering about on slabs to improve your slab climbing, try and make a slab problem that's hard for you. Something that will be constantly testing your balance and technique rather than just pulling on easier slab problems climbing them slowly and in control.
- Assess what you are bad at (slabs, arêtes, crimps, slopers, Egyptians, heel hooks, etc...)
- Look for a bit of wall that suits the style you are bad at (i.e. a wall with lots of crimps/slopers or an arête/slab).
- Choose a line of handholds that looks fairly easy to do using anything for feet and then proceed to climb it to the top.
- Once completed, make it harder now by swapping holds about or removing key holds that make the problem easy.
- Now it is harder, so work on it until you can do it again!
- Finally, once you have done the problem in its hardest state or if you are struggling to make it harder, why not try eliminating the footholds you are using and instead only use selected footholds?
This activity is especially fun if you are in a big group of climbers, as you can benefit from learning from other climbers attempting the same problem. A popular game that follows similar principles to this is "Add-on". Basically, a group of climbers (minimum 2) get together and attempt to build a problem on the wall by taking turns to add 1 move of their own to the problem on each consecutive go. Usually each climber has a set amount of lives and if they fall off before reaching the previous high point, they lose a life, however, if they reach the high point, they are then allowed to "Add-on" a new move of their own (usually harder than any previous in an attempt to win the game).
Tactics – Route Reading
Tactics are another side of climbing that can affect how well you do on a route or boulder problem. Tactics refers to any decisions made before or after trying a climb that will affect how well you do on your attempts. In this article we will look specifically at the tactic of route reading.
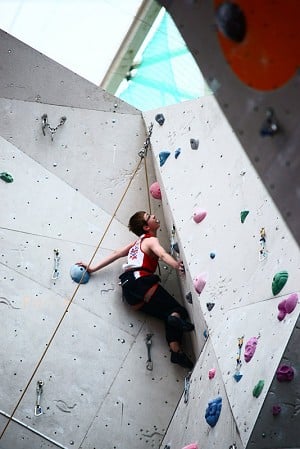
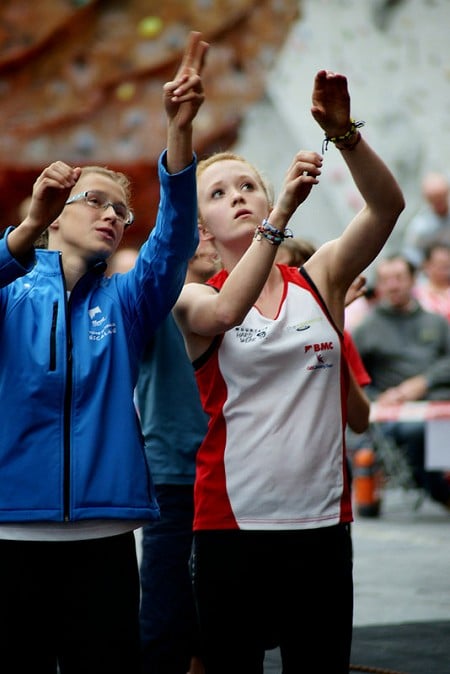
Route reading is the act of looking at the climb you are about to try before attempting it in order to assess what sequence you will use, where you will rest and essentially how you will climb the route. If you go to a climbing competition, you will always see the competitors waving their arms about at the bottom of the route. What you are seeing is climbers acting out the sequence of moves with their hands to give them a mental image of how the route is to be climbed. Not only will you see this happening at competitions, but also at the crag and even your local wall.
Learning how to route read isn't hard, but it takes practice. Before any climb you do you should always participate in a ritual route read before attempting. If you do this, you will make climbing a lot easier for yourself as you will already have an idea of the sequence you need to do before leaving the ground. Over time, you will become well practised in the art of route reading and will therefore be much more likely to read the correct sequence on routes - increasing your chances of ticking them quicker and with more efficiency.
Here are a few things to think about when reading sequences:
- Hand Sequence – Play out the hand sequence using your hands
- Foot Sequence – Think about where your feet are being placed for each move
- Resting points – Think about where the best resting positions on the route are
- Clipping Points – Think about where the best places to clip on the route are, even if they may be from above the clip?
- Cruxes – Where are the hardest moves on the climb?
- Pace – Where should you speed up your climbing movement? This is an interesting one as it differs between the style of climb you are on. If you are at the crux of a route, it makes more sense to climb quicker whereas if you are on easier ground, it might be more efficient to pace yourself.
Training Your Body – Endurance Training
In the previous article, I went into a small amount of detail as to what endurance is and how to train it. Now I want to go deeper into the realms of endurance training to seek out the best way to obtain it.
First of all, we need to ask ourselves, what is endurance? I would describe endurance as our body's ability to deal with high lactic acid concentrations in our blood. For those of you who don't know, Lactic Acid is the primary factor causing the weakening of your muscles during prolonged, intense exercise i.e. when we are on a route and our arms get pumped (this is lactic acid's effect). As we improve our endurance, we find that we don't get pumped as quickly and also when we reach rest points on a route, we can recover quicker than normal.
One of the biggest questions in climbing is, how do we improve this? Well, there are a number of ways, but my favourite and what has certainly worked for me are 4x4's.
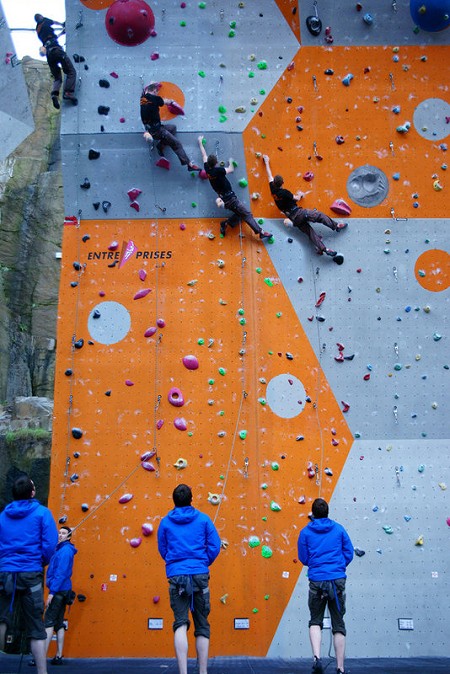
4x4's for endurance is a very simple exercise usually done on a route wall as opposed to a bouldering wall. A session of 4x4's is essentially 4 sets of 4 routes in each set - i.e. you climb 4 routes back to back with no rest. In between each set you rest for as long as it takes to fully recover i.e. 10-15mins. 4x4's are what I do at EICA: Ratho on 20-30m high walls, however, with climbers I coach at smaller walls I have given them 4x5's, 4x6's and even as many as 4x8's!
The exercise runs as follows:
- Climb up a route that gets you very slightly pumped (i.e. you don't need to shake out that much)
- Lower to the ground once completed, untie and then re-climb another route and attempt to maintain this same level of pump.
- Repeat a further two times, again maintaining the pump.
- Do not go higher than the pump level from the first climb. Simply maintain that level throughout every route.
- If you feel that you are going over that pump level, then reduce intensity immediately.
This is very simple but often climbers find it difficult to get the right level of pump or intensity. Because climbing training often revolves around grades, people get sucked into believing that depending on what grade a climb is, they should feel at "this" level of intensity. This is why grades can be a terrible thing, because they are so subjective, it can become impossible to correctly gauge intensity in exercises like this one e.g. every 6a is different, overhanging ones get Sally Slabmeister more pumped than vertical ones. So for 4x4's to work, scrap grades and follow this plan:
- Level 1: No Pump! You could climb at this level all day long and not get pumped. Think of massive jugs on a slab to vertical wall.
- Level 2: A very mild pump. You might shake a couple of times but it's nothing serious.
- Level 3: You feel it now. It is increasing, you have to shake out a few times on the route, but you are still climbing comfortably.
- Level 4: A hard pump! You are really having to fight now, you have to shake out often and it's getting harder to keep climbing.
- Level 5: BOXED! You are flailing here, its all out of the window now, you can see the light and you're off! At level 5 you will fall, its so hard to stay on the wall, this is the level beyond your max.
If you follow this plan of pump levels, then you will understand at what stage you are training endurance and when you have gone too far. For 4x4's to work endurance, you need to be maintaining a constant level of 2/3 pump. If you go higher, you are entering the realms of power endurance, an area we will look at in more detail next time.
Something that I noticed as well with 4x4's is that because you are doing so much volume of climbing movement at a relatively low intensity, you can really use this time to focus on technique. Climb as much in control as possible, looking for the best possible way up the wall rather than just hauling yourself up for the physical training effect.
If you live in an area with only a bouldering wall, all is not lost! This year it was too cold at Ratho to train on routes, so I got all the climbers I coach who were doing 4x4's to do them on the bouldering wall. First of all they built 30-40 move circuits at the right level, and they would lap them with 1 minute rest in between to simulate the time it would take to untie, pull the rope through and re-tie as if they where doing them on the route wall.
Remember to adjust these sessions to suit your level. Any climber can benefit from this training as long as it is prescribed to their current level.
Monthly Training Plan
From now on in my training series, the monthly training programs prescribed at the end of every article are going to be part of a longer periodised plan overall. So if you are following the series, you can also follow the training programs along with each article which should improve your fitness, strength, power and technique massively along the way.
There are three more articles to come after this one as part of the series and each one will include a new phase:
- Aerobic Endurance Phase – Article 3 (This article)
- Anaerobic Endurance Phase – Article 4
- Maximum Strength Phase – Article 5
- Peaking Phase – Article 6
This should be around 16 weeks of training to build a really good peak level for the Autumn time and a solid base level of fitness and strength for the winter period.
And one last thing, always remember to warm up before climbing or exercising and warm down afterwards. Check out my Warm Up Article for good warming up and down routines.
Monthly Training Plan |
||||
|---|---|---|---|---|
| Week: | 1 (Focus – Endurance) | 2 (Focus – Endurance) | 3 (Focus – Strength + Power) | 4 (Focus – Strength + Power) |
| Special Notes: | Feet on features to make any routes or boulders harder | Feet on features to make any routes or boulders harder | Feet on features to make any routes or boulders harder | Feet on features to make any routes or boulders harder |
| Session 1 - Endurance – 4x4's | Warm Up (Heart Rate-Dynamic Stretches-Regeneration) 1 x Set of 4x4's (Vertical) 1 x Set of 4x4's (Slightly Overhanging) 1 x Set of 4x4's (Very Overhanging) 1 x Set of 4x4's (Anything) 2 x No Handed Slab Climbs (or tennis ball/1 handed) Cool Down (Regeneration-Static Stretches) |
Warm Up (Heart Rate-Dynamic Stretches-Regeneration) 1 x Set of 4x4's (Vertical) 1 x Set of 4x4's (Slightly Overhanging) 1 x Set of 4x4's (Very Overhanging) 1 x Set of 4x4's (Anything) 2 x No Handed Slab Climbs (or tennis ball/1 handed) Cool Down (Regeneration-Static Stretches) |
Warm Up (Heart Rate-Dynamic Stretches-Regeneration) 1 x Set of 4x4's (Vertical) 1 x Set of 4x4's (Slightly Overhanging) 1 x Set of 4x4's (Very Overhanging) 1 x Set of 4x4's (Anything) 2 x No Handed Slab Climbs (or tennis ball/1 handed) Cool Down (Regeneration-Static Stretches) |
Warm Up (Heart Rate-Dynamic Stretches-Regeneration) 1 x Set of 4x4's (Vertical) 1 x Set of 4x4's (Slightly Overhanging) 1 x Set of 4x4's (Very Overhanging) 1 x Set of 4x4's (Anything) 2 x No Handed Slab Climbs (or tennis ball/1 handed) Cool Down (Regeneration-Static Stretches) |
| Session 2 - Boulders - Endurance | Warm Up (Heart Rate-Dynamic Stretches-Regeneration) 3 x Project Problems (3 x Attempts @ each max) Boulder Mileage Circuits (Time yourself) (15-30 problems) Cool Down (Regeneration-Static Stretches) |
Warm Up (Heart Rate-Dynamic Stretches-Regeneration) 3 x Project Problems (3 x Attempts @ each max) Boulder Mileage Circuits (Time yourself) (15-30 problems) Cool Down (Regeneration-Static Stretches)
|
Warm Up (Heart Rate-Dynamic Stretches-Regeneration) 3 x Project Problems (3 x Attempts @ each max) Boulder Mileage Circuits (Time yourself) (15-30 problems) Cool Down (Regeneration-Static Stretches) |
Warm Up (Heart Rate-Dynamic Stretches-Regeneration) 3 x Project Problems (3 x Attempts @ each max) Boulder Mileage Circuits (Time yourself) (15-30 problems) Cool Down (Regeneration-Static Stretches) |
| Session 3 - Endurance – 4x4's | Warm Up (Heart Rate-Dynamic Stretches-Regeneration) 1 x Set of 4x4's (Vertical) 1 x Set of 4x4's (Slightly Overhanging) 1 x Set of 4x4's (Very Overhanging) 1 x Set of 4x4's (Anything) 2 x No Handed Slab Climbs (or tennis ball/1 handed) Cool Down (Regeneration-Static Stretches) |
Warm Up (Heart Rate-Dynamic Stretches-Regeneration) 1 x Set of 4x4's (Vertical) 1 x Set of 4x4's (Slightly Overhanging) 1 x Set of 4x4's (Very Overhanging) 1 x Set of 4x4's (Anything) 2 x No Handed Slab Climbs (or tennis ball/1 handed) Cool Down (Regeneration-Static Stretches) |
Warm Up (Heart Rate-Dynamic Stretches-Regeneration) 4 x Hard Routes (Vary the style) @ Level 4/5 Pump 1 x Set of 4x4's (Anything) 1 x Set of 4x4's (Anything) Cool Down (Regeneration-Static Stretches) |
Warm Up (Heart Rate-Dynamic Stretches-Regeneration) 4 x Hard Routes (Vary the style) @ Level 4/5 Pump 1 x Set of 4x4's (Anything) 1 x Set of 4x4's (Anything) Cool Down (Regeneration-Static Stretches) |
That's all for Article 3, but stay tuned for Article 4 where we will be delving more into steep climbing techniques and training at a more advanced level.
Robbie Phillips is a Climbing Coach based in Edinburgh. Robbie has produced a detailed series of coaching and training articles for us at UKClimbing.com - due to be published over the next few weeks.
Robbie - who has climbed F8b+ and onsighted multiple F8as - coaches several members of the British Junior Team and also gives private coaching at EICA Ratho.
"I don't claim to know everything there is to know about training and becoming a better rock climber - no-one really does for that matter - yet I am always learning and my enthusiasm for the sport has brought me very far indeed. I have travelled the world climbing outdoors and taking part in competitions and I have helped coach some of Britain's top youth competition climbers such as Natalie Berry, William Bosi and Angus Davidson."
- See Robbie's Coaching website for more details.
The photographs to illustrate this article were taken by Will Carroll - visit his blogsite here: io-photography.co.uk
