

Shoulders
In this article, climbing coach Robin O'Leary teams up with top physiotherapist Nina Leonfellner to help climbers prevent and cure common imbalances and injuries, thus enabling you to reach your potential without destroying yourself. This is the first in a four-part series and deals with Shoulder Impingements.
Many climbers are blissfully unaware of the most common injuries that we suffer from – or even worse, are ignoring the ones they actually have, being naïve to the seriousness of them. Most experienced climbers will be more familiar with the "alarm bells" of injuries, but ignore them and decide to climb, as they can... despite suffering from a bit of pain.
Over the next few weeks, I aim to help the majority of climbers by identifying the three most common injuries we, as climbers, suffer from and what we can do about the ones we may already have. With the terrible weather currently and (hopefully) a warm, dry summer round the corner, it may be the perfect time to give your body the rest it well deserves and to look at what exercises you should be doing to keep any damage at bay, or to rehabilitate your current injuries so that you can make 2014 pain free. We will focus on shoulder impingements, elbow tendinopathy and finger strains – pulleys and tendons.
I have partnered up with well known physiotherapist Nina Leonfellner to help illustrate these injuries and exercises.
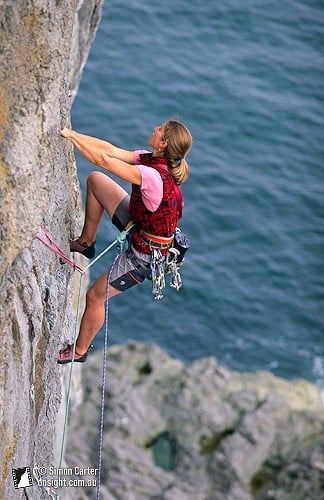
Climbing is considered a pulling sport. Move after move of pulling down, pulling in and compressing – the upper body is consumed by this repetitive nature and sooner or later, if left to its own devices, you will get injuries along with a poor posture.
To avoid this, climbers must counteract these movements with antagonist exercises. Nina describes it well:
"Tissues loaded in a certain direction will deform and lose fluid. A way to reverse the deformity is to exert an opposite force on them. This replaces lost fluid and helps reshape the tissue. A bit like correcting a dent in a car door...if tissues are constantly exposed to the same stresses and strains the dent simply gets bigger and bigger, until eventually the stresses are big enough to cause damage."
To find out more about antagonistic exercises and how best to avoid or prevent injuries with correct warm-ups and cool downs, please visit my blog, where Nina and I have been discussing the best protocol.
Assuming it is a little too late, and we have been climbing a little too much with poor technique and not enough rest or conditioning, we need to look into what are the alarm bells of the common injuries, what they are and how to essentially, "correct the dents" as Nina says.
Part 1 – Shoulder Impingements
What is a shoulder impingement?
Nina: Shoulder impingement is when the delicate, deep shoulder tendons (rotator cuff) are getting pinned and pinched under the bony archway of the shoulder blade. The rotator cuff is an amalgamation of deep tendons that surrounds the ball and socket joint of the shoulder. There are technically 4 muscles of the rotator cuff, however, really it is one tendon. The most common ones to be injured or pinched for climbers are the supraspinatus and infraspinatus tendons.
Can you describe what it feels like?
Nina: A pain in the front, top or behind the shoulder joint. You can feel this pain at rest and especially when reaching or raising your arm. A lot of climbers will describe it as a deep pain IN their shoulder joint.

I have had an impingement before and it really is painful. I was constantly raising my arm on rest days and trying to massage it. I remember thinking that it came out of nowhere? How do we get an impingement?
Nina: Shoulder impingement happens when the ball and socket of the shoulder complex does not stay centered when the arm moves. Most of the time, there is a problem with the socket, which is the shoulder blade. The shoulder blade is the base of this moving system. The shoulder blade lies onto the torso and rib cage, and therefore also comprises part of the "base" of the moving arm. Torso and upper back stiffness can affect the movement, or lack of movement to the "base". This is obviously extremely common in climbers.
When your arm moves up, down, backwards and forwards, your arm bone (humerus) should move twice as much as your shoulder blade (this is an average and can differ for different sports, and can also be adapted, which can be part of the problem). If the arm bone and its base do not move in synchrony, then the rotator cuff tendons can become wedged under a bony archway called the "Acromium".
As mentioned previously, a stiff upper back and lower neck can affect this movement ratio. Poor shoulder posture and muscle imbalance can also prevent the ball and socket joint from staying centered. This is another reason that climbers should do their antagonistic exercises! Over developed Lats will pull the front of the arm bone (humerus/ball of the socket joint) forwards, off-setting the ball and socket joint. Pressing and lifting exercises, as well as, keeping your shoulders, upper back and lats loose, will oppose all the pulling you do in climbing, which will help to equilibrate the shoulder socket forces.
General shoulder posture is just as relevant as the shortened or lengthened state of your muscles. You can have loose, flexible shoulder muscles, as well as strong pulling and pressing muscles, but if you sit in front of a computer all day with your shoulder jutted forward, or tend to have a "slouched" posture, then you are not much better off. You can have poor posture while climbing as well. Repetitively adopting a "chicken winging" position either when pumped, or just out of habit (because our shoulders move easily in that direction), will strain the rotator cuff tendons, and is an uncentered position for the shoulder socket. This is when coaching and video analysis are crucial, as you can see exactly when and how often you are doing this. You can keep the socket centered in a "chicken wing" position, as long as the blade moves in synchrony with the arm bone, but this does not always happen. Climbers are often too stiff to do so, or are not accustomed to moving their shoulder blades and torsos in this way.
So Nina, an impingement is something that can happen over time due to poor posture, unbalanced muscles and/or poor technique, but can this happen in a single episode, for instance, when a foot pops off a hold?
Nina: Yes it can, however, that would be a traumatic incident to (normally) the rotator cuff tendons. If you have a shoulder that is not centered, and/or you are in a position of being "off centered" then you are more likely to create pain and/or a significant injury. In other words, you will be worse off than someone with strong, well balanced muscles in a safe, un-pinched position.
So what does this mean for climbers? Can we still climb?
Nina: Bad news unfortunately, as this condition normally worsens. If left untreated you can develop tendon wear and tear that will lead to degeneration which could lead to a rotator cuff tear as well as a shoulder labral (cartilage) tear. Put simply, you will be climbing in pain and your grade will drop quite quickly.
Right then, we have a shoulder impingement and the Christmas holidays are approaching. We can take some time off, eat nice food, have a rest from climbing, but what exercises should we be doing to help rehabilitate this injury?
Nina: Exactly – good time for active rest. All of these exercises can be done 3-5 times per week and obviously form is crucial. If you are not sure about your technique, please do not hesitate to contact either myself or Robin using the details at the bottom.
1 - Re-setting the Shoulder Blade:
You will most often need to strengthen the Trapezius muscle in order to tilt the shoulder blade back into position, as well as, training the muscle to hold the blade upwards so that the archway of the blade lifts up when the arm bone lifts up (what happens when reaching upwards).
It is safest to start working statically with the 'diamond' pose (A), then progress to straight arm at 135 degrees (B), then to 180 degrees (C)

What to do:
Lie face down resting your forehead on the floor, or, onto your other hand, or, onto a folded towel; whichever is most comfortable for your neck. Press your forehead gently down so that it does not move, pull your lower belly in towards your spine, so that your lower back stays still as well. Then using your shoulder blade muscles from behind and on top of your shoulder blade lift your arm slowly focusing on relaxing your wrists but leading with them upwards towards the ceiling (do not lead with your elbows). Really focus on your shoulder blades working predominantly. If you feel pain or 'pinching' in the shoulder then you are either not doing it correctly, or it is not the right exercise for you.

You should feel a mild burn or muscle contraction centrally, not into the shoulder itself. You can statically hold the contraction 10-30 seconds times 5, then add shoulder blade lifts (same positions just up and down using the blade muscles)10-30 then finish with the static 30 second holds at the top of the movement. Once you can do all 3 positions (A,B,C) whilst lifting and holding and have built up the endurance of working each shoulder blade for total of 5 minutes with no breaks, 2-3 sets easily, then you can move onto working your shoulder blade in a more dynamic way. See D.

© Nina Leonfullner |

© Nina Leonfullner |
C: Standing
Same as lying on floor only you have to lift your shoulder blade up first before extending it backwards with the arm. Sometimes this is better to start with before doing 180 on the floor.

D: Dynamic 'Blade-setting' version for Climbers:

© Nina Leonfellner |

© Nina Leonfellner |
This exercise incorporates isolating your Trapezius against gravity, as well as adding a pulling action like you do when you are climbing.
What to do:
Use a physio band or cable machine and attach it to a fixed point. Lift your arms using your blade muscles, keep your wrists high. Pull the band mainly focusing on your shoulder blades and keeping your lower belly pulled upwards. This is more of a blade exercise than a lat pull exercise, although the action is identical to what you would do for a Lat Pull down. You can pull the band so that your arms are past 90 but only if you can keep good form, otherwise stick to 90 degrees as in the picture. You DO NOT want your elbows higher than your wrists, which will poke your arm bone forwards, like in a 'chicken wing' position. Always lift your wrists and blades as you pull and release the band back up to the starting position. Hold statically at the top and bottom of the motion for 10 sec, then repeat the pulling action 10-15 times or repeat until failure of form. Do 2-3 sets 3 times a week.
2 - Loosening or decreasing muscle tension in over dominant climbing muscles:
Keeping your Lats and upper back tension-free and flexible will allow your shoulder blade to move freely with your arm bone. There are numerous methods of doing this, sports massage or soft tissue therapy is ideal and really it should be included in any climbers training regime to help prevent unwanted niggles. Muscles that are tension free will contract better, and if they are flexible as well, then they will be less likely to pull the arm bone out of good alignment.
You can spend 3-10 minutes massaging
Some massage options are using a tennis ball and/or a foam roller:

Lean against a wall with a tennis ball against your upper back. Hug your arms under your armpits to round your upper back to expose the whole of your upper back. Leaning backwards into the ball on the wall, with your feet quite forward on the floor, press and roll the ball up and down and side to side. Do right and left sides for as long as you can tolerate.

Lie your armpit over the roller, keep your knees bent and use them to inch yourself onto the roller. Roll your armpit and top of your rib cage staying sideways, but also a bit forwards and backwards to get different parts of your shoulder blade and rib cage. It is normal for all these massage techniques to be painful, especially if you are really tight and have a lot of tension spots. The pain should ease to being tolerable once the tension goes away. You do have normal tender points in muscles however, so it will always feel a little bit sore, but just hopefully not agony!
3 - Static stretching over-dominant climbing muscles:
All static (held stretches for flexibility) should be held for 30 seconds times 2-3 AFTER sport and exercise, never before. Holding stretches for longer than 10 sec before exercise dampens reflexes in your soft tissue, making them less responsive within the nervous system and can slightly deform the tissue by overly elongating it.
Upper back stretch 1:

Kneel down and stretch your arm to the side and across your body. Round your upper back and press your hand and arm into the floor. Feel the stretch in your upper back.
Upper back stretch 2:

Sit on a chair and bend forwards from your hips with your feet very wide. Reach around and grab your opposite ankle/lower leg, then press your other hand onto your same thigh/knee. Using both arms actively press with the top hand and pull with the lower arm, while rounding and arching your upper back and chest. You are actively twisting your upper back to find a stretch. This one is a bit fiddly but once you find its great!
Posterior rotator cuff (Back/side shoulder)

Lie on your side; use a pillow under your head to relax your neck if it feels too tense. Raise your arm up so that your elbow is in line with your shoulder, lean forwards a touch, so that you are lying on, and hence blocking the shoulder blade from moving. Then, slowly rotate your forearm down towards the floor, keeping your elbow bent at 90 (degrees) approximately. You can use a 0.5 kg-1kg weight of some sort to help this movement if your shoulder is very stiff. You should feel a deep, achy pull around the back, top and side of the shoulder joint. You should NOT feel this pinching in the front of your shoulder. If you do, you are in the wrong position, or it is not the right stretch for you.
Lats

There are many ways to stretch your Latissimus Dorsi (AKA Lats = major pulling muscle that attaches onto your pelvis, back, shoulder blade and the front of shoulder). This is one option which is convenient.
To stretch your right Lat, step your right foot behind your left. Grab your right forearm or elbow with your left hand, with your arms above your head. Engage your whole body in this stretch by pressing your right heel into the ground and tensing your whole legs together, and into the floor all the way up to your shoulders. Pull your lower belly in towards your spine. You should try to engage your upper Trapezius muscle like you do in the "blade setting" exercises to help elevate your shoulder blade with your arm to avoid impingement. If you feel a pinch in your shoulder when you do this, then you especially have to think about this. If you are trying to engage your upper Trapezius but still feel pain, or pinching then this is not the right stretch for you. It is likely that your upper Trapezius needs more strengthening first, and you may also need some treatment.
PLEASE NOTE:
You may need to include rotator cuff exercises as well, depending on what type of impingement you have. You may need to include more neck and spine exercises as well. Each case is slightly different. It is always best to get a professional assessment.
Next week we will be looking at Elbow tendinopathy, so if you have always suffered from golfer's or tennis elbow and want to know how to get rid of it, make sure you check it out.
If you have any questions about this topic, please feel free to visit Robin's blog and contact him: RobinOLearyCoaching.com
Check out Nina's website for more information on her treatments and how you can book a session.