Training to Part 2
This is the second piece in a series of training articles and is aimed at low to intermediate climbers (Approximate grade range of around UK Severe to HVS, Sport grade F5 to 6b or bouldering grade V1 / UK Tech 5c).
The future articles in the series will be aimed at climbers operating at higher levels, increasing as the series progresses.
So you've been climbing for a while now but are still unsure as to what to do to get better? If you read the first article in my series then you will have seen a number of different exercises aimed at improving your movement on the wall. In this second article we will be looking in more depth at climbing movement as well as training your body physically to cope with the demands of climbing.
But first of all, let me introduce you to an imaginary friend of mine; Freddy Flag!
Occupation: Self-Employed Imaginary Character
Been climbing for: 6-12 months; 1-3 days a week
Personal Bio: I've been climbing for quite a while now and have seen a bit of natural progression, however, I really want to push myself that bit extra and perhaps if I could get some structure to my climbing it might give the added boost that I need to improve!
How are we going to blast Freddie on to the next level?
As I said in the previous article, the two most important areas in your climbing are footwork and body position. We looked at this at a very basic level last time, now I want to focus more on the subject.
Footwork and Body Position – The Essentials
As we improve in body positioning and footwork, it soon becomes apparent that the two areas are linked, as some body positions are only accessible with the use of good footwork. Lets take a look at some examples:
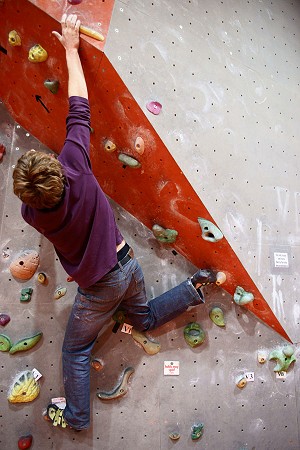
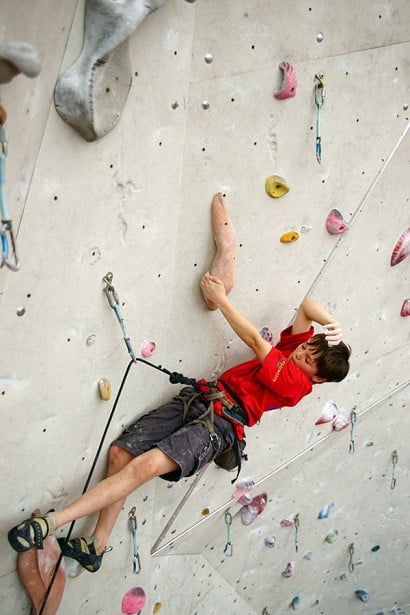
Rock-over – The 'rock-over' is one of the first techniques we learn as climbers. The basic position takes that of a high step onto a foothold, then the immediate transfer of weight over that foothold. This action enables us to get our bodies into a higher position on the wall as well as in some cases providing increased balance and resting abilities! With the rock over position, use of the heel instead of the toe can sometimes provide improved balance and a more secure position with hips closer in to the wall. The use of the toe on rock-overs is sometimes essential as the need for power gained by pulling with the toe increases.
Egyptian/Drop Knee – This position is named after what it resembles i.e. an Egyptian hieroglyphic person or simply the inversion of your knee. To execute this body position, simply place one of your feet on a higher foothold and attempt to invert your knee downwards towards the ground. This body position is incredibly useful when climbing on steep ground, taking body weight of your arms, or getting your hips closer to the wall to reach further away holds. Footwork is essential for this position, if you don't place your feet correctly it becomes impossible to drop your knee without it popping off. This then introduces the concept of pivoting your foot, which we will look at in more detail next.
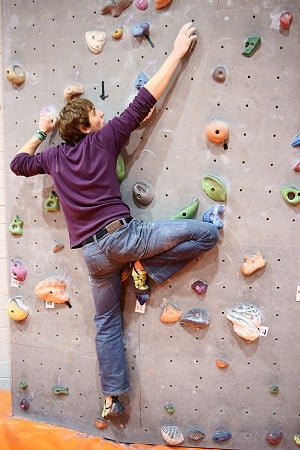
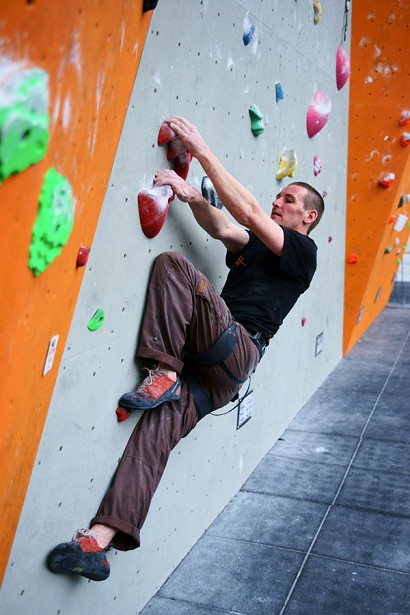
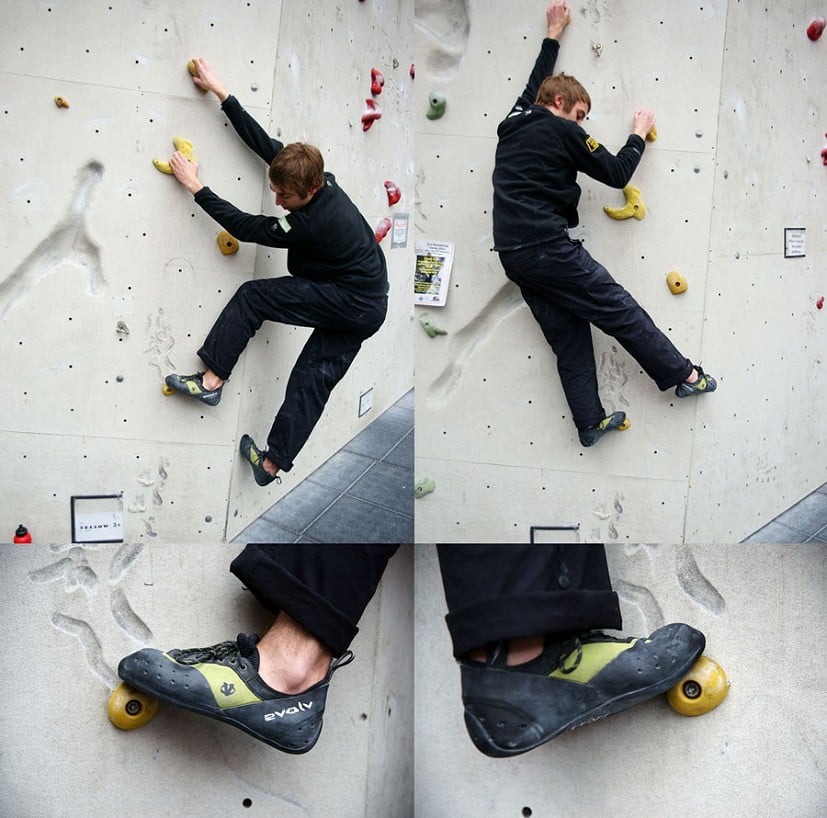
Flagging – The concept of flagging is pretty easy to describe. In fact why don't you try it for yourself? Get up on to your feet and balance on one leg, you will notice almost immediately the natural desire to move the other leg into various positions to maintain stability. Flagging is basically using your other free leg to counteract weight imbalances on your body when you only have one foot on the wall. Often the flagging foot pushes against the rock to stop you 'barn-dooring' (spinning out of balance). There are two types of flag, the inside flag and outside flag - in the photo on the right is an 'inside flag' - the flagging foot is under the body, however if the climbers body was higher, his foot could flag in the same way but cross inside and above his weighted left foot (hence the name inside flag).
Now we have mastered the Rock-Over, the Egyptian and the Flag, I want to introduce you to what I believe is the most important tool in your footwork arsenal, the Pivot!
Pivoting - This is when you can turn your toe whilst placed on a foothold in any direction to allow maximum freedom of movement through your body. The ability to pivot only comes when you can place your toe on a foothold precisely, if you cannot do this, then your foot will pop off when you attempt to pivot. This is the main reason why you don't want to get into a habit of placing the ball or arch of your foot on footholds, as pivoting becomes impossible.
If we are doing any of the movements mentioned above, the foot often has to pivot on its hold to allow the movement to happen.
How do I improve all of this?
In the last article I included a number of different exercises to help improve your body position and footwork. These are all still useful exercises and now that you know a bit more about these skills, you can begin to apply them to the exercises as well e.g. when traversing, look for opportunities to rock over, flag, use Egyptians and pivot. The most important thing to remember when trying to improve your technique is to look for the opportunities to use them, only by doing this will you eventually develop the ability to move naturally using these skills.
Training the Body
Now here comes the bit everyone has been waiting for, the physical training part of the article.
Fancy training regimes and hardcore campus board workouts are not really what you need to be doing at this stage in your progression. Technique is still the most important thing you should be concentrating on.
What I would recommend though, is structuring your training sessions in a way that you will be improving the physical aspect of your performance as well as the technical. Areas to focus on are endurance, strength and power.
Endurance
Endurance is basically the ability to climb long sustained routes whilst being able to manage your forearm pump effectively. As well as this, with good endurance comes the ability to recover quicker at rests on routes, in between routes and even in between climbing sessions!
To train endurance, you can do a number of things:
- Longer Routes
- Lapping Routes
- Traversing (Circuits)
- Boulder Mileage
You can improve endurance simply by climbing longer routes. If you climb mainly at really short walls, then
performing up down up sets (climb up, then down, then back up again) is a really great way to improve endurance as well as training technique. Because you are climbing down, the focus on your feet is increased, making good footwork and body position essential.
If you are stuck for time and a belayer, traversing on the bouldering wall is a good way of training endurance. You can make up your own traverses on the bouldering wall, which are tailored specifically to your own needs. If you are going to do this, look to set longer traverses (or circuits) at around 30+ moves.
Finally, if you are after an endurance related bouldering session, why not do some boulder mileage? Instead of going all-out on your hardest projects, attempt to climb as many mid-grade problems as you can (none that would take any more than 3 attempts). At a lot of walls, they have boulder circuits (a specific group of boulder problems of a similar grade) and these can be used for boulder mileage by planning to complete each circuit within the session, or even timing yourself and seeing how fast you can do each circuit? If you time yourself, you restrict the rest you have between each problem, thereby inducing more of an endurance training effect.
Strength and power are essential for both routes and bouldering. Strength is refers to the ability of holding really intense static positions (i.e. no movement) whilst power refers to dynamic movement. Power is directly related to strength:
Power = Strength x Speed
There are some very simple things you can do to improve in both of these areas:
- Bouldering
- Hard Project Routes
- 3 Second Locks
Simply going bouldering will improve strength and power. I can tell you now, that some of the best climbers in the world just go climbing and nothing else! They don't use fancy training tools like campus boards, and to build strength and power they just go bouldering. If you want to train strength specifically, seek out really hard problems that perhaps you can only complete one or two moves at a time (it's that intense). If you think power is what you lack, look for problems with dynamic moves.
If you want to do routes, but still train power and strength, seek out really hard project routes. Perhaps these routes will be so hard, that even linking individual moves and sequences together might be as hard as the toughest boulder problems you've tried! But even if you are finding it really difficult, you will still be training your body to deal with these intense moves and at the same time learning new techniques to complete harder routes.
One of my favourite strength training exercises is 3-second locks. You can do this on routes as well as boulder problems (more appropriate for strength on boulders though). Attempt to climb each problem locking off at each move and hovering your hand above the next hold for 3 seconds. This not only improves static lock off strength, but also teaches the importance of body positioning and footwork, since without it, you would be unable to lock off and hold each position. Look for problems that you really struggle to do this on, and it will teach you even more.
And one last thing, always remember to warm up before climbing or exercising and warm down afterwards. Check out my Warm Up Article for good warming up and down routines.
Monthly Training Plan |
||||
|---|---|---|---|---|
| Week: | 1 (Focus – Endurance) | 2 (Focus – Endurance) | 3 (Focus – Strength + Power) | 4 (Focus – Strength + Power) |
| Special Notes: | Feet on features to make any routes or boulders harder | Feet on features to make any routes or boulders harder | Feet on features to make any routes or boulders harder | Feet on features to make any routes or boulders harder |
| Session 1 - Routes - Endurance |
|
|
|
|
| Session 2 - Boulders - Endurance |
|
|
|
|
| Session 3 - Routes - Endurance |
|
|
|
|
Robbie Phillips is a Climbing Coach based in Edinburgh. Robbie has produced a detailed series of coaching and training articles for us at UKClimbing.com - due to be published over the next few weeks.
Robbie - who has climbed F8b+ and onsighted multiple F8as - coaches several members of the British Junior Team and also gives private coaching at EICA Ratho.
"I don't claim to know everything there is to know about training and becoming a better rock climber - no-one really does for that matter - yet I am always learning and my enthusiasm for the sport has brought me very far indeed. I have travelled the world climbing outdoors and taking part in competitions and I have helped coach some of Britain's top youth competition climbers such as Natalie Berry, William Bosi and Angus Davidson."
- See Robbie's Coaching website for more details.
The photographs to illustrate this article were taken by Will Carroll - visit his blogsite here: io-photography.co.uk
