Training to Part 4
This is the fourth piece in a series of training articles and is aimed at intermediate climbers (Approximate grade range of around UK E1/2, Sport grade F6b+/6c or bouldering grade V3/4 / UK Tech 6a/b).
The future articles in the series will be aimed at climbers operating at higher levels, increasing as the series progresses.
Welcome to the world of plateaus. You are at the level that 90% of climbers reach but never pass. Sometimes it's because they don't want to and are comfortable enjoying what this level offers, but for those of you that want to push a bit further, you need to start doing things a bit differently.
You can't be stuck doing the same routines day in and day out, you will only hit a brick wall if this is your plan. You have to be constantly changing how you climb, where you climb and what you climb. I can't tell you how many people I have seen at the wall who do the same routes and boulders every single session. They have the same routines, the same structure, the same everything and they wonder why they aren't improving. Usually they accept that improving is an aspect of climbing only for either the young or those with superior genetics. My belief is that everyone has the ability to get to a high standard in climbing, the only variable affecting this is how much you are willing to put into achieving it. It's no coincidence that after structuring your training ever so slightly, climbers who have been plateaued at one level for years can suddenly have a massive boost in ability, sometimes as much as a number grade.
In this article we will be advancing on areas looked at in the last article as well as introducing new concepts to think about in your climbing. First of all, let's introduce our imaginary character:
Occupation: Imaginary Character
Been climbing for: 1-2 years; 2-4 days a week
Personal Bio: I've been climbing consistently 2-4 days a week for the past year now and have progressed through the grades steadily. I am a confident leader as long as it's well within my on-sight grade range. I want to push my on-sight and redpoint grade both indoors, on sport and in trad now. I also have difficulty climbing steep overhangs and feel that I can't seem to rest on my arms when it's so steep.
Footwork + Body Position – Steep Climbing
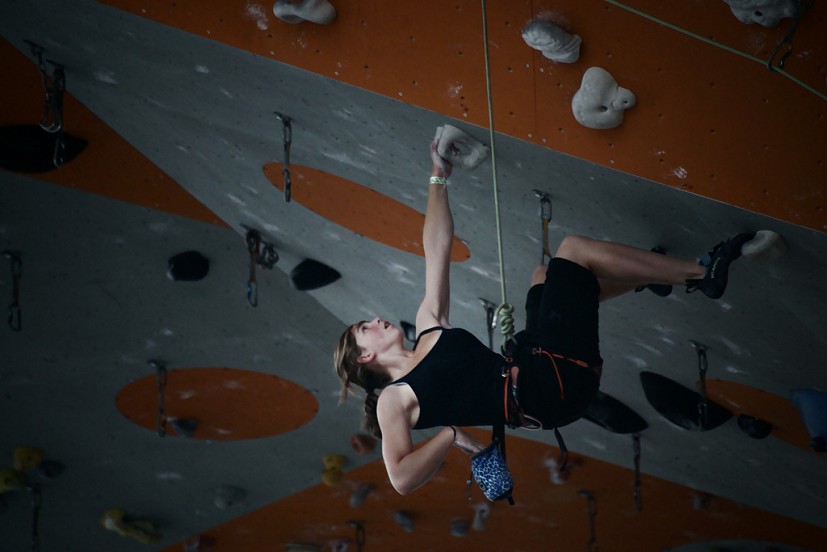
When you make the transition from vertical to overhanging climbs, one thing in particular takes effect - gravity. On vertical and slabby walls, your weight is largely distributed through your feet, making gravity less of an issue, however when you are on an overhanging wall, more weight is directed onto your arms and suddenly we find ourselves tiring quicker. There are, however, subtle techniques that we can apply on steeper ground that help us avoid this unfortunate factor. Footwork and body position, as described in the previous articles, help us climb more efficiently and in balance. So far we have only scraped the surface of how we can use them, now we will look deeper into their use on steep ground.
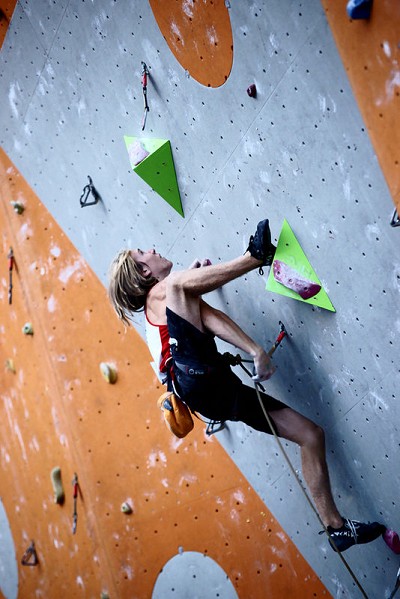
As I said in article one, we have several different parts of our shoe i.e. the outside/inside edge, toe and heel. We've looked at the edges, but now we are going to focus more on the toe and heel.
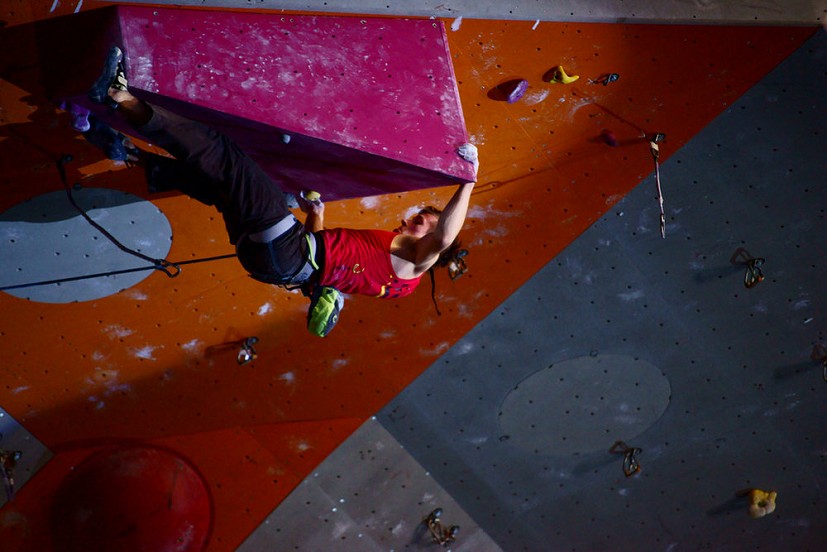
Heel Hooks
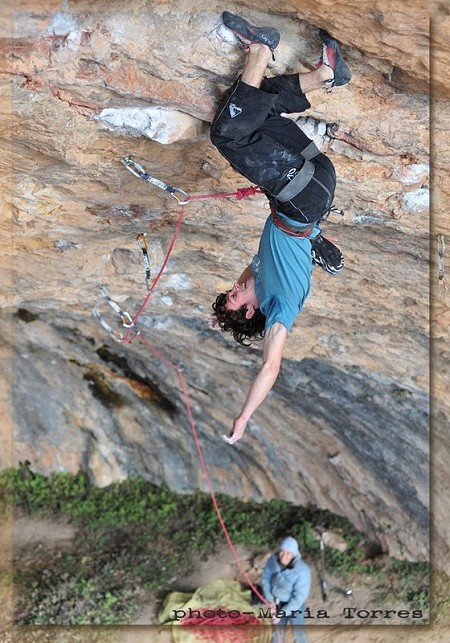
Heel hooks are a skill that I take great pleasure in exploiting as much as I can. As a kid, I wasn't the strongest of the litter, I was the heavier one that couldn't do a pull up never mind a one armer unlike most of my mates, so I had to look for new ways of getting up steep routes and boulder problems other than through sheer thuggery. I can still remember, me and one of my friends trying a particularly tricky problem up a steep overhanging prow. We were both throwing for this horrible pinch but unable to stick it. My mate was very strong, British champion in fact and was capable of doing one armers on pinches, yet couldn't latch this hold. How could I do it if he was so much stronger than me? This was probably a turning point in my climbing, the moment I realised that I didn't have to be super strong to climb hard... I threw my heel over my hand and made the move statically, then topped out with my friend in total astonishment.
Heel hooks are an amazing skill on steep ground, all you need to do is place your heel behind a hold and if enough pressure is there, it will stick and provide another solid point of contact. Heel hooks are put to best use on steep ground because hanging on your heel takes more weight off your body than simply pulling down on your toe (another technique we will look at next). As well as giving us the ability to do harder moves on steep ground, they can also provide rests, longer reach and better balance.
On less overhanging walls, using your heels can be the difference between being in and out of balance. If I am rocking over on a positive flat hold, sometimes if I place my heel on it instead of my toe, I can position my hips closer into the wall providing better balance and a more solid position. If you have really good balance, you can even sneak in no-hands-rests at times.
Toe Hooks
Toe hooks are exactly as they are described. On steep ground your toes can provide a lot of support including improved balance and stability as well as resting positions. The most common occasions to see your toes used like this are when there are obvious features such as aretes, volumes, big holds and on the lips of roofs. Because these features provide a larger surface area than your normal sized hold, you can get more purchase with your toe on them. Here are a few examples of good toe technique:
Use on Holds – In this position there was no other foothold to provide stability whilst making the next move, so a toe hook was necessary and with a lot of core strength, it provided a new point of contact.
Use on Arêtes – Putting your toe round an arête and pulling on it to provide stability and balance.
Rest Position – Toe hooks can provide a means of resting on steep ground whilst double toe hooks can provide full recovery with a no-hands rest.
Bicycling – Placed a toe hook to pull and a toe to push for that extra purchase on the foothold.
Toeing Down
A technique often missed out, the art of pulling with your toes. If we are on a vertical wall, we are taught to push down to take weight off and gain height. It only makes sense that on an overhanging wall, pulling down on your toes could provide the same effect. Because of the overhanging nature of the wall, only pushing down on the footholds doesn't provide the same effect as it would on a vertical wall, so that's why, instead we opt to pull down on them as if we are trying to hook or rip them off the wall. If you go into any climbing store and look at the majority of performance foot wear for climbing, you will notice that they appear to curve in shape almost like a talon. This shape is designed specifically so that toeing down on steep walls is improved by applying force more effectively.
How To Learn These Techniques?
It's simple. All you have to do is get off your butt and climb on steeper ground. A lot of local climbers at EICA: Ratho (my local wall) choose not to go on the steeper walls because they say it has no relevance to what they want to climb and that they can't benefit from it. This is not true. Climbing on steeper ground will hone your technique for climbing on overhanging terrain i.e. you will get better at toe hooking, heel hooking and using all the techniques necessary to climb it, but also you will develop your core body strength, upper body strength and power as well as improving your all-round technique. And to be honest, you get steep climbing everywhere no matter what the grade, so why would you hold back on learning new skills and developing your climbing?
If you want to, you can add steep climbing technique drills to your warm up traverse i.e. look for opportunities to use these skills and test out when they are appropriate and when they just don't work. If you do this you will be more likely to know when to use them on the wall.
Climbing Movement on the Wall
Is movement on the wall just technique and body position? The answer is no, there is much more to climbing efficiently than just positioning your body well. Climbing dynamically is something that every climber has to learn. Being able to switch between climbing slowly and climbing fast is another big issue in a lot of climbers' techniques. What about recovery as you are moving? Things are getting pretty specialised now as the series has advanced and topics such as these are essential to developing climbers like you.
We've all seen the videos of Adam Ondra running up the wall, now I definitely don't climb as fast as him, but you can't disagree that if you can speed your climbing style up without losing that efficiency, you are going to be on to something pretty good. The key to this technique though isn't just climbing fast, it's knowing how to pace yourself. On vertical and slabby routes where balance is everything, climbing fast probably isn't necessary, however, when climbing something overhanging, the difference between speeding up slightly or maintaining your usual speed could make a huge difference.
When I was out in Spain earlier this year, I was chatting to a friend of mine, Tom Bolger, arguably Britain's best talent on the world sport climbing scene. He sees the best climbers climbing everyday at crags such as Santa Linya, Rodellar and Disblia. He says that pacing yourself on a route is an invaluable skill to learn and it certainly shows up in the best performances by the top climbers in the world. Watching Tom climbing his project (a 30m 9a+), he blasts through the first 8-10m of climbing, hardly stopping at all and only for a quick flick of his wrist for a small bit of recovery between moves. Reaching a rest in the roof, he stops, controls his breathing, deep breaths follow and then a quickening of breath after a minute or two and he's off again, speeding up through the next bouldery section until he reaches another rest. After another minute, he is off again and this time on much easier moves than the lower section. He seems much more controlled but still very fast, fluid and efficient. This is pacing, being able to climb through the hard sections fast and efficiently, utilising the rests, controlling your breathing and making the most efficient ascent possible for your hardest climbs.
To learn these techniques, it's important that you try including them in your sessions all the time. Every time you get on a new route, route read from the ground, think about where you need to be fast, where you need to be slow, and where you need to rest. If it's a redpoint route, hang on the rope whilst working it and try climbing sections faster than you would usually in an effort to see if it affects how pumped you get.
Learning to climb faster is hard initially, but once you've started including it in your training it comes quickly. I would include a couple of easy routes or traverses as part of your warm up where you aim to climb them fast whilst still maintaining good technique. Don't try and speed climb them (I.e. As fast as you can), just aim to learn how to move more quickly with good efficient technique.
Moving Dynamically
Something I have recently been using is a dynamic movement technique drill. A lot of climbers simply don't know how to be dynamic, some say they aren't strong enough to do so but in my opinion it's more because they don't know how.
Being dynamic is an important skill to learn. If you are a boulderer, being dynamic is absolutely essential and is learned early on. If you are a sport climber, having a dynamic element to your skill set is important when pushing the grades, climbing statically all the time is not an efficient way of climbing. If you are a trad climber I guess you don't want to be jumping about all over the place, but there certainly are routes that require being dynamic.
After warming up, 30 minutes of focussed dynamic climbing can be an excellent way to improve your skills. Search the bouldering walls for good jugs and practice doing dynamic movements between them:
- You can do big moves using your momentum to carry you from one hold to the next.
- You can do double handed moves up and down keeping your feet placed solid in the same position but moving up and down with your hands to grasp just how much power and momentum is needed for the move to be executed most efficiently.
- Try executing a few hand movements at once as you traverse the wall making use of the momentum from the first pull.
- Try speed climbing a bit, practicing how being dynamic can help you with this.
By trying out a variety of different movements, you will learn loads of key skills essential to improving you as a climber.
Tactics - Redpointing
In the last issue, we looked at route reading. This is another key skill to learn if you want to improve your onsight grade, however, when Redpointing a route, whether it's indoors, outdoors, trad, sport or bouldering, certain tactics can give you an added advantage.
Working the Moves
A common theme amongst climbers is to pull your way through the hard moves after falling off, get to the top and come back down to the ground with no more thought put into the route until the next attempt. Many climbers even miss out the "going to the top" bit and just return to the ground once they fall off. This technique known as "ground up" has it's place in trad, however, in indoor or outdoor sport routes, this is rarely practiced. When trying to redpoint a route, it's important to learn the sequence and key beta as thoroughly as possible early on. Once you have fallen on an onsight or flash attempt, it's a good idea to follow a strategy (below) for the best knowledge of the route's sequence:
- As soon as you fall, attempt to figure out why you fell.
- Spend some time linking sections of the route that you feel will be important when on your next redpoint attempt.
- Bolt to bolt the rest of the route, spending as much time as possible learning all the beta; rest positions, foot beta, clipping positions, key hand sequences, cruxes, etc...
It's a mistake to just lower off if struggling on one section of wall or feel like it's not necessary because you think it should be easy when rested, I have done this in the past and paid the price for it (falling 5m from the top of a 70m 8b+ because I was too aloof to learn the beta for the top section of wall after the crux).
Resting Between Attempts
Often taken for granted, you feel fine now, but you won't once you are back on the wall. Even if you fell off right near the ground, give yourself a good break before getting back on a project route. It's not just the physical exertion of the climb that you need to rest from, but also the mental pressure you put on yourself. After building an attempt up in my mind, I need more than a 5 minute break to re-collect my nerves, confidence and composure for another attempt. This is true in all disciplines and some aspects of recovery will take longer in others. For example, if you have just fallen from the top move off your 20m route project, you will be both physically and mental exhausted to the max needing at least another 30-45 minutes break before another attempt. If you have just fallen from the top of your boulder project, you will be physically tired more than mentally exhausted and because of the nature of the the activity, you should be ready to pull back on within 10 minutes or so. If you have just fallen off your trad project, you may be mentally shaken and require a great deal more mental recovery than anything else. That could last anywhere from a few hours of collecting your thoughts to a few weeks of re-building confidence.
The point is, rest until you are fully recovered (unless training specifically), don't lower your chances for a successful ascent because your impatient.
Training Your Body: Power Endurance
The concept of power endurance in climbing is a term heard often but misunderstood by the majority of climbers. The basic idea behind it is:
"The ability to sustain medium to hard moves continuously for a set period of time"
Not a lot of people know this, but power endurance accounts for most single pitch style routes. Any climb that gets you pumped in which you still have to repeat relatively hard moves whilst in this state is a power endurance route. I often hear climbers refer to continental style routes as stamina rigs... This is true to a certain extent, they do require more stamina than most British style sport routes, but most are still power endurance. Unless you can get full recovery at various points all the way up the route, you will be operating in the anaerobic threshold and thus working power endurance. It's not until you start to recover that stamina (endurance) starts coming into play.
Since we have just finished a focussed stamina (endurance) cycle, we will now add a power endurance element to the plan over the next month. This will include a number of different exercises, some you will be familiar with from the last cycle and others that are new. When training power endurance, it is essential that we get the right level (just like when training stamina).
3x3's
4x4's except there's 3 of them (also, these are a lot harder). When training stamina, we were aiming for a level 3/4 pump (see previous article for explanation on levels) and maintaining it. In power endurance, we are going all out for failure at level 4/5. That means if we finish the set, it will be at our absolute max and we will be only moves from falling off.
I like to spike the set early with a harder climb, then maintain the pump afterwards with easier ones. If you are clever, why not slip in a hard red point attempt as your first route? As long as you get high up on the attempt it will be effective for 3x3's and if you fail or reach the top, lower off and begin your second route.
Boulder Laps
Choose a boulder problem a few grades within your ability level between 8 and 12 moves. You are going to attempt to repeat this problem 5 times with only the period between jumping off, chalking up and getting back on as rest. You are aiming for a level of intensity in which you are failing on around the 4th -5th attempt.
Circuits
These are probably the most common power endurance exercises done at walls. Circuits are just hard routes but on a bouldering wall. The good thing with circuits is that you can tailor the circuits to suit your own needs e.g. If you are training for a trip to Margalef (Spanish pocket pulling central), circuits trained mostly on pockets would be ideal preparation.
I like to vary my circuits throughout the cycle, covering lots of different styles of climbing. If I am in a strength phase, I make my circuits shorter (15-25 moves), if I am in a power endurance phase they are a bit longer (25-35 moves) and when I am in a stamina phase they are longer still (35-50 moves). I have plans over the next month to do shorter sport routes at Malham Cove, so I have been doing 15-25 move long circuits. Circuits are a really fun training exercise when with a couple of friends, you can build them together benefiting from different input into the circuit and finally when it comes down to climbing it, the competitive nature between each other works as motivation to keep gunning for it. Also, your friend's attempts on the route can work as rest times before you get on (I would always wait until fully recovered before getting back on though).
Circuit Reps
The same idea as with boulder reps except with circuits. Aim to complete 3-4 repetitions of the circuit before failure with a resting time off around 1-2 minutes between each rep. This is an excellent power endurance training tool and will certainly take you to the edge of the anaerobic threshold. Your circuits should be in the 15-35 moves mark, not over. As progress on the circuits continues, lower the time between each rep. Aim to lower resting time to 30 seconds or a minute if completing the circuit four repetitions in a row consistently, or you could just make the circuit harder.
Building Circuits
Whether just for hard circuits or circuit reps, it's important to make your circuits both fun and effective. An ideal circuit for training power endurance will be incredibly sustained with no single moves harder than any other. There should be no position on the circuit where you can rest well, it should be continuous throughout the whole climb to maintain the anaerobic training effect.
For circuit reps, maintain the same concept but lower the grade. The difficulty of the route should be around your regular onsight grade (one or two grades below your max onsight level) so that you can continue to repeat that level of difficulty once the sequence is learned even when really pumped.
Monthly Training Plan:
| Weekly Sessions | Session 1 (Power/Endurance - 3x3's) |
Session 2 (Strength/Power - Boulders) |
Session 3 (Power/Endurance - Circuits's) |
Special Notes |
|---|---|---|---|---|
| Week 1 Focus - Power/Endurance |
Warm Up (Heart Rate / Dynamic Stretches / Regeneration) 15 minutes of Dynamic Climbing Drill 3 x Hard Routes (Redpoint or Onsight 1 x Set of 3x3's (Slightly Overhanging) @ level 4/5 1 x Set of 3x3's (Very Overhanging) @ level 4/5 Cool Down (Regeneration / Static Stretches) |
Warm Up (Heart Rate / Dynamic Stretches / Regeneration) 15 minutes of Dynamic Climbing Drill 3 x Project Problems (3 x Attempts @ each) 3 x Campus Boulder Problems (3 x Attempts Each) Boulder Mileage (15 x Problems)(1st or 2nd go) Cool Down (Regeneration / Static Stretches) |
Warm Up (Heart Rate / Dynamic Stretches / Regeneration) 15 minutes of Dynamic Climbing Drill 2 x Circuits (25-35 moves)(Attempt each circuit twice) 3 x Boulder Reps (4-5 reps max) 2 x Circuit Reps (3-4 reps max) Cool Down (Regeneration / Static Stretches) |
Feet on features to make any routes or boulders harder |
| Week 2 Focus - Power/Endurance |
Warm Up (Heart Rate / Dynamic Stretches / Regeneration) 15 minutes of Dynamic Climbing Drill 3 x Hard Routes (Redpoint or Onsight 1 x Set of 3x3's (Slightly Overhanging) @ level 4/5 1 x Set of 3x3's (Very Overhanging) @ level 4/5 Cool Down (Regeneration / Static Stretches) |
Warm Up (Heart Rate / Dynamic Stretches / Regeneration) 15 minutes of Dynamic Climbing Drill 3 x Project Problems (3 x Attempts @ each) 3 x Campus Boulder Problems (3 x Attempts Each) Boulder Mileage (15 x Problems)(1st or 2nd go) Cool Down (Regeneration / Static Stretches) |
Warm Up (Heart Rate / Dynamic Stretches / Regeneration) 15 minutes of Dynamic Climbing Drill 2 x Circuits (25-35 moves)(Attempt each circuit twice) 3 x Boulder Reps (4-5 reps max) 2 x Circuit Reps (3-4 reps max) Cool Down (Regeneration / Static Stretches) |
Feet on features to make any routes or boulders harder |
| Week 3 Focus - Power/Endurance |
Warm Up (Heart Rate / Dynamic Stretches / Regeneration) 15 minutes of Dynamic Climbing Drill 3 x Hard Routes (Redpoint or Onsight) 1 x Set of 3x3's (Slightly Overhanging) @ level 4/5 1 x Set of 3x3's (Very Overhanging) @ level 4/5 Cool Down (Regeneration / Static Stretches) |
Warm Up (Heart Rate / Dynamic Stretches / Regeneration) 15 minutes of Dynamic Climbing Drill 3 x 3-5 Move Boulder Problem Projects (3 x Attempts @ each) 3 x Campus Boulder Problems (3 x Attempts Each) 3 Second Lock Problems (5 x Problems)(3 x attempts max each) Cool Down (Regeneration / Static Stretches) |
Warm Up (Heart Rate / Dynamic Stretches / Regeneration) 15 minutes of Dynamic Climbing Drill 2 x Circuits (15-25 moves)(Attempt each circuit three times) 3 x Circuit Reps (3-4 reps max) Cool Down (Regeneration / Static Stretches) |
Feet on features to make any routes or boulders harder |
| Week 4 Focus - Power/Endurance |
Warm Up (Heart Rate / Dynamic Stretches / Regeneration) 15 minutes of Dynamic Climbing Drill 3 x Hard Routes (Redpoint or Onsight 1 x Set of 3x3's (Slightly Overhanging) @ level 4/5 1 x Set of 3x3's (Very Overhanging) @ level 4/5 Cool Down (Regeneration / Static Stretches) |
Warm Up (Heart Rate / Dynamic Stretches / Regeneration) 15 minutes of Dynamic Climbing Drill 3 x 3-5 Move Boulder Problem Projects (3 x Attempts @ each) 3 x Campus Boulder Problems (3 x Attempts Each) 3 Second Lock Problems (5 x Problems)(3 x attempts max each) Cool Down (Regeneration / Static Stretches) |
Warm Up (Heart Rate / Dynamic Stretches / Regeneration) 15 minutes of Dynamic Climbing Drill 2 x Circuits (15-25 moves)(Attempt each circuit three times) 3 x Circuit Reps (3-4 reps max) Cool Down (Regeneration / Static Stretches) |
Feet on features to make any routes or boulders harder |
Robbie Phillips is a Climbing Coach based in Edinburgh. Robbie has produced a detailed series of coaching and training articles for us at UKClimbing.com - due to be published over the next few weeks.
Robbie - who has climbed F8b+ and onsighted multiple F8as - coaches several members of the British Junior Team and also gives private coaching at EICA Ratho.
"I don't claim to know everything there is to know about training and becoming a better rock climber - no-one really does for that matter - yet I am always learning and my enthusiasm for the sport has brought me very far indeed. I have travelled the world climbing outdoors and taking part in competitions and I have helped coach some of Britain's top youth competition climbers such as Natalie Berry, William Bosi and Angus Davidson."
- See Robbie's Coaching website for more details.
The photographs to illustrate this article were taken by Will Carroll - visit his blogsite here: io-photography.co.uk
