


What Scott and Haston found was protection from wind and snow, along with a shelter that could provide some measure of warmth. In winter this is the essence of survival in conditions that would otherwise be likely to prove fatal. There's no doubt that having the skills to create an effective emergency winter shelter is an essential skill for all winter mountaineers.

© Paul Lewis
Should I stay or should I go now?
If you are facing the possibility of spending an unplanned winter night out you should carefully consider whether you'd be better off trying to get back to the valley instead. A night in a snow shelter with little insulation is never going to be comfortable. A fit group with good navigation skills and decent torches may be best ploughing on. A group that are struggling to keep going or where there's an injury or problem like hypothermia and the decision to stay might be taken for you.
"...A fit group with good navigation skills and decent torches may be best ploughing on..."
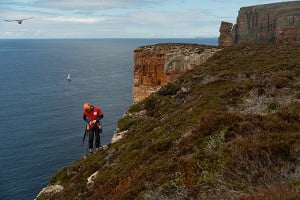
Location, Location, Location
 © Marmot Catcher, Mar 2006
The other factor that influences the type of shelter you can dig is the type of snow. In softer snow you can dig in fairly quickly whereas in harder snow the better option may be to cut snow blocks. If you have snow that will both produce blocks or can be dug you'll have a decision to make. I'd usually dig because it's often easier.
So, if you can find a reasonably steep slope with a good build up of soft snow you will be able to dig in relatively quickly and use gravity to excavate the debris downwards. If it's flat there are still options.
Emergency Shelters For Slopes
In a soft snow bank on a slope or in an accumulation point you can build a simple bivvy shelter. Dig straight in for about a metre (keeping the entry hole about shoulder width apart) then excavate upwards until you can sit up inside the shelter. As you work the snow will fall and can simply be excavated out of the shelter and down the slope. Close your jacket up well as you'll get a fair bit of snow falling on you. Eventually you'll end up with a small pod that you can sit in.
"...Your trusty ice axe is all you need to build an effective emergency shelter..."
The Tools For The Job
For most winter hillwalkers the standard tool they will have at hand is their trusty ice axe and this is all you need to build an effective emergency shelter.
The key part of the axe that will do most on the work is the adze so it's worth making sure your tool has a decent sized scoop shaped adze when you buy it. An axe with a reasonable amount of weight in the head will also help when you're swinging it in firm snow.
Once you start excavating snow from inside the shelter you'll find the space quite restricted. At this point the length of your ice axe shaft is quite significant – the longer it is the trickier it will be to use in a small space. The debate about ice axe length always prompts lots of debate but for my money 55cms is a good length for a general purpose axe and the shaft won't get in your way too much when digging.
If you are happy to carry a snow shovel then digging a shelter will be far easier. Shovels move snow far faster than any axe and broaden the range of shelters you might be able to construct. In emergencies a deadman or even the frame sheet from some rucksacks can be used in soft snow – but don't expect it to be anywhere near as easy to use as a shovel. Shovels obviously have other uses such as digging out avalanche victims and performing snow pit analysis too.
If you are buying a shovel ensure it has a good sized blade and a comfortable handle. Aluminium blades will cope with hard snow and hitting the occasional rock far better than plastic blades. Look for shovels by Back Country Access, Black Diamond, Ortovox or Voile. They don't have to cost a fortune.
Other kit to consider includes an avalanche probe to mark the shelter's location and test snow depth. A snow saw can be handy too. They don't weigh much and they make life a lot easier when cutting blocks. Some models can be stored inside the handle of certain shovels.
www.backcountryaccess.com
www.blackdiamondequipment.com
www.ortovox.com
www.voile-usa.com
A shovel up is another good option for flat ground. They take a while to build so they are not suitable when you need a quick shelter but they are simple to construct and you can create different sizes to cater for varying group numbers. Start by piling up the parties' rucksacks to minimise the amount of snow you'll need to shift. Then keep shovelling snow on top until a substantial mound has been created. Tunnel in to retrieve your sacks then keep piling snow on top as more snow is excavated from inside. The process of digging the snow starts a consolidation process that soon solidifies the snow. The entrance can be sealed with snow blocks or rucksacks. Shovel ups are vulnerable to collapse in thaw conditions.
Add a ledge to sit on and use your rucksack to block the entrance and you'll be sheltered surprisingly well from the elements. If there is more than one of you it is fairly easy to make the shelter wider. As with all shelters you must ensure you have sufficient ventilation. Push your axe through at face height to leave a breathing hole and periodically check this remains clear by pushing through on a regular basis. Sit on a rope or rucksack and stayed huddled up to keep body heat in.
You'll also build up a lot of warmth doing all the digging. If the weather allows take off your mid layers and wear just a base layer and shell. Then you'll have some warm layers to put on after the hard work is over.
If the snow is firm enough you can dig out a simple slot big enough to sit in and just about as wide as your shoulders. Then cut blocks and lay them up from bottom to top to cover the hole. To provide support to the bottom block it can be laid across trekking poles used like a lintel. With practice either variation can be constructed fairly quickly.
Emergency Flat Ground Shelters
On flat ground a snow grave works well providing you have a snow base that's at least half a metre deep. They are simple and quick to create. Dig out a pit slightly longer, wider and deeper than your body then fashion some blocks to put across the top. If you can excavate the blocks from the pit itself you'll save some energy. Leave space to crawl in at the head end and leave blocks within reach to cover the entrance. If you can't make blocks long enough to lay across the hole you can make half length blocks and stack them into a triangle shape like making a card stack.
"...Have a practice during your winter journeys. Half an hour's digging before you stop for lunch and at least you'll have somewhere warm to eat..."
 © Paul Lewis
If the snow is unsuitable for block cutting you can sometimes fashion a roof by laying your bothy bag over the top. If you do this ensure you weight down the edges of the bothy bag really well otherwise you might see it flying off which is never good news in the middle of a freezing night! If it's really blowing you can dig a channel around your grave, tuck the bothy bag into it and fill the channel with snow. This will help prevent flaps of fabric likely to catch the wind.
Snow graves can also be built on moderately steep slopes. As you dig out the grave pile the snow around the sides and you will easily be able to keep it reasonably level. Sometimes you will dig through a hard snow crust and find much softer snow underneath. Use this to your advantage by only creating a small opening. Once you have a hole you can access the snow underneath and scoop out the soft layer. This minimises the open top that you then need to cover once you've slid your way inside.
Practice Makes Perfect
Of course the way to get proficient at any shelter construction is to get out and practice. The shelters described shouldn't take long to create so have a practice during your winter journeys. Half an hour's digging before you stop for lunch and at least you'll have somewhere warm to eat that ham panini.
But one final word of caution. I heard of an accident in Canada where a snowmobile crashed through the roof of a shelter and seriously injured the occupants. Make sure you mark your creation with your avalanche probe or some other method to avoid unexpected visitors.

Paul Lewis is the owner of mountain adventure and training specialists Peak Mountaineering. Paul offers a 15% discount on all courses for UKC users.
Find out more at peakmountaineering.com or contact Paul on 01433 620283.
UKC Articles and Gear Reviews by peakpaul
- Montane Torque 40 rucksack 30 Oct, 2013
- Petzl Nao Head Torch 10 Jul, 2012
- What Gear To Take: Scrambling 10 Aug, 2011
- Evolv Bandit Rock Shoes 27 Sep, 2010
- Who is AMI? 18 Mar, 2010
- RAB Neutrino 20 Mar, 2009
- Mountain Equipment Kongur MRT 6 Jan, 2009
- REVIEW: Crampons - Everything you need to know! 21 Oct, 2008
- The Lord of the Swings... Walking Axes 2 Oct, 2008


Comments