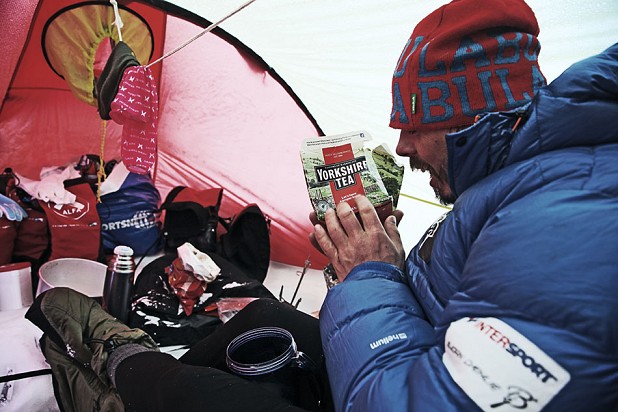
What is Alpine Style food and how can I get the most out of it? Andy Kirkpatrick discusses alpine style cooking in the modern age, including sprint and marathon meals, dehydrated food and stove choice.
One of the first articles I ever wrote was for Climber magazine back in the mid 90s, the title: M&Ms, Pig Fat and Baby Food. In it I wrote about the types of food used by alpinists I'd met along the way, from the highly developed and tasty to the somewhat functional and extreme, like Mick Fowler and Steve Sustads diet of babyfood on Cerro Kistwar. I'd never seen an article that really dealt with this subject in any detail before, with most just talking about taking a tin of sardines and a Mars Bar or two, and so what I wrote was what I'd wanted to know myself.
In the intervening years many things have changed, both the stoves we use (back then the state of the art was the heavily modified Markill Stormy or MSR XGK), and the food we cook on it, with the range of off the shelf quick cook food you can buy at supermarkets exploding (we live in a quick cook age!), as well as the quality of freeze dried food. And so I thought that I would revisit the topic of alpine food again, after all it's one of the most important aspects of alpine climbing.
What is Alpine style food?
Well first off, what I'm writing about here is not classic mountaineering or expedition food, where you're looking at replacing the bulk of calories lost in a multi week, or multi month trip. This is more sprint food, life support, designed to be used on routes from a single day to about a week (sprint food will often be used for the actual climbing part of much longer trips).This style of cooking and its menus are a balance of weight and energy, with the body's own stores being leant on in order to reduce the weight to the minimum, with input to output ratios often being about one to eight (1000 calories of food for 8000 expended a day). Beyond a week I find this kind of diet leads to a rapid reduction in performance, with fatigue (mental and physical) and hunger severely cramping your performance, one reason most lightweight push climbs tend to last less than a week.
Modern Climbing Fast-Food
During the war fighting in Iraq and Afghanistan the US army found that soldiers were taking their heavily packaged and expensive MRE (meals ready to eat) rations (a days dried food that heats itself when water is added to a special pouch), and binning all the heavy stuff that needed cooking, taking instead the light easy-to-eat food. The MRE was designed for prolonged warfare, a war with the Warsaw pact, where mechanised soldiers would not need to carry much in the way of food themselves. But in the 21st century battle soldiers were forced to be more mobile, either in cities or out in the hills, carrying everything on their backs or stuffed in pockets. When on patrol there were no fixed positions to fire up stoves, and patrol may last much longer than intended, and they may be engaged in combat for many hours, even days. What these soldiers needed was food they could consume quickly and on the go, without cooking, survival food to keep hunger at bay and stop fatigue. This led to the adoption of a new assault ration, with bars, energy drink and a pre packed sandwich replacing the MRE, a light, simple and functional package. If stoves were taken they would be Jet Boil style stoves, whipped out when there was a lull or a break, to quickly brew up tea or coffee, but not a hot meal.
This assault concept approach to food and cooking fits very well with modern alpinism, but here I'll call it sprint food, as it also matches the modern speedier style of climbing, where the aim is to design-out the lag of life as much as possible, so that you can move onto the next lag-less moment. Alpinism these days, by and large, has become more like bouldering in style, where we try and fit in climbs in between life in a smaller and smaller window. Now it seems to be about day climbs, or getting it done in a one-er - only dinosaurs or the slow and inept take more than a day to climb a route. Not long ago it was the norm on say a big winter route in the alps to take five or six days, where now only the hardest climbs take so long. Gear is lighter and better and people are fitter and have more information at their disposal (route lines, conditions, what's required etc). This means that actual bivy food has changed too, with the food consumed pre-bivy being very different from that eaten on the climb, and the food on the climb designed more for that sprint - so more calories - than the slower slog, where food/weight balance often means smaller meals (one is for an alpine firefight, the other for a long protracted campaign).
Sprint Food
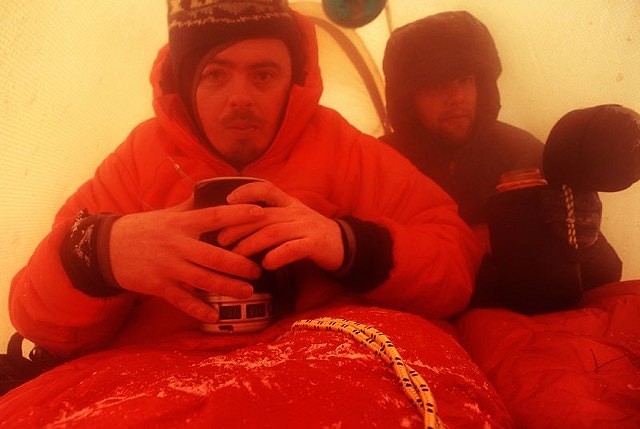
Such sprint food is drawn from a huge pool of sports-specific products on the market, from bars and powders you find in supermarkets and Decathlon, to more specialist products you find in high end bike and running sports shops, such as gels, jellies and supplements. This food also includes old school stuff like sandwiches (wraps are better as they last longer), the basic idea is to have a menu that can be eaten on the move and without cooking (although you can add in cook-in-the-bag meals). This style of fast mountain food can do you on routes of one or two days, and is light, compact and does not require cooking, meaning your stove can be purely focussed on producing water for hydration. This style of food is also portable and robust and easily consumed, stuffed in pockets and pack lids, so it can be eaten on the go, so as to top yourself up, avoiding actual breaks (having a Reverso style auto locking belay device is vital for this). The main content of this fast food is carbohydrates (complex and simple), but try and add in fats and protein, savoury as well as sweet, things like individual cheeses, salami, crackers, boiled eggs, even sachets of butter, ketchup or mayo as well so after two days it'll begin to be as appetising as dust, and your body will soon want to switch back to a more balanced hot diet.
A good example of this approach was Ueli Steck's solo ascent of Annapurna's South face, where he took only six bars and some energy gel, a far cry from the hampers of food used on the first ascent.
Sprint Menu
With such a huge choice of products, with many competing bars, drinks and gels, how do you build up a meal plan? Well here are six points to take into consideration:
Palatability:This is crucial because no matter how good your food is for you, if it doesnt reach your stomach it'll do no good at all. I tend to find most Powerbar style bars unpalatable, while others chomp on them like snacks, both on and off the hill, so for me this kind of food often goes on and off the hill uneaten. I do find gels easier to eat, plus they're fast and take only a few seconds to suck down, but this is offset by the fact that they get easily punctured and make a mess. Sports drinks are easier to deal with, making water palatable as well as keeping energy up and cramp at bay, but again some can taste like drinking Lance Armstrong's piss. To check palatability it's obvious you need to develop a taste for what works, so including such food when at home is perfect.
Quality: You could carry a one kilogram bag of sugar and just keep spooning that down all day, or fill your bottles up with McDonalds banana milkshake, getting a thousand or so calories with each one, but being on the hill is the same as being at home and so you should avoid just going for the easy, cheap and unhealthy option - plus blood sugar spikes are the last thing you want. Instead go for a balanced approach, with a mix of carbs, fat and protein, or just carbs if your climb is short, and of course you really want complex carbs as much as possible, feeding them into your engine regularly.
Cost: It may seem daft to think of cost as a factor but very often the actual difference between having some cheap Tesco muesli bars, a packet of jelly babies, dried bread with margarine you nicked from the cafe, along with some budget cheese and sausage may be marginal over some space age sports selection. Often they can also taste a lot better. Having food that is affordable and does the job will help you get into the habit of eating it while building up for a big alpine hit, rather than saving it (like pricey freeze dried meals).
Menu Effectiveness: Different combinations of food need to be built up and tested before you find yourself depending on them, and again this needs to be done during your training back at home, used on multi night trips and long days. It's no good going on the hill with some untried mush in a bag and finding it inedible and spoiling your climb when you could have discovered this in your own kitchen at home, or at the crag. Knowing how each part of your menu locks into each other part is key in getting the most out of what you take. When doing long hill days work out how much you need to feel strong and fight off fatigue caused by a calorie deficit. Try to avoid going into the red and instead be like a horse and keep grazing, never eating a whole bar in one go, maybe just a quarter every half hour, or drinking lots, but just sipping (learn NOT to drink too much if you're using a bladder).
Psychological Benefits: Having food you crave is a great way to boost moral, from small bars of chocolate and sweets (chocolate eclairs are very good, as they are light and sweet, but have a ton of calories and can be sucked for a long time), to oddities like Fisherman's Friends or Pork Scratchings. Having treats to look forward to, especially when moral is ebbing, is always good and can be used to create some naughty spice in your performance diet. These items can also be used to cheer up partners, or as rewards or bait!
Weight: Unlike longer routes for a sprint diet your aim is to power you to the top, so the effect of the boost is weighed more heavily than pure weight itself. You will be moving fast, and perhaps from dawn to dusk, maybe all night, so you need enough food to power you on. Think of this menu as like a space rocket, designed to fire you up to the moon!
Sprint Food Examples
Variations on what to take are endless, and for this style of food - well any alpine style of food - you are not building a three meal style but more of a running buffet! Below are a list of items you could consider:
Muesli/energy bars (bulk of your calories)
Small packet of Jelly Sweets (Jelly babies, Haribo etc)
Wasabi Nuts
Small packaged Salami sticks
Pre cut Chorizo sausage (tends to have more fat, cut and rap in clingfilm)
Power gels (store in a zip lock bag)
Tin of fish (tuna, salmon, sardines)
Small packet of nuts or trail mix
Individual Cheeses
Crackers
Chocolate (Celebrations are a good size)
Solid energy gels
Halva
Meal replacement Powders (Ultra Fuel)
Mini butter, jam or Nutella serving.
Wrap cut into pieces (meat, cheese, salad with high water content will freeze, such as tomatoes).
Energy drink (I use Nuun tablets as they are simple, quick and not messy - plus much better than powders if you're using a bladder).
Tea or coffee plus milk powder.
When making up these sprint meals pack them in zip lock bags for the day's food.
Alpine Marathon Food
If your climb is going to take longer, say two to seven days, then you're going to need to reduce the weight per day in order to be able to carry that amount of food on what could be a very technical climb. As mentioned above, in order to do that you'll have to reduce the calories carried for each day and so fall back on your own energy stores (the one thing you can scrimp on is water). The food taken remains very much the same and I would always go for a menu that needs minimal cooking (no food should EVER be placed in your pan), and can be eaten at any time and anywhere, meaning muesli bars instead of cereal/porridge, simple snack foods that can be eaten on the move, and meals that are adequate, tasty and easily cooked. In the past climbers have made great use of foods such as couscous, noodles, stuffing mix and potato powder (mixed with tins of fish, soup or cheese), which are light and low cost (place food into a large plastic insulated mug and let it cook once boiling water is added). When Boardman and Tasker climbed Changabang they lived off dried veggie mince mixed with Oxo (Oxo cubes are a great little extra for any alpine menu, used alone to make a thin soup, or added to other food to give it taste).
By far the best food for hard climbing, or climbing where you want the maximum advantage are freeze dried rations, where you just empty your water into the bag, stir, seal for ten minutes then eat. This style of food is very tasty, filling and is far higher quality energy wise than a cup of noodles (which tastes like food, but actually isn't). There are many types of dried food on the market but some are designed more for camping than climbing, with my favourites being Drytech, Mountain House, Good-to-Go and Fuizion. This style of food allows you to make up no-brainer menus and is especially useful if you have trouble calculating a multi day, multi man menu (in Antarctica in 2014 we had 400 meals for six people!), and I would just take one meal per day, a few bars per day (one for breakfast, and one to be eaten in bits in the day) and brew stuff (including soups).
Dehydrated Food Tips
It's vital that you mix in the food completely with the water, otherwise you'll end up with a mouthful of powder!
Buy a long metal spoon, or long handled wooden spoon, so you can stir the mix well and get at the food without having to stick your hand inside the bag.
Boiling water means boiling, anything less and you'll find that any dehydrated meat remains half dehydrated.
Never eat a dehydrated meal if you suspect that the packaging has been damaged or pierced as this can lead to serious food poisoning. Meals that are vacuum packed will show damage easily (vacuum packed food is always best for climbing, as it can't burst in a pack), while packs with some air are equally easily identifiable. With all packs give them a squeeze first to check, and if you let air out of packets to pack, then eat them within a week or throw them away.
A classic tip is to fill with hot water then stick the food in your jacket or sleeping bag (vital in very cold climbs), but as you can guess this can easily lead to a mess when the bag pops open! Instead of tearing away the whole top, just do it half way, pour in the water, stir (you'll need a long spoon), and then lock it down with one of those wide freezer bag clips.
Empty food packets can be used to store rubbish or be reused (you can decant meals from their heavier packets to thinner plastic bags).
On multi day routes, vary the meals and brands, as they can get a bit old soon (I never want to see another monkfish stew again!).
If you find you're going to run out of food you can easily split bags between two (split dry content into two bags and add less water).
If you can take the weight it's always worth carrying packet soups, as they can be used when all the food has been used up, or when you're forced to stay in the same place, so as not to cut into your climbing food. These soups can also be added into dried meals or other foods (especially good with super noodles). Oxos and other bullion style cubes and gels are also worth carrying.
Doing the Maths
Don't go overboard but do a little spreadsheet with your primary food and drinks on it, inputting each item's carbs, fat and protein, weight per calorie and calories per bar. With this data you can plan out some sample hill food, adding new items as they crop up in the supermarket. Play around with it, such as adding Halva, palm oil, dessicated coconut, and see what kinds of meal you can plan. This kind of spreadsheet may seem a little anal for single day routes, but if built up over a long period, adding in freeze dried meals you like as well, you can build up a very good database for longer trips and expeditions. If you're planning a month on Denali you can easily create some core meals, such a breakfast, lunch, dinner, assault food (climbing food), then build up a menu with this, checking the data adds up. This way you can hit your nutrition target without the risk of taking too much or too little (although on an expedition too many staples is always a good idea unless you have to carry them on your back).
Alpine Stoves
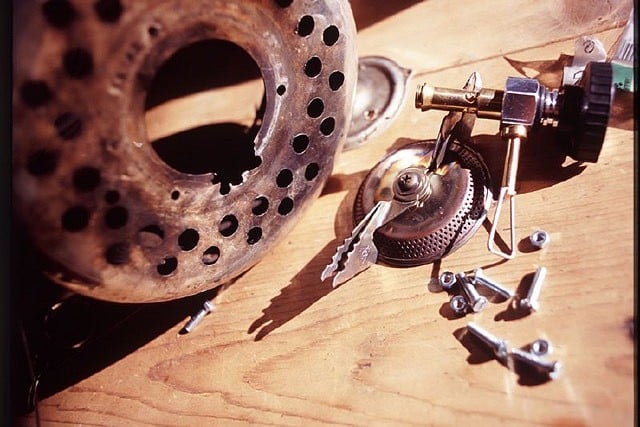
Since I started climbing in the 90s the one piece of Alpine climbing gear that has really made some revolutionary strides is the stove. The first stove I used in the alps was a massive Peak Colman multi fuel stove, something that looking back was as appropriate for Alpine climbing as taking an Aga. Very soon I switched over to the only hardcore stove option around, in the form of the Markill Stormy, a pretty lightweight hanging stove that fitted together in a pretty tight package, and could be hung on the wall (I was told it had been designed by Jeff Lowe). This stove had a great pedigree and was used on just about every hard alpine climb around the turn of the century, with the MSR being the go-to stove for longer routes in the greater ranges. The Markill was often tweaked by adding better burners, lighter wires (rather than the chains it came with), or adding copper heat exchangers that ran from the flame and down and around the canister, making it far better in cold temperatures (back then gas mixes did not work as well in sub zero temperatures, and even with better mixes these heat exchangers probably still trump a lot of new stoves). A few climbers played around with other stoves designs (such as the Bibler hanging stove), or home made designs in order to get a lighter stove, but the real revolution came with the JetBoil, which overnight blew the past away.
All in one compacts
The modern all in one compact integrated stove, based on the original Jetboil, is really the only option for alpine climbing, with white gas or multi fuel stoves saved for longer routes far from the beaten track. This is not a review of the stoves available as most are much of a muchness (The Alpkit BruKit is the best value, while the MSR Windburner is probably the most sophisticated), but the best size of stove is the classic Jet Boil size as it packs down well and is small and light enough that each member of the team can carry one. The advantages of this, if you can accept the weight, is you have redundancy in one of the most important items of survival gear you carry. Secondly you half the time it takes to produce water to drink, and either member can fire up the stove when the opportunity presents itself. The actual weight penalty is smaller than you may realise, as the all in one stove replaces your pan, bowl, cup and even piss bottle.
All in one tips
Store everything in a stuff sack with a clip in loop, including the stove, flint and steel lighter, spare lighter in a zip lock bag (keep a spare somewhere else), small square of pan scrub (in zip lock bag), all spoons, hanging kit (in a small stuff sack).
Store all your brew kit in the stove (t-bags, milk powder in double zip lock bag), along with one small gas canister (100ml), so you can quickly get a brew on when the situation allows.
On climbs use smaller canisters rather than big if you can, as they can be stored more easily in over-stuffed packs, and being smaller they are a smaller target for damage. With a highly efficient stove and careful husbanding of fuel, you can often get a 100ml gas canister to last 1 day. Avoid putting large 200ml or 250ml gas canisters inside the stove, because if the stove becomes damage or squashed (sitting or standing on a pack), then the gas may be impossible to remove. With smaller canisters this isn't a problem.
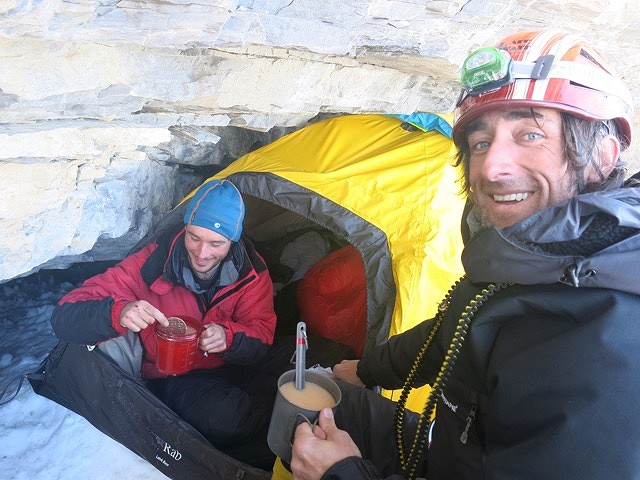
Get a hanging kit that works, either home made (use wire and swages), or one designed for the stove, and practice how to set it up before you need to use it. If you find yourself without a hanging kit then you can sometimes clip off the stove with a quickdraw into its side handle (if it has one), but always be careful that the bottom of the stove doesn't drop off!
The beauty of the Jetboil style stove is that it can be handled in situations where no other stove would work, such as inside a sleeping bag, or tucked between you and your parter or jammed in a crack.
People focus a lot on extreme accidents, such as crevasse falls or lightning strikes, when one of the most dangerous is knocking boiling water over onto someone - which happens. Do this and your climb and your trip is over, so really take great care, especially when tired. This is one reason why a hanging stove is a good idea, especially in a tiny tent. If you're camping on snow then take a small piece of wood as a stove board (drill a hole into it you can clip a krab or thread a sling or insert a tent peg), and place this in a hole in the porch of the tent (so you step down into the tent to enter). Having a stove pit means that if the stove did flare up or go crazy (say there is a leak in the seal), the flames are much lower than the porch, and if it's knocked over the water will just go into the ground, not burn you or drench your kit. If the stove goes crazy you can kick snow down onto it to extinguish it.
Gas stoves and the gas they use has improved a great deal over the last twenty years. Nevertheless, in very cold conditions the power of your stove will drop off, as the burnt-off gas lowers the temperature of the gas left behind (you'll find ice building up on the outside. In the past, using normal gas stoves, they would heat up a bivy tent quickly (yes you're not meant to cook in a tent, but then you're also not meant to sleep in a tent on a ledge the size of a settee) reducing the chilling effect, as well as giving a very nice boost to moral. Unfortunately this heat was all wasted heat, and so the modern super efficient designs tend not to warm a tent half as well, meaning they can be slow. If you're on an open bivy, then a faster stove is always best, as you can just get the cooking over with a bit faster. In the past people made home made heat exchangers, a bit of flattened copper pipe that ran from the flame down to the canister (Epigas in Japan produced a magnetised version that stuck on your canister) which was highly effective. Climbers these days tend not to bother, but a good trick is to pour an inch of water into the plastic end cap of the stove (the bit that protects the burner) and just dip the gas canister into it for a few seconds. Even if the water is almost freezing you will see the stove burst into life.
Summing Up
So there's my views on short term food for climbing, which really is pretty simple, and like all alpine climbing really just a case of trying to wring out the last drop from the smallest sponge. For longer trips this diet tends not to work well at all, and so you need to switch to more of a living focus, rather than surviving, but nevertheless as climbers in the 21st Century we really have no excuse to run out of steam!
Andy Kirkpatrick, Hull's second best climber (after John Redhead), has spent 201 nights on Yosemite big walls, including successful one day ascents, several push ascents (climbing from the bottom to the top with bivy gear) and three solos.
- 10 Tips on Staying Warm in Winter by Andy Kirkpatrick 15 Dec, 2014
- PHOTOGRAPHY: Bum Shots & Shaky Vids 15 Sep, 2014
- The Nose: How to Climb El Cap's Most Famous Route 21 Jul, 2014
- 10 Tips for Climbing El Cap by Andy Kirkpatrick 25 Jul, 2013
- GUEST EDITORIAL: Everest - Sucking on the barrel 3 Jun, 2012
- REVIEW: Fiva - An Adventure That Went Wrong 24 Apr, 2012
- Andy Kirkpatrick - Exclusive excerpt from Cold Wars 16 Sep, 2011
- Making The Jump From Scottish III and IV to V and VI 30 Dec, 2010
- How To Hone Your Alpine Psyche 27 Nov, 2009
- Doctor Gear IV: Best Glove system? 8 Mar, 2009

