140m, 5 pitches.
No description has been contributed for this climb.
Feedback
| User | Date | Notes | ||
|---|---|---|---|---|
| TradSimon | 19 Aug, 2022 |
Show βeta
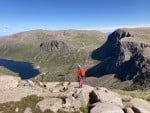
βeta: bit of an adventure route finding. The guidebooks are not great. P1 we climbed the slab to the ab (bail? winter?) tat, which was a bit run out. We thought the 'red wall' for P2 was the really blobby juggy one above a grassy ledge, about 5m left hard left of the tat, which you can climb direct or easier on its L. The traverse under the overhang is a nice rising traverse. There is a lot of climbing after the guide book says it finishes - we kept our ropes on and there is a significant crag at the very top (maybe we should have angled R rather than L for an easier exit?!) | βeta? | |
|
Show beta
βeta: bit of an adventure route finding. The guidebooks are not great. P1 we climbed the slab to the ab (bail? winter?) tat, which was a bit run out. We thought the 'red wall' for P2 was the really blobby juggy one above a grassy ledge, about 5m left hard left of the tat, which you can climb direct or easier on its L. The traverse under the overhang is a nice rising traverse. There is a lot of climbing after the guide book says it finishes - we kept our ropes on and there is a significant crag at the very top (maybe we should have angled R rather than L for an easier exit?!) |
||||
| Pauljames | 1 Jul, 2021 |
Show βeta
βeta: No idea where P2 was meant to be. Traversed left for a few meters and carried on up. Some loose rock on the route | βeta? | |
|
Show beta
βeta: No idea where P2 was meant to be. Traversed left for a few meters and carried on up. Some loose rock on the route |
||||
Logged Ascents
32 users have logged this
Guidebooks for Stag Rocks
Not all climbs at crag may appear in this book 14 users have this on their wishlist
Please Login to view more details on the logged ascents
Route of Interest
The Clean Sweep
Grade: VS 4c ***
(Hell's Lum)