

Handholds and Grip Technique - Part 2
It can become mind-boggling as soon as we start to unravel the layers below the surface of climbing technique. There is way too much to consider when we're on a hard climb in the heat of the moment, but if we make time out to focus the microscope on individual areas and practice on easy ground then we can reprogram our autopilot to do a better job. In the last article, we saw just how much there is to consider when it comes to something as seemingly simple as gripping an edge and just how much energy you can save by making the tiniest adjustments. This time I'll be tackling the remaining list of handholds and in the next article, I'll be revealing some more key tips for making sure that you are always gripping the most efficient way.
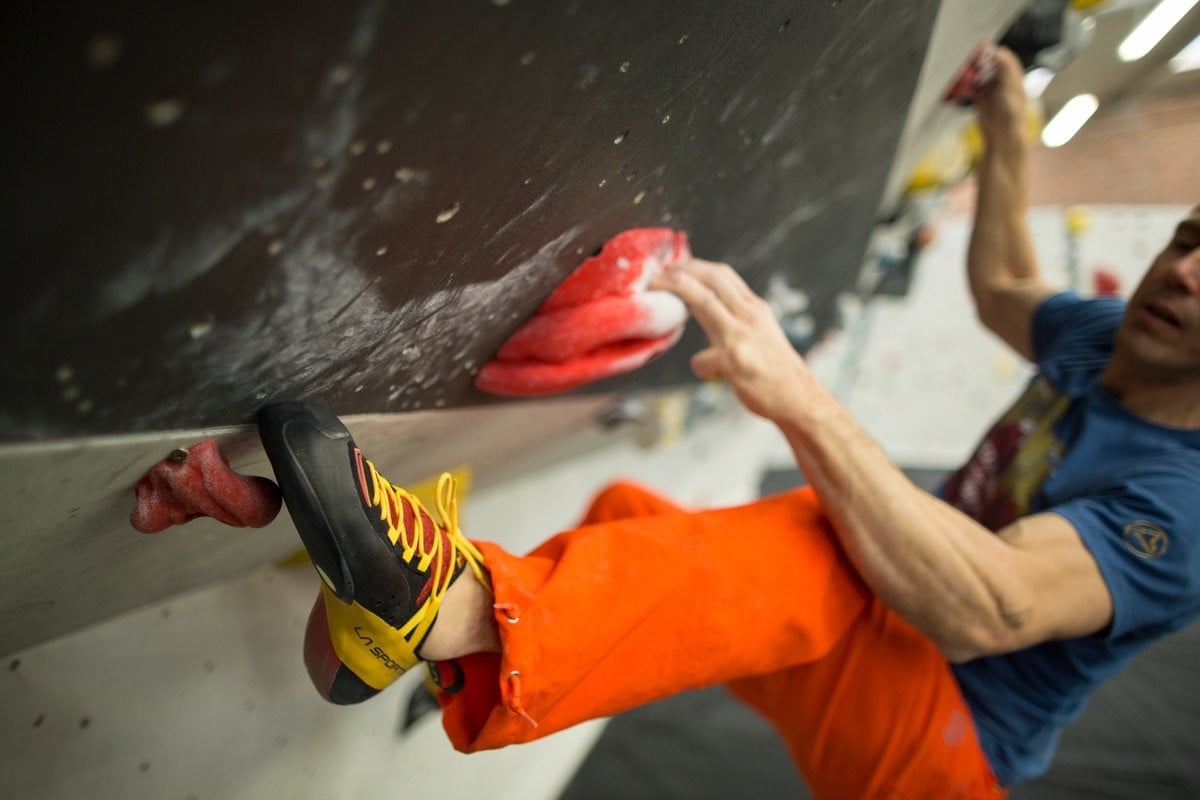
Slopers

Over the years in coaching, I can virtually count the number of climbers who have described slopers as their favourite holds on both hands. Perhaps things are changing, with slopers now featuring more extensively at indoor walls, yet still, most climbers (other than elite boulderers) will list them as a weakness. If you're into trad or sport climbing then it's easy to kid yourself that you don't need to be good at slopers, yet it really doesn't' make sense to allow a huge weakness to develop.
Practising slopers provides spin-off benefits to many other areas of performance: core strength, dynamic movement and so on, not to mention the fact that they do crop up on sport routes occasionally! So if slopers really are your Achilles-heel then don't leave it a moment longer - forget about the grade and roll up your sleeves. The following checklist covers the key points for gripping technique and also pays lip service to body position and movement.

Slopers – gripping technique tips:
Look first and then feel to find the best part of the hold.

Use the thumb and consider different positions, such as below and to the side of the hold. Pinch hard to get as much from it as possible.

Keep your wrists stiff.

Slopers – movement and body-position (short-list)
Be hyper aware of balance – try to suspend the hips vertically below and centrally between both handholds to prevent them from swinging when you make each move.
If you need to slap dynamically between the holds then don't be half-hearted and give full commitment. Aim to strike a crucial balance between over-powering it and causing too much instability and under-powering and failing to reach the hold.
Move the feet and body stealthily, maintaining constant core tension and 'drill' the toes into small footholds.

Keep an open mind. It's all about attention to detail. Slopey problems can go from feeling impossible to straightforward at the flick of a switch.
Supportive training for slopers:

Deadhanging the slopers on the fingerboard can be worthwhile, although this tends rely on balance and available friction. No doubt it is more valuable to practice on the wall.
Pinches
Many climbers struggle with pinches but they only get harder if you shy away from them.


...This is usually achieved by stepping through and using the outside edge of your foot, but if this isn't possible and you end up 'front on' with parallel hips then it pays to have strong thumbs as a back-up! Practice on wide and narrow pinches, incut and sloping ones, and also deep and shallow ones. Don't expect to be any good if you don't do this!

Supportive training for pinches:
The best way to get strong on pinches is to set hard boulder problems on a woody board. For best results try to train the thumb in a range of positions by using wide, medium and narrow holds.


It can be tricky to train pinches by dead hanging from fixed holds, seeing as you often end up compressing them (squeezing inwards), as opposed to pinching with the thumb, so pinch-blocks suspended from ropes provide a good alternative. You can attach these to weights and try to lift them or suspend them from cords. Use the same protocol for reps and sets as you would use for dead hanging.
Pockets

It is very difficult to offer generic advice on using pockets as so much is dependant on finger length and the nuances of each hold.


It pays to be versatile and to feel comfortable with either the index or the ring in combination with the middle. This way, not only will you be adapt to a broader range of shapes and depths of pocket but also, you can switch from one combo to the other on sustained pockety routes in order to conserve energy. The way to achieve this is by making a conscious effort to try out both combinations when training.

Injury prevention tips for pockets
Above all else to take care, seeing as pockets are perhaps the most notorious holds for causing injury.
Warm up thoroughly
Be prepared to let go very suddenly if you feel the start of a tweak.
Don't 'siege' pocket problems and instead, give them a few tries, with good rests in between attempts and then move on to something different.
Avoid monos unless you are at a super-elite level or you really have to train them for a specific project that you want to do badly! Virtually every climber who tries to get good at monos will end up injuring themselves at some point.
Supportive training for pockets:

When fingerboarding, use the drag/open grip and bird-beak grips. You don't necessarily need to use pockets and edges can work just as well.
Slots
With shallow slots, it's usually a case of seeing what works from the 3 main options: half-crimping, bird-beaking or dragging.


Finger combinations
For complex features or clusters of edges and pockets, be prepared to use any number of the previous techniques in combination. Split the fingers and locate the most positive, in-cut sections in order to obtain maximum purchase. Be creative but also be careful as unconventional holds are prone to causing rotational forces in the tendons and loading them awkwardly. You may have to settle for a gripping method that provides slightly less purchase but feels less 'tweaky'.
'Guppying'
With large projecting holds or spikes - wrap the side of the hand around the hold. This can alleviate grip strength massively and provide a 'thank-god rest' in the middle of strenuous terrain. Guppying is a particularly useful technique for indoor climbing and so many climbers miss the opportunity to use it.


Jams

Entire books have been written on crack climbing so get hold of one or book onto a masterclass with the Wideboyz or better still, just get out there with a rack of cams and get amongst it. It was the legendary pioneer of the 60s and 70s, Don Whillans who said, 'you're not a real climber unless you can jam', but let's leave it there before I get myself into deep water. I'll be back on these pages in a few weeks to give gripping technique the final treatment.
With special thanks to Boulder UK Preston and Depot Climbing, Manchester.

Neil Gresham is widely regarded as one of the world's leading voices in performance coaching for climbing. He has been coaching and writing regular training articles for national magazines since 1993 and has pioneered many of the methods that are used widely by coaches today. Neil is the current training columnist for UKClimbing.com and Rock & Ice in the USA.
He has climbed E10 trad, WI 7 on ice and in 2016 he climbed his first 8c+ at the age of 45 when he made the first ascent of Sabotage 8c+ at Malham Cove. Neil puts all his successes down to hard work, motivation and refinement of his game. He believes that work and family commitments don't need to limit our climbing goals provided we are focused and make the best possible use of our training time.
Key components of Neil's training programmes
- All programmes are based on response to a detailed questionnaire and are aimed at the ability level, weaknesses, strengths, goals and lifestyle constraints of each individual.
- Programmes can also be based on the results of optional benchmarking tests. See 'benchmarking' on this site.
- Programmes can be for all-round performance or geared towards different climbing styles: bouldering, sport, trad or competitions. They can also be targeted towards goals, weaknesses, trips or projects.
- You can choose between a full training programme (which includes all aspects of training) or a 'fingerboard-only' training programmes. Fingerboard programmes include advice on how to fit the sessions in with other climbing and training.