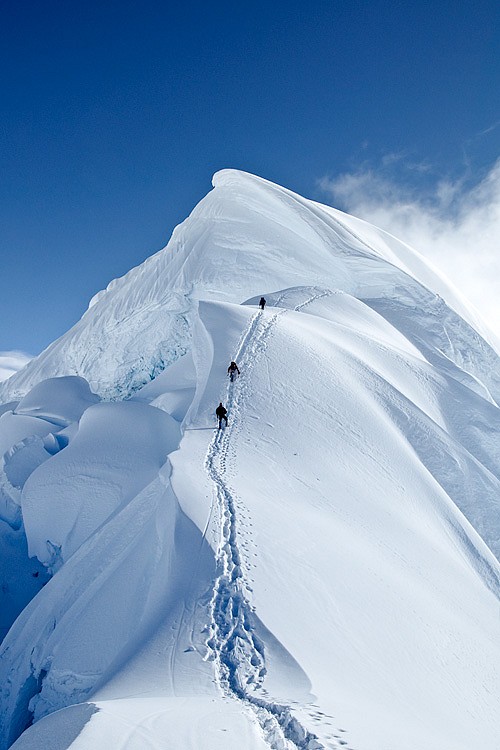
Introduction
In my (very biased) opinion, mountains are the most beautiful environment on the planet, and certainly a very important source of great photography. But besides their intrinsic beauty, those big stacks of rock have another attribute that makes them of special interest to imagemakers: they are inaccessible. Or rather, very difficult to access, requiring special knowledge, equipment, and physical abilities. Which means that the perspective from mountains is likely to be very unique, only having ever been seen by a very select few. Beauty and originality, the dreams of any photographer, come (almost) for free in climbing. It is no wonder, then, that most of the climbers I know have a deep interest in photography.
However, the blessing of mountain climbing photography is also its curse. Because it is so difficult to get there in the first place, because the climbing itself takes up so much effort and concentration, one has to make all sorts of compromises with the photography, and often bring back pictures that are disappointing, at least when compared to the experience that has just been lived. Virtually all the climbers I know bring a small point-and-shoot camera (digital or film) and use it only during long breaks and on the summit. But it doesn't have to be. DSLRs have gotten good enough that they can be brought on a technical climbing expedition, all the way to the summit. Here is how.
This article will mainly be useful to people who actually climb mountains, but others might find it interesting. Many of the advices also apply to hikers and trekkers, our horizontal cousins. If you ever shoot in very cold conditions or if you go on expeditions where power isn't guaranteed, you might want to read the parts about battery and memory management. And if you ever find yourself trying to take pictures in a mountain area, then there should be useful things in "what to shoot".
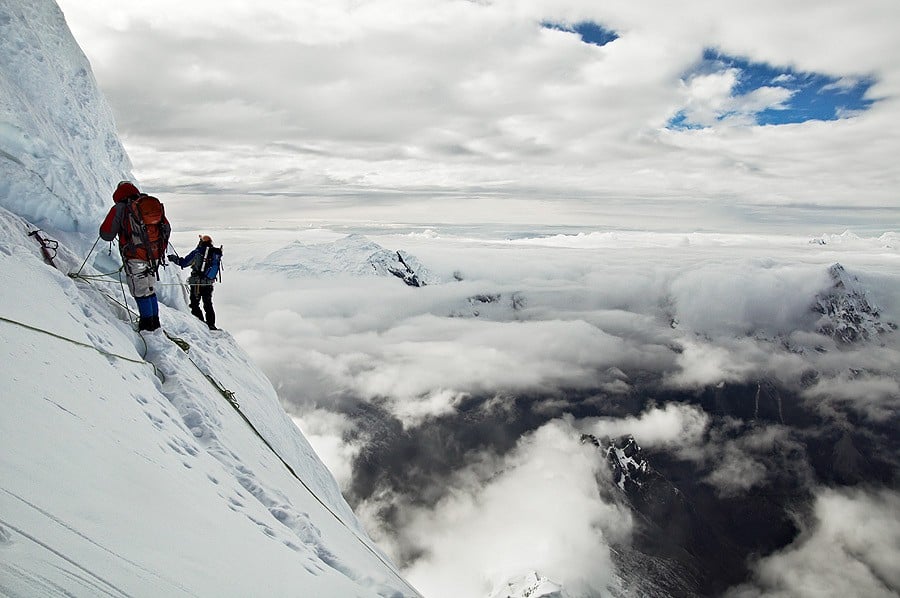
1. The Gear
It used to be recommended to bring a small, mechanical, film camera with as little electronics as possible, as they will keep working after cold and adverse conditions killed anything else. But as much as I may like film photography (I even briefly shot in 4x5), I am of the digital generation, and I want the ease of use and the versatility of my DSLR. Not having to change film rolls with mittens while hanging from an ice wall is also a big advantage. Still, I think it is a good idea to bring a small backup camera, possibly film, to save those few crucial shots when the big camera suddenly decides it's really too cold to keep going (or when it decides to get back down much faster than planned).
When choosing your gear for climbing, you have to add an extremely important variable to your choices, one that is usually given relatively little importance: weight. You are going to carry all of this stuff up for probably several thousands of meters so will be grateful for each gram that you can save, even at the cost of some convenience or even *gasp* image quality.

What I bring
Here was my whole photography equipment on my recent expedition to Peru:
- Nikon D90. My current main body. To me, it is the right combination of features vs weight (not to mention price). It has enough direct controls that I can do all I need with heavy gloves on and without accessing menus. It is not weather sealed but still very well built and has withstood all I threw at it so far. Less advanced cameras like the D40 or my old D50, while even lighter, lack features I need, such as direct access auto-bracketing, easyISO, precise battery information and are much more difficult to operate with gloves on. More advanced ones, like the D300 or D700, add a lot of bulk and weight for relatively little extra benefit, especially if one adds for the much heavier pro-grade FX lenses.
- Sigma 18-50 f/2.8: My wide zoom, and the only lens I take on summit pushes. I use it around 20mm most of the time but appreciate being able to zoom to 50mm when needed for a scene. The fast aperture allows me to shoot well before sunrise. And it is beautifully sharp at almost every apertures, even in the corners. If I was going super light, I would consider taking the kit Nikon 18-55 VR II instead.
- Nikon 70-300 f/4.5-5.6 VR: The lightest long zoom that exists (well, except for the older 70-300 f/4-5.6 but low optical qualities and no VR are two reasons I'm glad to having gotten rid of mine). Optically superb, even at 300mm. VR means no headaches for early morning and late evening shots, and you can even get the occasional (daytime) wildlife shot with the nice AF-S motor. I use it a lot for landscape and portraits, especially while in camp, but I usually leave it on summit days, as it is less useful for environmental shots.
- UV filters: All my lenses are equipped with a Hoya multicoated UV filter, mostly for physical protection. They can also provide a cheap trick when you are having a condensation problem and a photo opportunity that can't wait: simply unscrew the filter, get your shot, screw it back on and only then deal with the condensation.
- Thinktank Skin belt system:: probably the most critical piece of equipment. I used to carry a shoulder bag in the mountains, but have recently switched to a modular belt system and am not looking back. It's light, allows me to carry exactly what I want, balances the load on my hip, is comfortable even with a backpack and a climbing harness on and most importantly of all, it gets out of my way!
- Microfiber cloth: A very useful addition, as front elements tend to often receive snow or dust. When shooting on a glacier, I tend to have to wipe the lenses several times a day.
- Hard drives: I actually bring two Hyperdrives (one original Space and one Colorspace UDMA) for redundant backup, but take none to the summit.
- 10GB worth of SD cards, including a high performance one.
- Batteries: 2 en-el3e. More on memory and power later.
What I don't bring
- Tripod: Even though I own a very nice carbon fiber tripod for hiking, I always leave it home for actual climbing. I know that except at sunrise and sunset, light will be strong enough for me to shoot at optimal aperture and ISO with very comfortable shutter speeds. It would only be really usable in camps anyway, as it is complicated and time-consuming to set up. And finally, even carbon fiber weighs something, and with a reasonable ballhead, it probably is a minimum of 1.5 to 2kgs. For low-light shooting, I simply bump the ISO and for night photography use rocks or makeshift platform (a sturdy snow pile with a crampon on top works great). So far, I have never found myself in a situation where no tripod meant no shot.
- Flash: For it to look interesting, one would have to take the flash head off camera, which is simply too complicated to do while climbing. Managing batteries would also be a nightmare (I can barely do it for a dayshoot from home...). And of course forget about light modifiers. Finally, mountain light is very unique, and I want to exploit that fully.
- Filters: Besides the UV that are permanently on, I don't take anything. Screwing and unscrewing very thin things with big gloves isn't very fun, and they are likely to be dropped at the worst moment. The only one that could be useful would be a grad ND, but they are even more of a pain to use and set up than regular screw-ons. I use HDR instead in situations that would require them (see "Exposure").
- Exotic lenses: As much as I like exploring new effects and trying new things, the weight requirements limit what I am willing to fool around with. I will probably carry an ultra wide-angle one of these days, though, as I think it could create very interesting things.
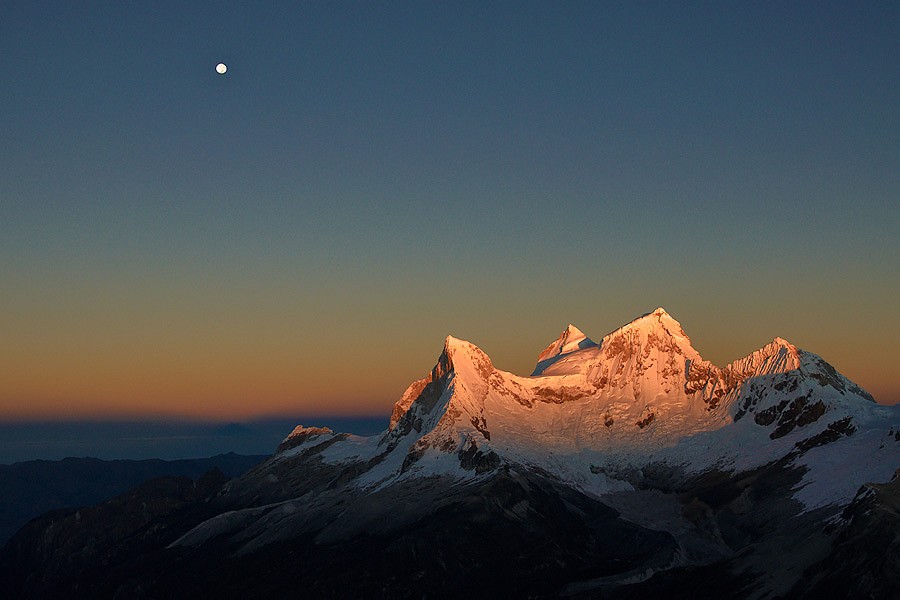
Managing your resources
With digital, there are two basic resources that you need to take care of: memory space and battery life. Since most climbing expeditions span several days (or weeks for the most extreme ones), and mountains usually don't come pre-equipped with power outlets in campsites, one has to be careful and plan ahead.
Memory
This is the easy one.
There are two basic options: either buy enough memory cards to last you the whole trip, or get a hard drive that you can download pictures onto. Though weight would be lower with the first choice, it has many disadvantages: it is more expensive, cards will likely not be of the highest possible performance, and having dozens of cards could easily lead to confusion. But most importantly, photos will only be in one single location, a tiny piece of plastic that has a tendency to easily get lost or corrupted.
For those reasons, I carry two hard drives and download all my pictures on both every day (usually in the tent, at night), then format the card immediately. I try to keep the drives in separate locations, for instance one in the photo bag and the other one in the backpack, in case, well, that shit happens. The hyperdrives that I use have a pretty impressive autonomy and the UDMA version can probably backup 100GB before I would start worrying about its battery (the official specifications gives 250GB per charge, but I find that overoptimistic), i.e. more than I will shoot in any reasonable trip. Just for safety, I also bring a plastic casing in which I can put the LR6 batteries of my headlamp to be used as an external power source.
I only carry 10GB in cards, with the high performance Lexar UDMA 133x 4GB being my workhorse. Since I rarely shoot more than 4GB a day (that's about 300 RAW files on the D90), I have a big safety margin. This
also means that I can leave the hard drives without remorse for summit days.
Batteries
Meet the biggest problem with climbing photography. The issue is that mountains tend to be pretty damn cold, and that batteries don't like that. At all. Their capacity drops to a fraction of what they usually are. The good news being that as soon as they are warmed up, they go back to full capacity.
Summit pushes tend to happen at the end of a trip, so one needs to be very careful in order not to suddenly be powerless (pun intended) when the truly great photo opportunities finally arise. In order to avoid that, there are several possible strategies.
Note: I assume having two batteries, which is a minimum for any expedition. It is easy to adapt to more.
- The dumb strategy is to deplete the first battery entirely, then switch and repeat. The only advantage is that you don't have to think about it at all, but there is a good chance that you will find yourself without power by the end of the climb. Even if you are careful to have capacity left for the summit, you are at the mercy of cold and this is a recipe for missing shots.
- A variant is to swap batteries regularly so as to have them roughly at the same capacity. When wanting to shoot in cold weather, keep one close to your body, where it's warm, and the other in camera. Once the capacity of the cold one drops below a certain level, swap them and keep shooting. The advantage is that you are guaranteed to always have a warm battery. The inconvenient is that you still need to be careful about having enough power left for the summit, and also that it's a pain to switch batteries with gloves on (whoever designed the door for the battery compartment on Nikon DSLR obviously wasn't thinking about climbers).
- Finally, my favorite option relies on the observation that most of the shooting happens while in camps (because of having more time, no distractions from climbing and often good light), but that most of the good pictures are taken while doing actual climbing. I then reserve one the batteries for climbing days (and especially summit pushes) and use the other exclusively for shooting from campsites. This way, I am more or less guaranteed a near-full charge on summit day and when the photography really counts. On the down side, I may have to limit my campsite photography, and if extremely cold, I may run into power troubles. In case this happens, I will swap batteries with the other one, hopefully not too depleted, only long enough for the first one to warm up a bit.
2. Carrying the Gear
You might not believe me (at first), but this is by far the most important part of this guide. It is knowing how to have your gear accessible that will make the difference between getting back home with photos or not.
Having it with you
Try the following experiment: take a DSLR, put it in your backpack and go climb a mountain. I can pretty much guarantee that you will get pictures from exactly two locations: the camp, and the summit. The reason is that those places are the only ones where you are going to stop long enough for the hassle of getting your gear out to be worthwhile. If you think about it, you need to: unclip your pack straps and possibly parts of your harness (e.g. if you are wearing a chest one), take your pack down, open it, dig your camera bag out, open the camera bag, take the camera out, shoot, and reverse all of that. It's at least a couple of minutes before you can take the first picture, and no less than 10 minutes break for the whole party. And even if it taking that long that wasn't a big problem, the real reason that you won't stop is that climbing is an extremely involving task, both mentally and physically, and that you will be unwilling to break the "rhythm" by switching to an entirely different activity for that long.
What is needed, then, is to have the camera as accessible as possible, in a way such that you barely need to stop to take pictures. The solution, of course, is to keep the camera bag on the outside, connected to the harness. With the Skin system, I can simply slide the pouch containing what I need to the front and open it in a few seconds, even with big mittens on. In adverse weather, I simply put the raincover on and can stop worrying on whether my equipment will get wet (instead worrying on whether I will get wet...).
The camera will be inside my backpack in only two cases: the first one is on alpine starts, as shooting by night is too much trouble for usually too little reward. I will generally get the camera out an hour before sunrise and try to get shots of climbers with headlamps on. Having moonlight helps a lot, too. The other case is when the climbing gets real hard. On steep ice or mixed terrain where I need great freedom of movement, the weight of the camera bag and the way it is distributed (badly) through the shoulder straps is just a pain, and I probably want to concentrate on the climbing anyway. There is often a small break after technical parts, to catch your breath and calm down, and I use that time to get all the photo gear out again.
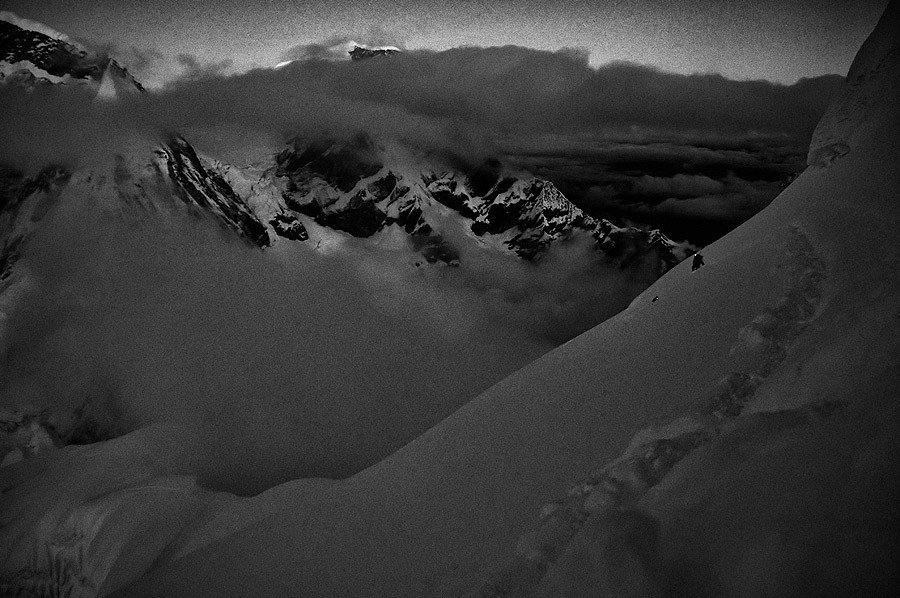
How to not drop your stuff
Though I have only ever dropped my camera on concrete in big cities, falling gear is a constant concern while climbing (and the reason many climbers don't want to take a DSLR up there), for the obvious reason that the chances of recovery are remarkably close to nil. The key to not losing anything is to not rely on your skills (between altitude, cold, tiredness, uncomfortable stances and big gloves, everyone can find a good reason to be clumsy) but to instead assume you will drop stuff, and figure out systems that will ensure they don't fall too far. Of course, being very careful helps as well.
In short, everything is, directly or not, connected to my harness. The first link, as already mentioned, is a biner from the camera bag to a gear loop (those are usually rated for between 5 and 20kgs, by the way, so assuming you're not bringing that 500mm f/4, you should be fine. If you want to be paranoid, use a cow's tail or a daisy). The next step is to connect the camera strap to the camera bag. The most convenient way I have found is to use a large biner and clip it to the bag strap, as this setup will slide up and down freely. The downside is that it needs to be reset every time the camera is going back to the bag, and there is a small chance you might drop everything in the window of time between opening the bag and clipping the biner. Another solution is to girth hitch a thin sling to the camera strap and then clip it to a biner on the bag strap, leaving the sling sticking out of the zipper when the camera is stored. You gain security but lose waterproofing.
For the small stuff (lens caps, memory card, batteries, etc...), I do everything inside the camera bag, not even above it. I have lost count of how many times a lens cap slipped from my fingers. Memory cards, and especially SD, are even worse. Bags like the Nova are nice because as long as you maintain them by their strap, they will stay upright and not spill their content out, but just to be on the safe side, I always shut the bag (but don't zip it up) as soon as I have taken what I need out.
3. Taking the Picture
When to shoot
Assuming you have your camera handy, it is easy enough to take pictures during breaks, when you have time and are not busy with climbing-related thoughts. But that also means that you are not choosing when to take pictures, and that you will be missing most of the "climber in action" images that can be so interesting. For that reason, you need to be actively looking for pictures all the time, and often will have to create your own opportunities. Whenever you see a good photo, it is time to assess the situation, taking into accounts the following factors:
- How long is this opportunity going to last? If it is relying on someone doing a climbing move or on fast-changing light, then you need to act quickly. If it is a landscape, conditions don't look about to change dramatically and your path is not going to alter the perspective, then you have more margin.
- How safe is it to stop here? Can everyone on the party anchor safely? Is there no risk of stonefall, nor of avalanching?
- How convenient is it to stop now? Did everyone just take a break recently or is one due soon? Are you pressed for time before nightfall or snow warm-up? Is it getting cold? Are your partners starting to get annoyed at your photography slowing things down? When is the next stop likely to happen?
- How good is the picture likely to be? Did you already take similar shots earlier in the day? Can you take more than one image with this one stop?
Once all of this has been weighed (it goes without saying that the safety part is the most important and that if you have any doubt stopping would be dangerous, just forget about photography and get out of there), you can take the decision to ask for a quick stop or to wait for the next break. It is very important to discuss it with your partners, maybe even before the trip, and to be ready to compromise if they object. After all, while you are happily snapping away, they will be standing around doing nothing, possibly getting cold in the process.
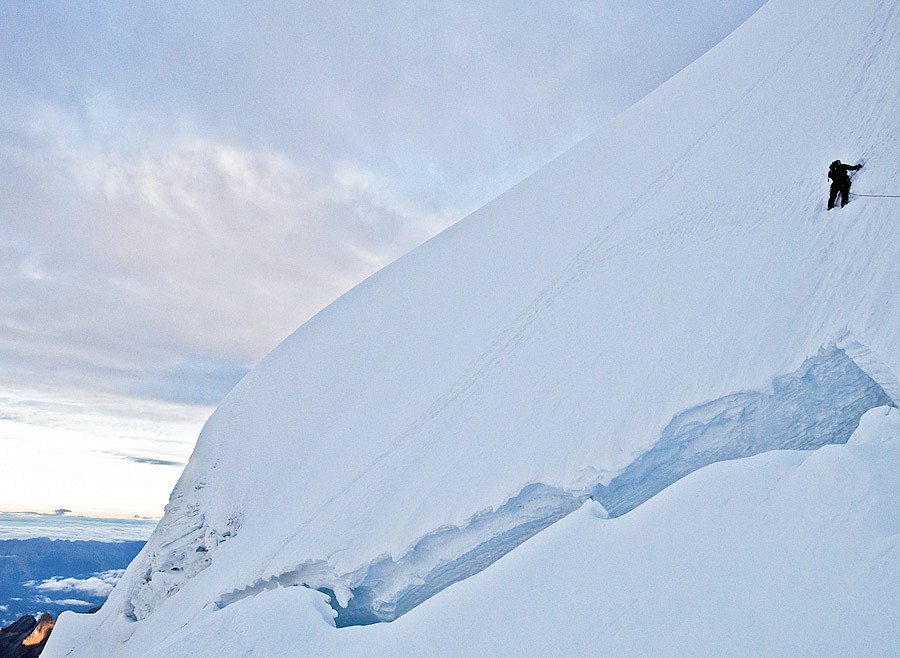
In my opinion, the best moments to take pictures are at belay stations: you are already anchored, someone is maybe climbing close by (if you are the belayer, you should obviously not be taking pictures) and you are likely to be in an impressive looking location. And it is usually ok to take an extra minute for photos when the team is getting ready for the next pitch. Rappel stations are also very good, and you are likely to have even more free time. And then, of course, there are regular breaks, summits and camps.
Modus Operandi
Here is a more or less complete of all the steps I go through to take a picture while climbing:
- Assess the situation as explained previously, paying special attention to safety. Let's assume I decided to stop (or that a break was scheduled anyway).
- Inform the rest of the party.
- Anchor myself safely to the ground (as one should always do when stopping). Even on very easy glacier terrain, I at least bury one ice axe: since I will redirect some attention from keeping my balance to taking pictures, I want to have a safeguard.
- Get into a comfortable position where I can freely use my two hands. It often means sitting down.
- Unzip the camera bag.
- Without taking the camera out, get the biner attached to the camera strap and clip it to the bag strap. My camera is now safe from falling.
- Pull the camera enough to be able to access the front of the lens, but still keeping it in the bag. Take the lenscap out and drop it in the bag.
- Put the camera strap around my neck.
- Take the camera out of the bag
- Close the bag (but without zipping it up).
- Check that there is no snow on the lens (I learned this one the hard way).
- Turn the camera on.
- Check that the battery level is high enough. If not, swap batteries (inside the bag!).
- Check that the shooting mode and the parameters are what you want (in my case, it's 98% of the time aperture first, f/8, ISO 200).
- Check exposure compensation is correctly set (-0.7 stops if sunny, 0 otherwise, see the next section)
- Check autobracketing is off.
I am now ready to shoot. For each image that I want to shoot, the process is:
- Take a test shot.
- Check histogram. If highlights are clipped, dial exposure compensation by -0.7eV steps until they are not blown anymore.
- On the last image, if shadows are heavily clipped, then bracket for HDR (again, see next section).
- If I can see anything on the LCD and if battery is not expected to be too big of a problem, then zoom in to evaluate sharpness.
When I am done shooting, I will take a few seconds to reset autobracketing and exposure compensation if I modified them, then revert the initial steps in the exact same order. I try to make the whole thing a small ritual, as forgetting anything could range from mildly annoying (forgetting autobracketing was on) to downright catastrophic (wasn't this biner clipped to my harness?). With a little bit of practice, the whole thing takes less than a minute.
You will maybe have noticed that nowhere do I mention taking off my gloves. That's because it simply isn't needed, and I encourage everyone to not take the habit of relying on having small gloves or bare hands to operate their camera. It is very easy and fast to get frostbite, and even if it doesn't go that far, there are few more efficient ways of turning a climb into an ordeal than having cold hands. It's true that I can't take pictures when I have mittens on, but then I can't tie knots either (I know, I know...), and if I have to be wearing mittens, photography won't be my main concern anyway.
Since it is very important to shoot fast, I often don't have the time to compose as carefully as I would usually do, so I tend to try multiple compositions and angles, shooting away, and do the selection once back home. I also often shoot several frames of the same basic composition if I feel the image is good, simply for safety, as it is often hard to judge sharpness on the spot. That's one of the big advantages of digital over film, and I make full use of it.
Exposure
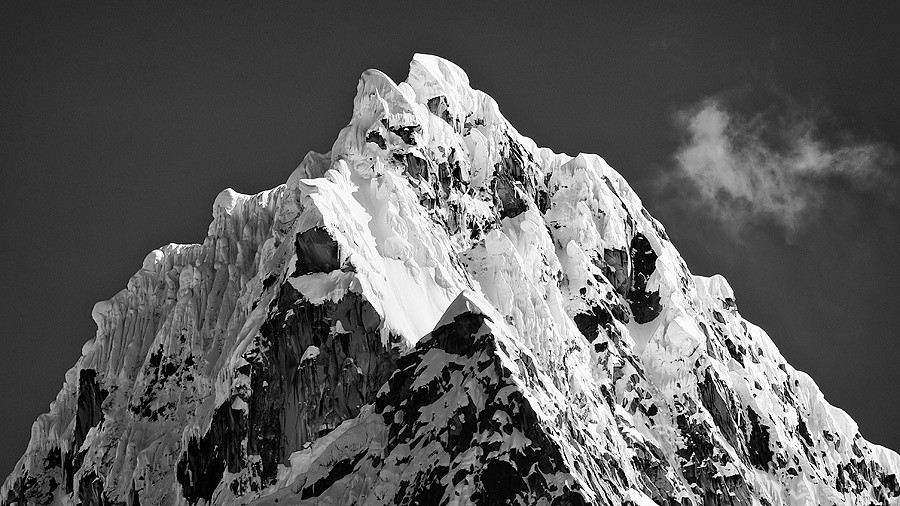
Light in the mountains is often very harsh, especially as altitude increases, as every climber who forgot to wear his protective sunglasses learned quickly. Snow is as reflective as things get, and there tends to be a lot of it. Add to the mix luminous clouds and dark patches of rock, and you have a perfect recipe for blowing out the dynamic range of any camera. For that reason, special care should be given to getting a correct exposure of every image - sometimes not an easy task.
Back in the days of early light meters, exposing for snow could be a little tricky, as it is far brighter than 18% gray. It used to be recommended to overexpose by 1 to 2 stops whenever a substantial portion of the frame was (sunlit) snow. Nowadays, however, matrix meters have gotten so good at recognizing those scenes that this is not needed at all anymore. The problem tends to be quite different: unless the whole image consists of objects tonally close to snow, in which case correct exposure will be achieved right away (as it should), the dynamic range of the scene is likely to largely exceed what the sensor can record, resulting in deep shadows and blown highlights. However, in most mountain scenes, the important stuff is pretty bright (snow texture and clouds) while the dark parts (rock patches, climbers) can usually be close to black without doing too much damage. Following that observation, I keep a -0.7 stop continually dialed in on my camera while climbing in the sun. That saves me a lot of clipping, and a good rule of thumb is that if there are no clouds in the frame, the exposure will be fine, especially with the option of raw recovery. Which of course doesn't mean that I shouldn't check the histogram, certainly a good habit to take for every shot.
If the highlights are still being clipped with -0.7, I keep dialing down by -0.7 increments. Once nothing is blown anymore, it's time to look at the shadows: if they are reasonably detailed, then I just leave it at that, usually keeping all the intermediary shots. If not, however, it is time to start bracketing for HDR. The formula is simple: you want 3 frames at +/-2 stops (I have yet to see a scene which doesn't fit in this range), such that the darkest image of the lot is -0.7 stop than the last image you obtained previously (the one correctly exposed for the highlights). In practice, it means adding 1.3 stop to whatever exposure compensation was previously on. I then simply take a hand-held 3 images burst in high-speed mode (4.5fps on the D90). Since a handful of pixels will be lost when aligning, it is a good idea to frame a bit wider than what is really wanted. One important thing to check is the sharpness of the brightest image, since it will have been taken with a significantly slower speed.
This is not an article about HDR (though I have written one too), but suffice it be said that it doesn't have to look like the LSD trips one sees so often on flickr. By being quite conservative and using the HDR software only to recover details, it is possible to get very natural looking results, though it might take some practice. I think the investment is well worth the effort, however, as this is the only alternative to carrying ND grad filters (not really an option for climbing photography). I personally use Photoshop CS4 to align the images and Photomatix Pro to do the HDR generation and tone mapping.
4. What to Shoot
If you have managed to stay with me so far, you should by now have a fairly good idea of how to carry and operate your DSLR in the mountains. But an important point hasn't been discussed yet, and that is what to point the lens at.
Well, mountains. Duh. Or is the answer really that simple? I may be the biggest mountain lover you will ever meet, but few things bore me quicker than a slideshow of peak after peak which have been shot for no other reason than the fact that they were around. Good photography engages the viewer, and more, good climbing photography engages the non-climber viewer. If one can't somehow relate to the scene, then it will be no more than a picture of a big piece of rock.
I would put images from a mountaineering trip in two different categories: on one side, "pure" landscape images, where the scenery is the subject, and on the other "climbing images", where the goal is to show humans doing silly stuff to get to the summit.
Landscapes
Of course, entire volumes could be (and have been) written on the subject, and I don't claim to have the ultimate answer of what a good landscape image should be, but here are some things that you might find useful:
- You must have something to say with your images, just like in any other form of photography. For me, it usually is how majestic the mountains are, how small humans are in comparison or how inaccessible and inhospitable they can be. If you don't care, the viewer won't either.
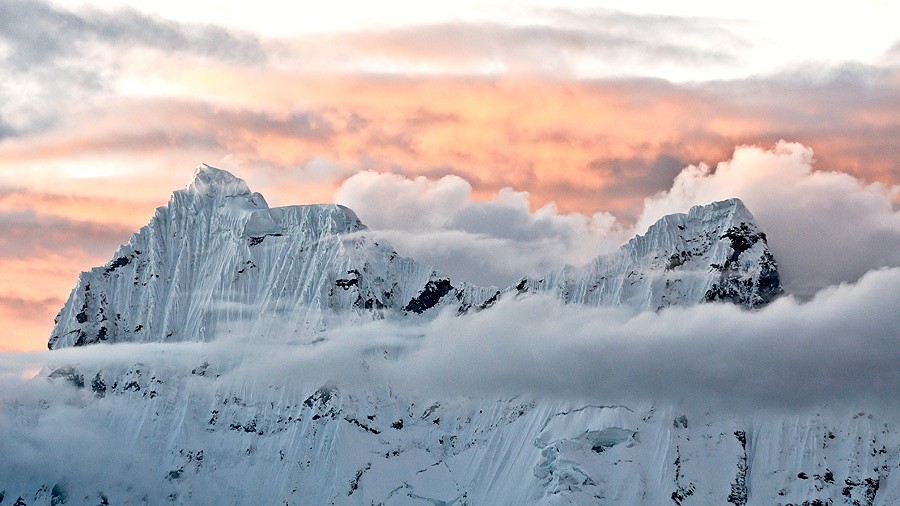
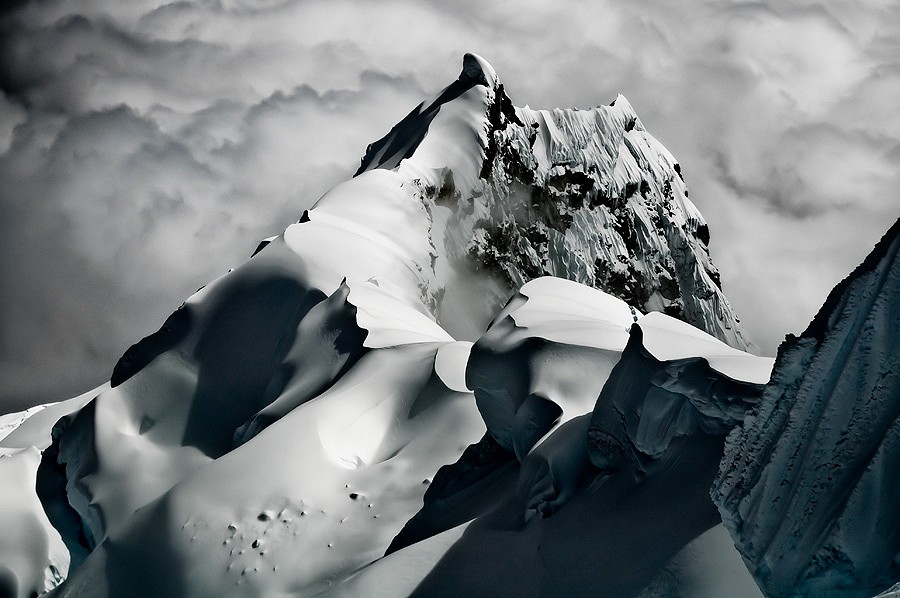
- A good test to find out how interesting and engaging your image is likely to be is to try and describe it with words. If you can't say anything else than "it's a picture of a nice mountain", then you can pretty much delete it on the spot. Some examples of what to look for might be "it's a rough looking windswept vertical rock face that looks particularly hostile", "it's a gigantic snow formation whose shape is underlined by low directional light" or "three-dimensional clouds partially hiding a snow-covered summit".
- While climbing, you have the unique opportunity of being able to look down on other mountains. Use it to differentiate your photography from all the lemmings who stay in the valleys!
- Think about getting close with a tele-lens, to isolate details and get cleaner composition. Distances are usually pretty high, so shooting wide will often result in tiny looking humps.
- Snow and ice are among the most amazing things to photograph. They can form crazy overhanging sculptures that would shame Manhattan buildings or bottomless crevasses that would scare the bravest of us, and if you add directional light, the most exquisite curves and gradients.
- Clouds often make amazing pictures, especially if they are around the peaks themselves. Clear skies are nice for climbing but boring for photography.
- Panorama software are getting real good these days, and I have rarely had stitching problems from handheld shots. Just make sure to have a lot of extra space at the top and the bottom. Unless in a whiteout, a 360° summit panorama is pretty much an obligation.
Climbing images
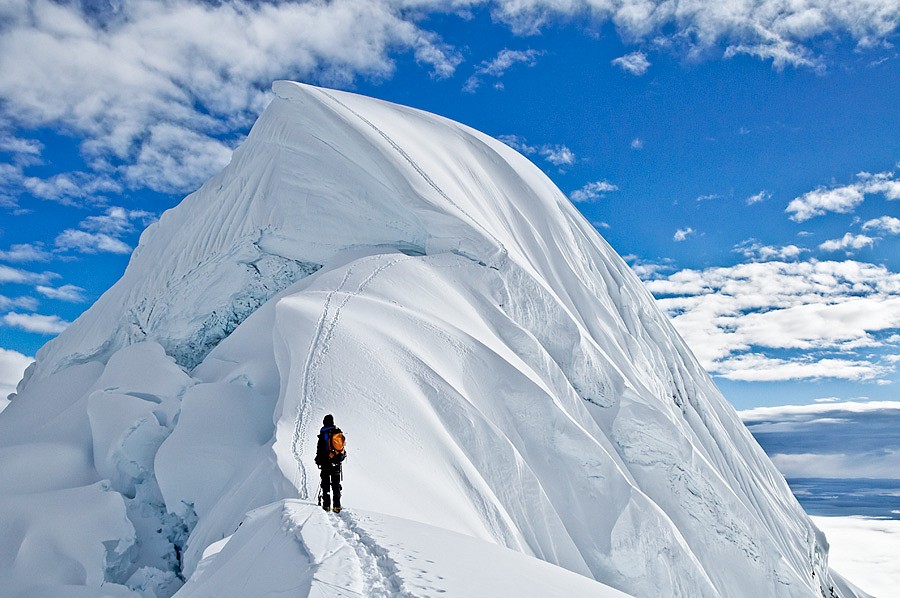
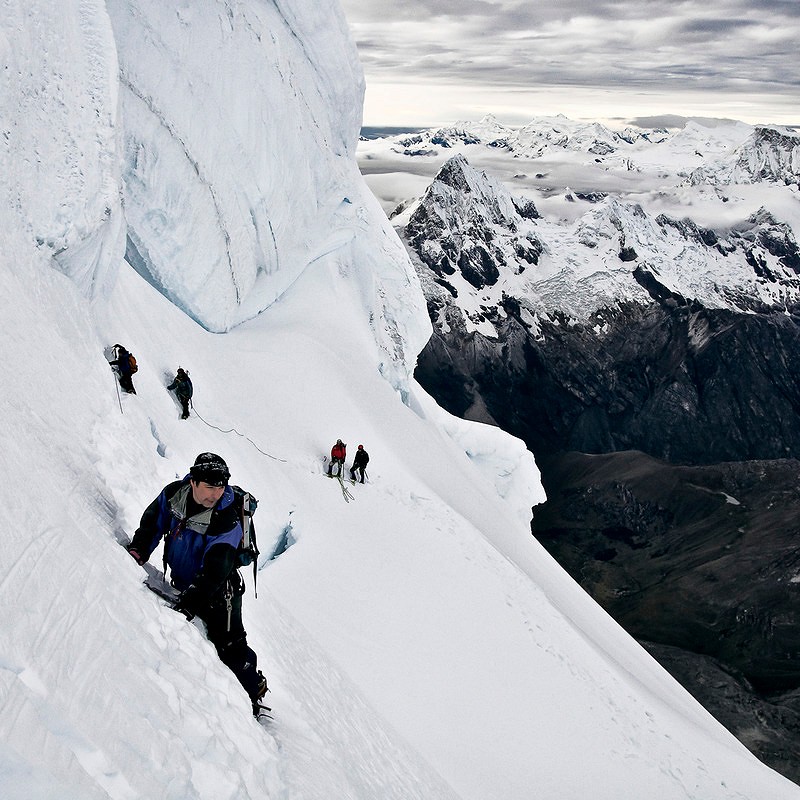
The most interesting images, however, often feature climbers. It can be simply to give an idea of scale, or to show someone involved in a very dangerous looking activity in a very vertical environment. Here are again some remarks:
- Perspective is extremely important, especially if you are doing a wide shot of someone close by. Try not to shoot horizontally, as this tends to be quite boring. Even if the subject is at the same level than you, either get low or shoot above your head.
- Feel free to cheat a little. The route might avoid this big crevasse and this overhanging ice wall, but the viewer doesn't necessarily have to know it. Playing with perspective can also often make things look a lot more exposed than they really are. But of course, don't push this too far: it's all about suggesting something. Cloning ropes out, for instance, is obviously unacceptable.
- Take action shots. If you can get this climber while he is swinging his ice axe, the image will be a lot better than if he is just hugging the wall. Likewise, get pictures of walkers while they are mid-stride, possibly with a cramponed boot in the air.
- Show what's around the climbers. The main interest of such images is the environment in which they are, so be sure to shoot wide enough to show all of it.
- If you are lucky enough to have another party at some distance, use the opportunity to get shots of tiny people in front of big mountains.
- You can get very good portraits of fellow climbers. Backgrounds won't get any better, light is often very good and more importantly, you can show them doing something that they really love. Plus few things say "hardcore tough guy" than frozen hair and this "tired but happy" look. Just remember to make them take their sunglasses off and shoot fast, as sunblindness isn't very fun.
- Don't underestimate simple shots of climbers life, such as the inside of a tent, camp, cooking food, putting shoes on, etc... This is a completely foreign universe to most people, and such documentary shots can be surprisingly strong.
5. Keep in Mind
Finally, a few (very) important things to keep in mind at all times:
- Mountains are dangerous. People get killed. You can die. Don't climb without the proper gear and instruction, and do not head in the mountains without really knowing what you are doing. I warmly recommend taking a mountaineering course before attempting anything. I can recommend schools depending on your geographic location.
- If you screw up your photography, you miss a shot. If you screw up your climbing, you and your partner get injured or die. Put your priorities where they belong. No summit and no photo is worth getting injured for.
- Once again: don't remove your gloves to take pictures. No shot is worth frostbite.
- In the mountains, speed is safety. If your photography is going to slow down the party, make sure that your partners are ok with it and that you are not putting everyone in danger by doing so. Always assess the situation before halting.
About the Author
Alexandre Buisse is a mix of mountain climber, landscape photographer, world traveller and computer science PhD student, in fluctuating proportions. When not climbing, he lives in Copenhagen, Denmark, a country whose highest mountain rises at an astounding altitude of 171m. Alexandre is also working on an instruction book on hiking and climbing photography, scheduled for publication next year.
You can contact him at ab@alexandrebuisse.org and see more of his work on his website.


Comments