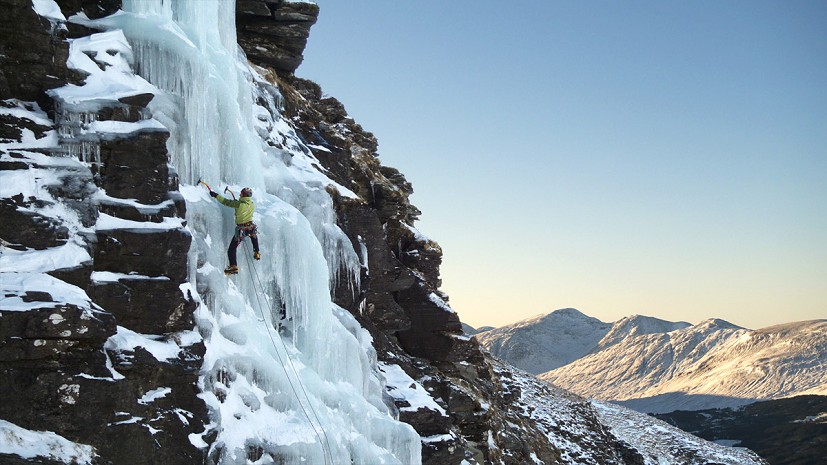
When climbers first climb steep ice they tend to ignore many of the principles of movement they have acquired in their rock climbing. Principles such as balance, precise footwork and weight transfer. Instead they tend to thump and whack at the ice with their crampons and axes, using brute strength to pull themselves up.
To a certain extent this crude approach will work – on short and not too steep ice climbs. As the climb becomes steeper or the ice more variable then this approach will cease to work as the climber finds their strength decreasing markedly. Good technique is the key to using your physical reserves efficiently – a key aspect of leading steep ice.
The Four Elements of Ice Climbing Technique
The core technique used for climbing steep ice is called front pointing. There are four main elements used in this core ice climbing movement technique. Combined together they allow the climber to move efficiently up their chosen ice climb.
- Placing crampons
- Placing tools
- Centre of Mass (body position)
- Weight Transfer
All the elements are combined together using Agility, Balance and Co-ordination or ABC* which are defined as:
- Agility: is the ability to change body position efficiently
- Balance: is the ability to control the body's position, while either stationary or moving
- Coordination: is the ability to integrate agility, balance, flexibility, ( + strength, power and endurance) so that effective movements are achieved.
*Based on the FUNdamentals Of Climbing
Newbie ice climbers find the use of ice tools and crampons off putting at first, mostly due to how difficult they find understanding the feedback that comes from the tools and crampons. A key part of ice climbing is learning to 'feel' what your ice tools and crampons are doing. By 'feel' I mean knowing when your tool placements are good, bad, or indifferent or when your crampon points are securely placed in the ice and how your Centre of Mass and Weight Transfer is affecting these tool and crampon placements. The good news is it does not take long to start developing a practical 'feel' for how your ice tools and crampons are behaving.
Core Ice Climbing Technique – The Triangle Position
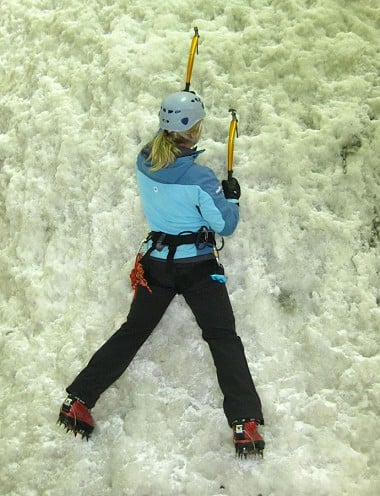
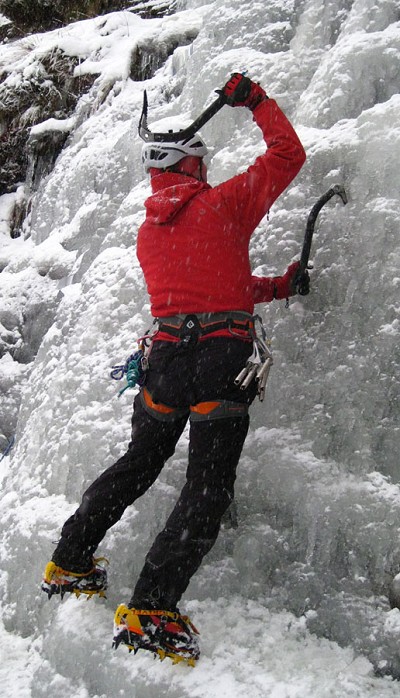
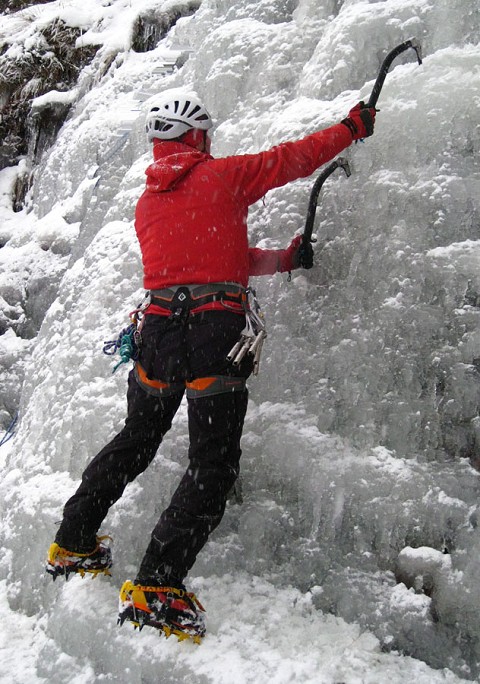
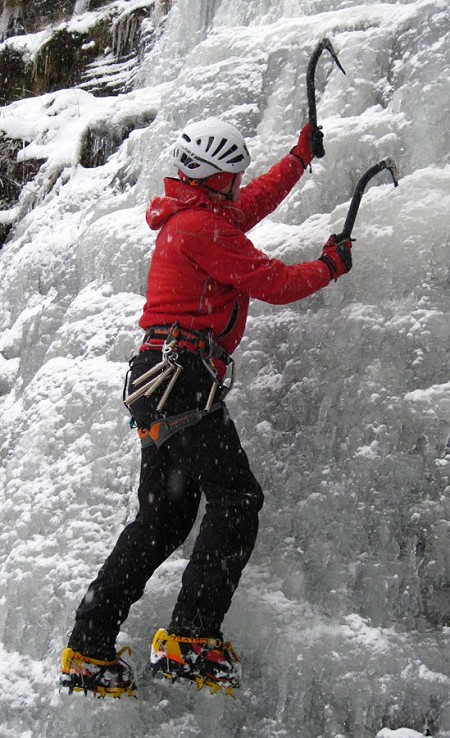
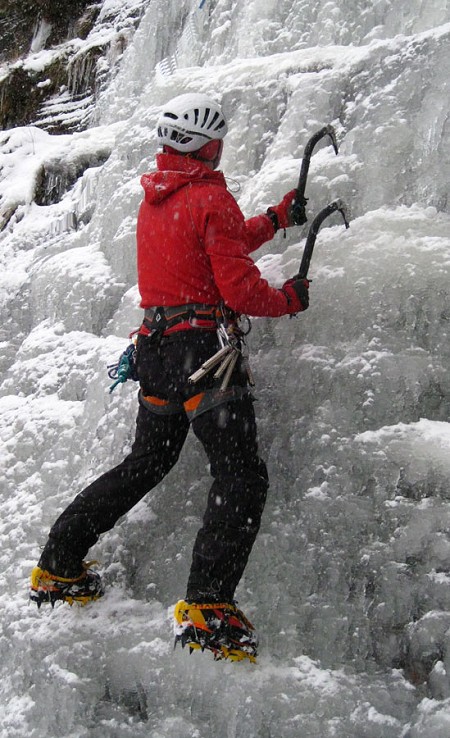
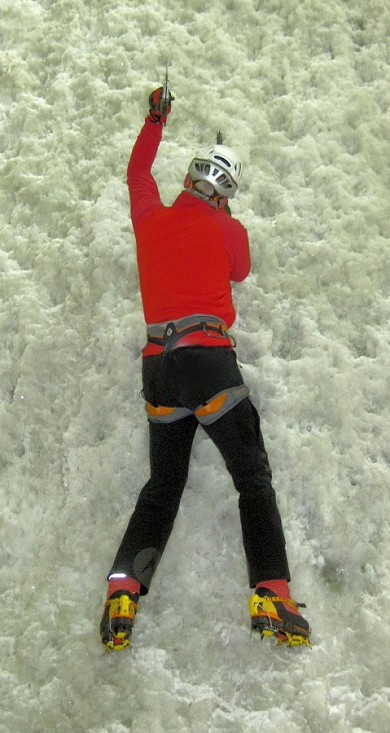
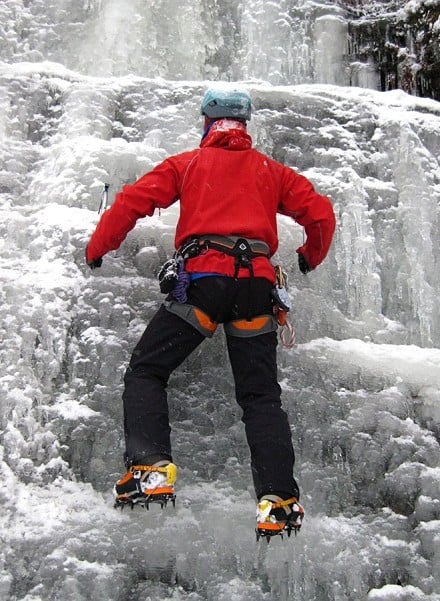
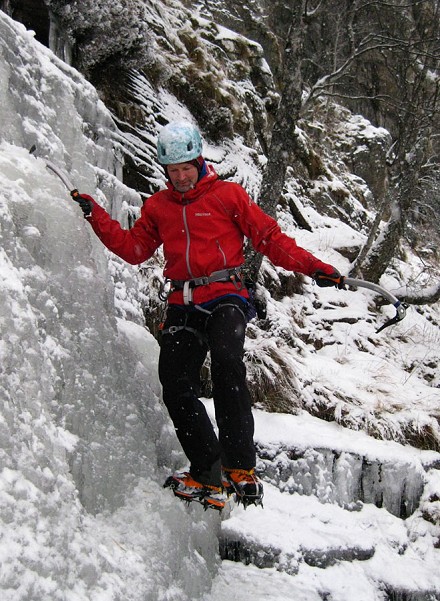
At the centre of efficient ice climbing technique is the Triangle Position (Fig 1 and 2 shown below). This is the start and finish of a simple movement sequence involving the climber placing their ice tools and crampons. The climber's centre of mass (CM) is the 'glue' that binds the crampons and ice tools together and it's essential that the climber's CM is at, or close to the centre of this triangle to avoid the climber 'barn dooring' on steeper ice. To begin I'll discuss the overall movement pattern then analyse each discrete section.
Ice Climbing General Movement Pattern:
- The climber's start point is feet apart – around shoulder width apart – knees slightly bent.
- The climber's hips are brought slightly forward (think clenched butt!) until they can feel their weight is evenly distributed on their feet.
- The climber's ice tools are placed above their head (in a target area roughly about beach ball sized and in line with the climber's belly button), each tool staggered i.e. off set on the vertical plane.
- To move up the climber hangs, straight armed, from the highest ice tool and brings their feet together underneath the highest tool.
- The climber then moves their feet up in a series of short steps until their shoulder is about level with the lowest tool.
- At this point the climber steps both feet out into a bridging position (shoulder width apart - at least) such that their 'belly button' (Centre of Mass) is in a vertical line with the highest ice tool and their weight is evenly distributed on both feet.
- The climber's hips are brought slightly forward (think clenched butt!) until they can feel their weight is evenly distributed on their feet and their knees are slightly bent.
- The lower tool is loosened out of it's placement and re-placed above the climber's head (in a target area roughly about beach ball sized) and the sequence is repeated.
I should stress that this is the core movement pattern. In practice you will find that this pattern has to be adapted to suit the ice conditions (brittle ice vs plastic), nature of the ice (featured vs uniform sheet) etc. But I would suggest you need to have the basic pattern sorted before you can adapt it for the many and varied conditions you are sure to encounter when climbing ice.
That proviso aside we'll look at the individual components in detail.
Placing Crampons
As in rock climbing, good footwork is the key to success in ice climbing. The more effective you are with your feet the more you will reduce the load on your arms thereby preserving the energy in your arms.
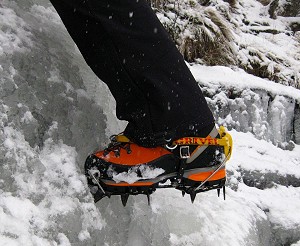
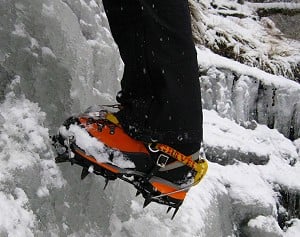
You can use your crampons in several different ways. You can kick the points into the ice such that they bite securely or you can place them on any edges, pockets etc in the ice. Similar to how you would place your rock shoes on rock edges.
When placing your points into the ice two principles are particularly worth considering:
Your body positioning (Centre of Mass) directly affects the load that is transmitted down through your legs and onto the front points.
LOOK at where you are placing your front points.
To illustrate the importance of your body positioning try this little exercise (with or without crampons. If using crampons it works well if you can place the points in the ice on a short steep step just of the ground. If need be use your axes to give you a couple of handholds).
Stand with your feet shoulder width apart and your eyes closed.
Now relax your hips such that your bum sort of, well, sags. Where do you feel your weight on your feet/rails of your crampons?
Again keep the same position (feet shoulder width apart) and this time slightly bend your knees (i.e. just relax your legs) and clench your butt cheeks as though you had a pound coin between them (this should pull your pelvis forward slightly). Where do you feel your weight on your feet/rails of your crampons?
What you should have felt in the first exercise with your bum err..sagging, is your weight towards the back of your feet/heels. In the second exercise where you tighten up your glutes and pull your hips forward whilst relaxing your knees, you should have felt the weight towards the ball of your feet/toes.
After placing your front points in the ice adopting that knees relaxed, butt cheeks clenched position, hips forward you will find that your body weight helps push the points into the ice and assists in keeping them located. Effectively what you are doing is 'balancing' your weight towards the front of your crampons. When moving upwards this weight transfer onto the front points of your crampons is crucial to effective footwork.
Looking down at your front points allows you to see where you are placing your front points and allows you to make best use of any surface irregularities. It also pushes your bum out allowing your legs to bend and lift without bashing the ice. Although this may seem a no-brainer it is surprising how many climbers tend not to look at their feet when placing their crampons, instead drag their feet up and blindly kick the front points in. Top tip - when placing your crampons make sure you eyeball them – and keep eyeballing them until you are happy with their placement.
When it comes to placing your crampons, bearing in mind the principals outlined above – body positioning and eyeballing your crampons - you have two main options. You can kick the crampon points into the ice or place them (much as you would do if placing your rock shoes when rock climbing) on any irregularities, edges or hollows on the ice.
Kicking your points in – this technique generally works best when there are very few features to use i.e. the ice is a uniform 'sheet'. To effectively kick your front points securely into the ice ensure that you first eyeball where they are going to go. Lift up your leg slightly, bend your knee whilst slightly raising your toes, then kick the points into place using a positive kick. What's a positive kick? You need to use enough power behind the kick to drive the points into the ice but not too much power you shatter the ice, and enough power that your points don't do much more than tickle the ice. When the front points have bitten into the ice positively weight the points. Repeat the process for the other leg.
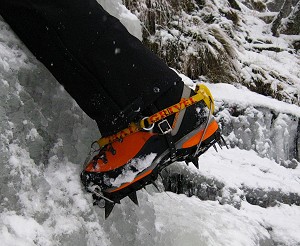
The key to avoiding the front points shearing as you weight the points whilst stepping up is keeping your heels level. Avoid the temptation to climb on your toes (rock climbers find this challenging to do as they tend to climb on tip toe on rock). If your front points keep shearing out try making a conscious effort to drop your heels more as you weight your crampon points. Dropping your heels slightly also helps the secondary points engage the ice more effectively creating a nice stable platform to weight. You do not need the points to be overdriven into the ice. You only need to have a small fraction of your front points placed into the ice and then balance your weight over the points using your centre of mass.
Placing your points – this works well if the ice is very featured. Here just think as though you were rock climbing. Again eyeball where you want to place your crampons before making any move. You are looking for any sort of feature that you can place your crampons on. You may have choices between using the front points on a small edge or pocket, or you may hook the secondary points over protruding feature (more technical crampons are specifically designed to allow this to happen and have secondary points that are V shaped allowing the gap between them to securely hook over such ice features.
Efficient footwork on ice does rely on you making effective use of either or both of these core techniques. Time spent practising using your crampons on ice (on a top rope) is time well spent honing your footwork.
Placing Ice Tools
On ice climbs your ice tools serve several functions. Their main one is to act as 'handles' allowing you to maintain your balance as you move your feet up. One of the mistakes climbers make with their tools is rather than moving their weight up by using their legs, they over grip their tools and pull their weight up. This only works for so long before your forearms burn and your shoulders feel like they are going to pop!
Another function your tools serve is as 'runners' when leading. If you are using leashes then you are effectively attached to your tools. With well fitted wrist loops and well placed tools you are effectively held in place – at least enough to guard against a crampon popping off. With the increasing popularity of climbing leashless i.e. not being attached to your tools, you are not as attached to your tools as you are with leashes (although many climbers may choose to attach their tools to themselves with umbilical cords so technically are 'attached' to their tools). That consideration aside it is still worth thinking of your tool placements as 'solid handholds' (think of the difference between pulling on solid rock handholds and rattly loose holds when rock climbing – which would you rather be pulling on?). So when placing tools we are looking at achieving the most efficient (in terms of effort and energy) and bomb proof placements. Making bomber placements or 'sticks' is key to maintaining both your mental and physical health when leading an ice climb.
Whether you climb leashless or leashed always remember to periodically shake out. Remember your arms if you hold them above your head for long enough will get tired – never mind when they are also involved in placing ice tools. So shake out!
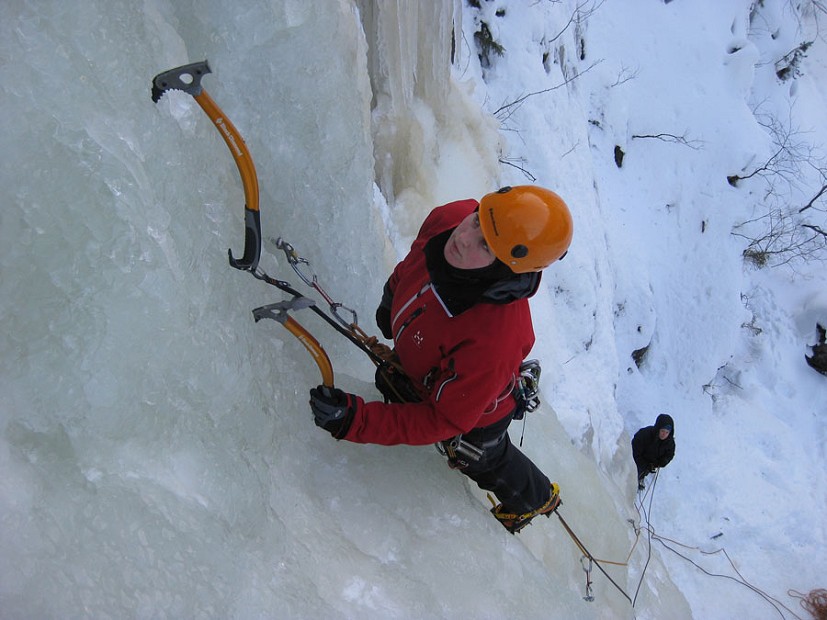
Top Tips for Placing Ice Tools
With most curved shafted balanced ice tools you will find that placing your tools does not involve a great deal of power. Instead the emphasis is on precise technique with minimum effort. Concentrating all your power into a combined precision swing and wrist flick - a very similar action to that used in throwing a dart. In fact too much power can lead you to overdriving the picks or causing the ice to smash. The following section breaks down the process of placing your tools to give a precision placement.
Ice tool grip – how you grip your axe is a key but often overlooked component of swinging your ice tools. You want a firm but relaxed grip with the thumb of your hand lined up on the shaft of the axe. This thumb placement allows you to more precisely direct the axe when you swing it.
Choose your spot – look to where you want to place the tool. To narrow down the target area reach up with the arm holding the tool. Ideally you are looking to place your tools in a beachball sized area above your head, or slightly offset, in relation to your centre of mass i.e. your belly button. Only reach up with the arm holding the tool until your arm is just slightly bent rather than fully straight (this will allow you enough reach to remove the tool if it turns out to not be a good placement). Additionally check out the ice. Look for any previous placements, concavities in the ice (where snow collects is a good indication) etc where your placements are less likely to shatter the ice. When climbing brittle cold ice this makes your life far easier and less stressful. Avoid placing your tools on the same horizontal plane and/or close to each other. Instead look to stagger your placements one above the other (in the beachball sized target and slightly offset).
X Marks the spot – After identifying the sweet spot to place your tools, mark the exact spot – the X - you want to place the pick by gently touching your pick against the ice. Keep your eyes focussed on this very spot as you bring the tool back ready to swing and place it into the ice.
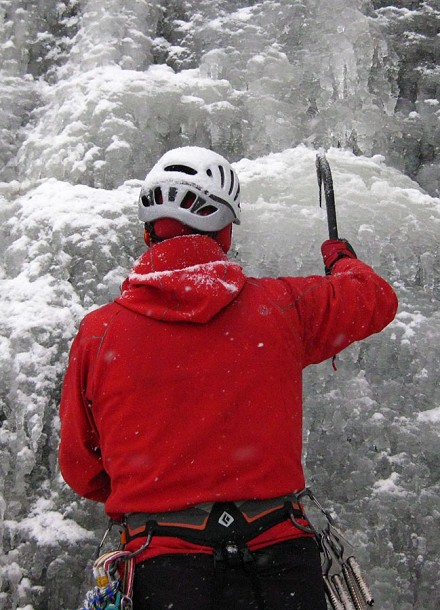
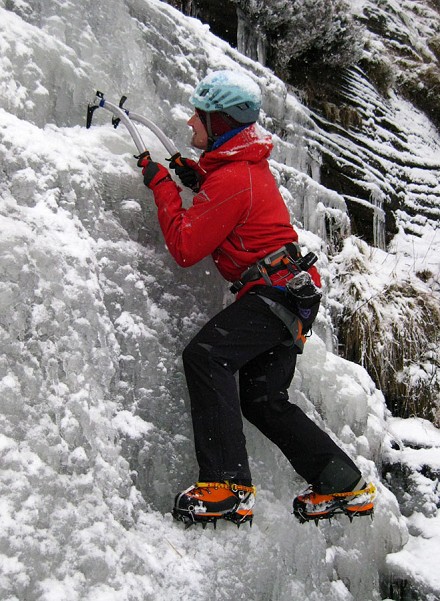
Swing and flick – keeping your eyes focussed on your target X bring your ice tool back. Keep looking at the X. Using the same motion as throwing a dart bring your hand forward and just as your arm straightens flick your wrist (make this last action 'snappy'). This flick of the wrist will bring the head of the tool forward at such an angle that the pick of your axe should make contact with the ice at the correct angle and increase your chances of a first time placement. A key element in developing a good swing is keeping your shoulder, elbow, wrist and ice tool in line – so initiate the swing from your shoulder. Slightly twisting your hip to face into the swinging arm will help maintain this line.
Assess the placement – as the axe makes contact with the ice you will get audio, visual and kinaesthetic feedback as to how good the placement is. With a perfect placement the sound of the pick going into the ice will be a satisfying 'thunk', you will see (and feel) the shaft of the axe vibrate (similar to the arrows in the Strongbow advert!) and you will feel this vibration gradually dampen down through the shaft of the axe. If the placement is not a good one remove the axe (by wiggling the pick up and down rather than sideways – you run the risk of breaking the pick otherwise) and repeat the above process. Sometimes placing the pick in the same spot after dislodging the rubbish surface ice from your previous placement achieves a bomber placement on the second or sometimes third blow. Use your common-sense here – if you are hitting rock or the ice is hollow then no amount of hitting your pick into the same spot is going to improve matters!
Test the placement – give the placement a test by semi-weighting it but at the same time be prepared that it might fail. Experienced ice climbers can assess most placements by 'feel' and have the confidence, based on experience of assessing many ice tool sticks, to trust the placement and commit to it straight off. If you are not sure or have yet to develop the confidence in assessing your placements then there is no harm in pull testing every placement – especially when you are leading. After testing you can now trust the placement.
Forget and move – when you are satisfied with the placement forget about it and concentrate on either the next placement or moving up on what are now bomber placements.
So when placing your tools remember this process:
Look; Place; Test; Trust; Move.
Centre of Mass (Body Positioning), Weight Transfer and Breathing
So far we have looked in detail at how to place your crampons and ice tools. Now we are looking at the 'glue' that binds these techniques together. Your body positioning - making use of your centre of mass - is key to allowing you to use the techniques for placing your axes and crampons effectively. Effective body positioning also allows you to efficiently transfer your weight from crampons to your tools and back again.
As you recall the basic 'Triangle Position' is the start and end of the sequence of moving up on steep uniform ice and allows the ice climber to maintain their balance. You start in the Triangle position, place your tools, straight arm from your highest placement, move your crampons up and then at the end of that movement readopt the triangle position. Key markers to using this position are:
Climber's feet apart – around shoulder width apart minimum – knees slightly bent.
The climber's hips are brought slightly forward (think clenched butt!) until they can feel their weight evenly distributed on their feet.
The climber's ice tools are placed above their head (in a target area roughly about beach ball sized) and slightly off set on both the vertical plane and horizontal plane.
Within this basic framework we can adapt our positioning to allow a more effective ice tool swing (especially useful on very steep i.e. near vertical to vertical terrain), avoid debris falling on us from placing our ice tools above ourselves and enable us to take advantage of features on the ice. Let's look at how this works in practice.
Allow a more effective ice tool swing
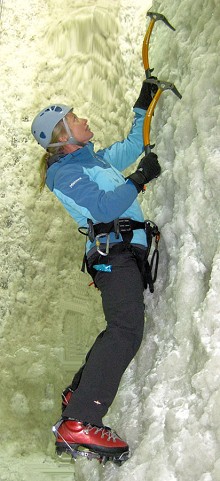
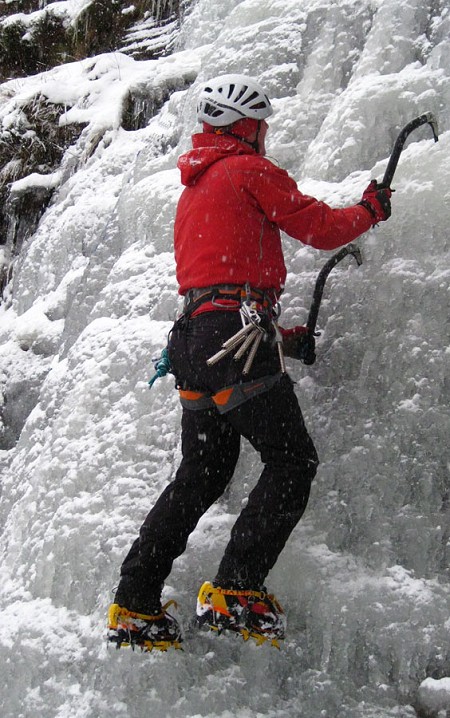
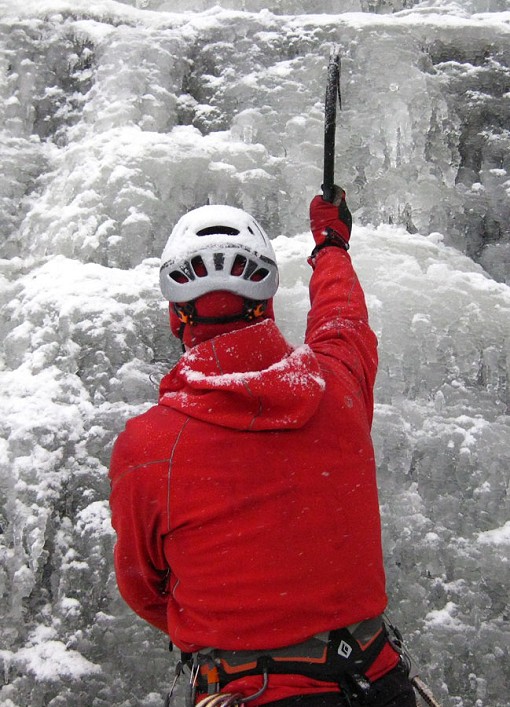
On steep ice you will find that tweaking your body position will allow a more effective swing. To do this slightly roll the opposite side hip to the lower ice tool e.g. assume your right hand ice tool is the lower tool - roll left side of your hip to face into the right hand tool. This will allow you to lock off on your lower ice tool more effectively and bring your upper shoulder into line with where you want to place your active ice tool. Rolling your hip to the same side as your lower (locked off) tool assists you in maintaining a straight line between your eye line (i.e. looking at your X), shoulder, arm and wrist, allowing you to put into action your killer ice tool placement technique as discussed earlier and as shown below in Fig 3 and Fig 4.
One point worth noting about using this variation on body positioning when climbing steep brittle ice is that any debris falling down as a result of placing your tools will fall onto you. Use your helmet to stop this debris rather than your face! On very brittle ice you can still roll your hips as described but place the tool above and more of to the side from your centre of mass. This reduces the risk of falling debris hitting you in the face. In saying that being cut or bruised from falling ice caused by placing your own tools is one of the unavoidable risks associated with climbing brittle water ice.
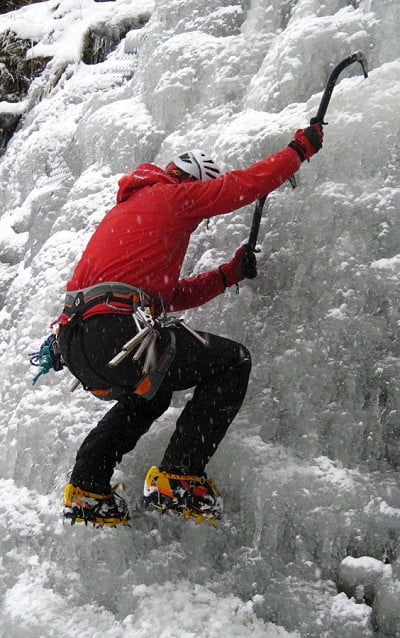
Allow effective crampon placement
Adopting the 'Triangle Position' with your feet at least shoulder width apart, butt cheeks 'clenched' and your knees slightly bent and relaxed will allow your body weight to push down and into the front points helping them to stay located in the ice, whilst allowing the secondary points to engage into the ice.
Weight Transfer
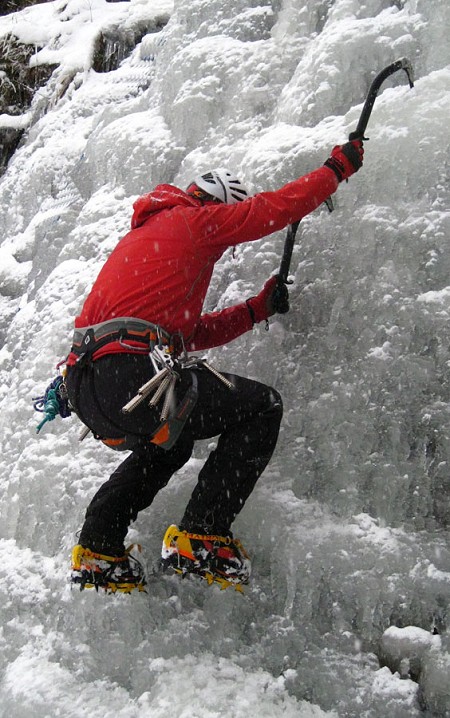
After placing your ice tools and crampons securely it's time to move up. To transfer your weight efficiently drop your hips such that you are hanging straight armed from your highest tool(s) and your body is in a crouch (see photo on right). Bring your feet together and eyeball your crampons, then walk your points up whilst eyeballing where you place them. At this point much of your weight will be taken by your arms holding onto your tools so be quick at moving your feet up to reduce the load on your arms. Focus on maintaining your weight on the front points of your crampons by dropping your heels slightly. When your shoulder is level with your lower tool re-adopt the basic 'Triangle Position'.
During this movement sequence you are moving your centre of mass – your belly button – into line with your upper ice tool. This should mean that at the end of the sequence you are back in balance. I think of the movement sequence as a 1, 2, 3. The first 1 and 2 is your crampons coming closer together and stepping up, whilst the 3 is readopting the bridging position at the end of the sequence. You can move up for longer but generally speaking this 1,2,3 sequence tends to mean you do not overstep and move out of balance.
On featureless good ice some ice climbers use a 'bunny hopping' action to bring their crampons up quickly, locating the front points with positive kicks and then quickly weighting them.
Keep Breathing
One common habit many climbers have when moving is holding their breath. For a variety of reasons this leads to tensing up. I'll discuss the implications of all this on both your physiology and psychology when we look at developing a mental skills toolbox for leading. As you transfer your weight i.e. when you start to move, take a deep breath in through your nose, using your diaphragm, and exhale through your mouth during the movement sequence.
At first this seems strange and awkward to do but it is worth developing this skill as it helps a great deal with staying relaxed whilst climbing.
See my earlier article about psychological techniques used in ice climbing: UKC ARTICLE.
BELOW: Technique Fault Finding - 6 Classic Mistakes
| Observed Fault: Chicken winging Description of Fault: Climber moves up to far on tools placed to far out to either side. Corrective Action: Body positioning and tool placements in relation to centre of mass. Check ice tools are placed in target area above centre of mass and check climber not moving up too far on placements. |
Observed Fault: Barn dooring Description of Fault: Tool placement and crampon placement fails causing climber to swing away from the ice like a door on it's hinges. Corrective Action: Body positioning and tool placements in relation to centre of mass. Emphasise bridging position at end of movement sequence. |
|
Observed Fault: Ice picks glancing or bouncing of the ice Description of Fault: When placing tools they tend to bounce or glance of the ice as though hitting concrete. Corrective Action: Poor ice tool swing – check technique for: Wrist flick at end of swing. Tool/wrist/elbow/shoulder in straight line when swinging ice tool. Body positioning when placing tool – hip roll. If wearing leashes check fitting of leash length. |
Observed Fault: Forearms quickly becoming pumped Description of Fault: Climber complains arms become pumped very quickly regardless of angle of the ice i.e. steepness. Corrective Action: Climber over-gripping on tools: focus on relaxing grip after placing tools. Shake-out often. If wearing leashes check fitting of leash around wrist. |
|
Observed Fault: Crampon points shearing out Description of Fault: Crampon points shear out as climber moves up or places tools. Corrective Action: Climber's heels too high. This can be caused by: Over-stretching to place ice tools. Legs very straight (climber will also complain of sore calves). Incorrect body positioning. |
Observed Fault: Crampon points not penetrating the ice Description of Fault: Crampon points appear to not penetrate the ice or bounce of the ice whilst being placed. Corrective Action: Climber's heels too high when kicking points in. Emphasise dropping heels slightly and swinging kick hinging on knee. |
George McEwan is based in Aviemore, Scotland and is a Senior Instructor at Glenmore Lodge (the National Outdoor Training Centre) and is the Technical Officer for the Association of Mountaineering Instructors (AMI).
George has been climbing and mountaineering for over twenty years. In that time he has put up numerous first ascents both in the UK, Europe and Nepal.
He has climbed mostly in the French Alps around Mount Blanc, both summer and winter. Also climbed in New Zealand Alps. Expedition to Langtang Valley, Nepal 1st ascent of the North Ridge North face Naya Kanga 1989. Second British Expedition to Tien Shan for attempt on South Face of Khan Tengri 1993. 1999 trip to Alaska to attempt Nettle - Quirk route on Mt Huntington, then West Ridge of Mt Hunter.
In the past few years his climbing has focussed primarily on waterfall ice climbing, with this passion taking him to Canada, Colorado, France, Italy, Austria and Switzerland.
His professional career has spanned seventeen years during which he has worked for Outward Bound, and for the past thirteen years with Scotland's premier National Outdoor Training Centre - Glenmore Lodge where he currently works as a Senior Instructor.
Although actively involved in all forms of climbing from bouldering through to ice climbing, George's primary passion is steep water ice.
- Essential Winter Skills: Ice Axe Self Arrest 5 Mar, 2015
- Ice Climbing Anchor Strength - Analysis 30 Jan, 2012
- Protecting Winter Belays - Safety Tips 16 Jan, 2012
- Ice Climbing - Physical and Mental Advice 19 Dec, 2011
- DESTINATION GUIDE: Colorado Ice 28 Feb, 2009
- Glenmore Lodge: 60 Years Involvement in Climbing and Mountaineer 9 Oct, 2008

