

Using Undercuts and Sidepulls
Undercuts and Side-pulls
Many climbers find that they're OK at pulling straight down, but for some reason when the holds are upside down or face sideways they always seem to struggle. It's no surprise that we're prone to getting flustered when confronted by undercuts, side-pulls or 'gastons' (side-pulls that face towards your body); most routes and boulder problems are set with the majority of the holds aligned horizontally, especially in the lower-grades.

To a large extent, you can approach these climbs instinctively, as if climbing a tree or a ladder. However, when the holds face in unusual directions it becomes more challenging to know how to position your body and which footholds to select in order to avoid losing balance and making things feel desperately strenuous. Furthermore, the majority of supportive strength training exercises for climbing involve downward pulling (pull-up bars, fingerboard, campus boards etc). Whilst technique is always the primary concern, there's no doubt that some specific supportive training will also play a crucial role in helping you to make better use of undercuts and side-pulls.
Undercuts occur in abundance at limestone crags such as Malham Cove in the UK or at an endless list of European tufa-infested crags. The best way to learn to use these holds is to pack yourself off to one of these crags for a baptism of fire!


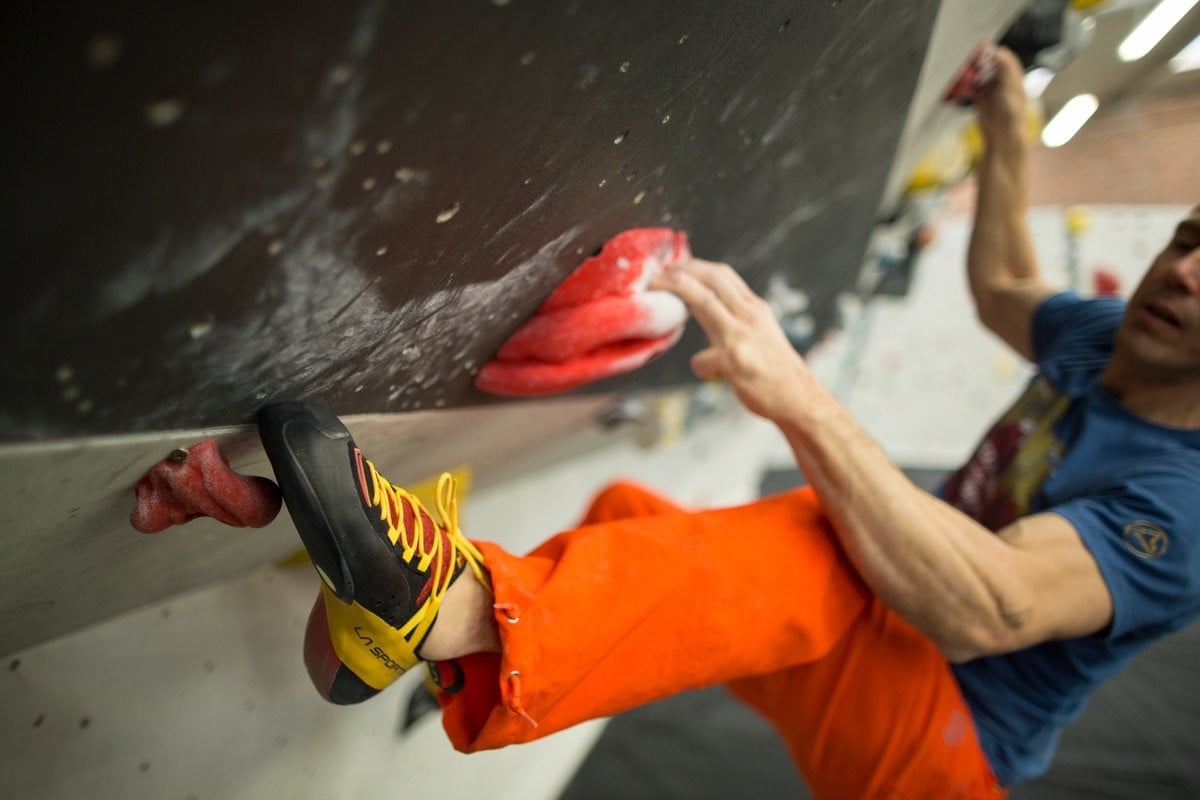
Undercuts and side-pulls may present themselves as small, positive edges or large rounded slopers or pinches.
If you're new to this series, you may find it useful to flick back through the previous three articles, which examine the different types of hold and the various gripping methods. There's simply no point analysing the nuances of body positioning for undercuts or side-pulls if you're not holding the holds correctly.
i) Undercuts

Undercuts always feel poor when they are high above your head, so the key is to build your feet up first before reaching to the hold and then to reel it in close to your torso as soon as possible.

At all costs, avoid going 'square on', with parallel hips as this will require tonnes of bicep strength and you will also feel perilously out of balance when making the next reach. Here, I'm out of position and tempting fate during the first ascent of Pollinator 8a S2 in Pembroke.

Always try to turn sideways and stand on your outside edge. If holding the undercut with your right hand then turn your left hip in and use the outside edge of your left foot. Flag the other leg out for balance and either smear or use a small foothold if there's one in the right place where your foot naturally falls.
When climbing on rock there tends to be lots of tiny footholds, so try to make small steps between a series of 'dots' rather than attempting a high-step between the largest footholds, as this may leave you stranded and unable to move. Make quick decisions and place your feet with great accuracy.

In most cases, stiff, high-tension shoes will provide the best option as the forces through your feet are never greater than when using undercuts.
A small intermediate handhold may help to 'break' the reach and make it feel less powerful (ie: go to the intermediate hold first then 'bump' to the undercut). Then once you've got the undercut, try pinching the top of it to improve traction.

Tense your core and keep your wrists as stiff as possible so as to reduce the chance of injury. Strains are common on undercuts and may be caused by unwanted rotational forces in the arms and upper body. You will also be able to apply more strength if your posture is stable. When linking multiple undercuts together you can repeat this movement sequence by stepping through, working your feet over to one side, reaching for the next undercut and then stepping back through and so on. If an undercut is far out to the side then the same rules apply – try to work your feet over towards it and then step through and turn in so it ends up close to your body.

The undercut moves on Hubble 9a are amongst the most powerful on any route in the UK. Here Adam Ondra narrowly misses the redpoint in less than favourable conditions.
Supportive training for undercuts
The key to progressing on undercuts is to have strong biceps across the middle and lower range (ie: from arm bent at 90 degree to arm virtually straight) and also strong anterior deltoids (front shoulders) to assist with reaching for high undercuts with a straight arm. See exercise list and training protocol at the end of this article.
ii) Side-pulls

The optimum movement sequence for side-pulls is similar to the one described for undercuts and the aim is usually to step through, use your outside edge and flag.
The ideal position for the target foothold will usually be directly below the side-pull at approximately knee height. So if you're holding a side-pull with your left hand, then step through and place the outside edge of your right foot below it. You can then layback in order to gain maximum height and make the next reach in balance. Make sure you spread your feet fairly wide for balance and stability, as it's still possible to 'barn-door' even when twisting in and using the outside edge.
Avoid going 'front on' and risking the dreaded 'barn-door' (hips swinging outwards from the wall).
When reaching up to a high side-pull directly above your head, your wrist will be bent at an angle, meaning that you will feel weak on the hold and may be tempted to give up; but if you have faith, steer into the move and lean away, your wrist will become straighter meaning that you will be able to express maximum strength.

When using a side-pull, an alternative to turning sideways and using your outside edge is to stay front-on and use a 'compression heel-hook' on an opposing side-pull. If you're using a left-hand side-pull then place your right heel around a large flat sideways-facing feature and squeeze with your hamstring to stop the barn-door.

Clearly this requires the appropriate feature to be in the right place! Sport climbers often tend to miss this option, whereas it will be second nature for hardened boulderers. We covered compression heel-hooks earlier in the series and there's no doubt that it's crucial to have them on the radar when using side-pulls.
When using pairs of opposing side-pulls, if they are close together then try to lean slightly to one side or the other rather than 'crushing' them from a central position. If the side-pulls are wide then you often need to move very dynamically between them, so get ready to push hard with your feet, bounce with your hips and catch the hold on the 'deadpoint' (the split-second weightless moment that occurs at the end point of a dynamic move).
Supportive training for side-pulls
The main supportive exercises will work the lats, rhomboids and muscles of the upper back as well as the upper pectorals. See exercise list and training protocol at the end of this article.
iii) 'Gastons' (a.k.a: 'reverse side-pulls' & 'back-hands')

It's surprising how many strong climbers consider gastons to be a major weakness, especially those with a lighter build. There is no substitute for regular practice.


The key is not to leave your feet down too low and instead, pick a relatively high foothold to rock-over onto. If you're using a left-hand gaston then rock onto your right foot.
If possible, use an intermediate handhold with the arm you're reaching up with, as this will help to alleviate the strain on the shoulder on the 'gaston arm', especially if you use this to generate a bit of momentum. If you get the body position right there should be symmetry between the gaston arm and the opposing leg that's rocking over. If the next hold is a long way off then an additional press from the arm may be required and this will always place massive demands on tricep strength.

When route reading, step to the side to see the in-cut sections of side-pulls and gastons or move in to the base and look upwards to see the best part of undercuts.
If a climb features undercuts and side-pulls, it really helps to visualise how you're going to move your body in relation to the holds before you set out. Here Adam Ondra runs his beta for Rainman 9b past Steve McClure on the Catwalk at Malham.

Supportive training for gastons
Supportive exercises for developing gaston strength should work the deltoids and triceps. See below.
Strength training undercuts and side-pulls
The main focus of this article series is technique, so following is a brief overview of supportive training for undercuts and side-pulls. You can cherry-pick some of the most relevant exercises and compile your own routines to perform at the wall, at home or in the multi-gym. Note that if you work your fingers hard during a climbing session then you may still be able to train your arms effectively straight afterwards or the following day. Some will prefer to do a 'split routine' and separate antagonist exercises (which use the 'pushing muscles': chest, shoulders and triceps) from the protagonist exercises (which use the 'pulling muscles': back, lats and biceps), whereas others may choose to mix them in a combined routine. You will need to emphasise both dynamic and isometric (static) strength. If you are new to this type of training then start off by building a 'base' by doing 3 sets of 15 – 20 reps, then over time (eg 4 – 6 months), work towards doing sets of 10 reps and finally switch up to doing 'strength sets' of 2 and 6 reps, (or 2 – 6 seconds for static exercises).
Exercises
The following list provides a snapshot of the huge number of supportive exercises that can be used to build supportive strength for undercuts, side-pulls and gastons. If you don't know how to perform them it's fairly easy to find more info online correctly or alternatively, hang in there until we change focus to training in this ongoing article series here at UKClimbing.com.
i) Bar/dumbbell exercises
Dumbbell curls - undercuts
Barbel curls - undercuts
Shoulder/military press - gastons
Dumbbell front raises – gastons
Dumbbell side raises – gastons
ii) Pull-up bar exercises
Reverse grip pull-ups - undercuts
Reverse-grip lock-offs – under-cuts

iii) TRX/suspension exercises


iv) Floor exercises
Wide-grip press-up – wide side-pulls, gastons
Narrow grip press-up – gastons


v) Climbing-specific exercises:
Try hard problems on a system board, which allows you to emphasise one type of hold orientation repeatedly. More to follow on this type of training later in the series.
System-undercut problems
System side-pull problems
System gaston problems