


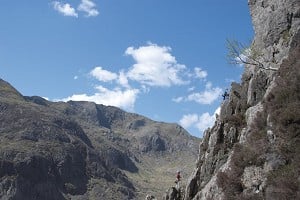
Safely, quickly and efficiently completing multiple abseils to descend from a multi-pitch route is an important skill. The following pointers cover some of the things that you should think about when abseiling. Practise the techniques needed to safely complete multiple abseils in a low stress environment before heading into the big mountains. The North Face of the Grand Jorasses in a storm is not the place to put these tips into practice for the first time.

© Jon Garside, Jul 2013
If any of the following is new to you or doesn't make sense, seek advice from a suitably qualified instructor or experienced friend.
The abseil set-up
When making multiple abseils it makes sense to extend your belay device away from the harness with a sling, creating a cowstail for clipping in to each anchor.
- Larks foot a sling into your harness' belay loop.
- Tie an overhand knot half way along the sling.
- Clip the belay device into the sling loop nearest to your harness. Attach this to the rope.
- Add a screwgate carabiner and prusik loop to the belay loop on your harness, and use this to make a French prusik on the rope.
- Use a screwgate carabiner at the end of the sling to clip into belay stations, and into the pulling rope when abseiling.

© Will Harris
Note that one end of the prusik loop is larks footed onto the screwgate carabiner, so that it cannot be dropped when removing the prusik from the rope:

© Will Harris
This video demonstrates how to set up the above system and attach to both ropes whilst abseiling.
In the UK we would call the backup knot in the video a French prusik, instead of a third hand. The other difference from the setup shown in the video and the one in the description and photo above is that the sling is threaded through the belay loop instead of both tie-in points; both are valid techniques but I think that attaching to the belay loop makes for a cleaner, less clustered harness. Similarly, instead of clipping the end of the sling back into the belay loop, I recommend clipping it to the pull rope.
Threading the ropes for retrievable abseils
When abseiling on two ropes, the first rope is threaded through the anchors, and a suitable knot is tied to attach the two ropes in use together. The rope which is not threaded through the anchor is pulled from below to retrieve both ropes.
 © Will Harris
This video demonstrates how to tie two ropes together at the abseil anchors:
In this UKC article, Jack Geldard discusses the different knots that can be used to tie two ropes together when abseiling.
Tying knots on the end of the ropes
Tie stopper knots in the end of your ropes before you throw them down the crag, as shown in the video above. This prevents the risk of abseiling off the ends of your ropes; an easily avoidable accident which has caused countless deaths and injuries.
Assessing the anchor
When abseiling off multi-pitch sport routes, you will find equalised bolted anchors at each station, however alpinists are more likely to encounter a mass of old tat connecting various dubious pieces of gear. It is essential that the anchor you abseil off is absolutely bombproof, as if it fails it may kill both you and your partner. Check the anchor carefully and back up or replace when necessary.
The inspection test
Have a good look at the gear you are about to trust your life to, assessing the following:
- Check that the sling, rope or tat making up the abseil point is in good condition, and hasn't been damaged by either rockfall, friction from previous ropes being pulled through, or exposure to the elements.
- Make sure that all of the pieces of gear making up the station are equalised to the central point you are going to abseil from.
- Check the individual pieces of gear that make up the station. Look for corrosion of anchors, and check that the rock that they are in is not loose.

© Will Harris
The bounce test
Before both you and your partner commit to hang from a station, bounce test it to make sure it can hold your weight. If you are about to make your first abseil and decide to bounce test the anchor it is essential that you ensure that if the in-situ anchor fails you are safeguarded by other pieces of gear. The bounce test:
- As the first person abseils down to level with the station, they clip into its central point with a quickdraw.
- Letting a few centimetres of slack through the belay device and prussic loop, hang your weight onto the anchor.
- Keeping your hands on the dead rope to lock off your belay plate, bounce up and down on the anchor. If the anchor fails now you will come tight on your abseil device and prusik.
 © Will Harris
Backing up an in situ anchor or building a new anchor
If an in situ abseil anchor does not look one hundred percent safe, then back it up by adding extra 5mm cord to equalise pieces of gear. If the pieces of gear themselves looks to be in poor shape, then add extra pieces of your own and equalise them to the central point with cord. In the photo below an extra wire with a separate piece of cord has been added to strengthen the in situ anchor.

© Will Harris
If the anchor that you find in place is in poor condition, or there is no anchor, then you will need to build your own. To do this use a sling or cord to equalise at least two good pieces of gear together to a central point.
This video demonstrates how to correctly equalise two pieces of gear to make a belay suitable for abseiling off:
If in doubt always leave behind extra cord or gear. Your life is worth more than a replacement wire.
Clipping in to each anchor
The abseil set-up shown above is ideal for allowing each climber to quickly and easily attach to each abseil station, as they can simply clip directly into the central point with their cows-tail. It is important that all climbers clip into the equalised central point at each abseil station, as shown below:
It is important that each climber is attached snugly to each belay by their sling, and is well below the anchor. If there is slack in the sling or the climber is not directly below the anchor and they slip this can generate huge forces, sufficient to cause serious injury or break equipment.
To shorten the sling attaching you to the abseil station make a bight in the sling and tie an overhand knot into it.

© Will Harris
Transitioning from one abseil to the next
To complete a long series of abseils in reasonable time all members of the team must work together to efficiently pull down the ropes from the last abseil and re-thread the new station. By using the routine below both climbers are working at the same time to make a fast, smooth changeover:
- After the first climber has reached the next station, checked that it is safe and clipped securely into it they remove their belay device and prusik loop from the rope, holding on to the released ropes.
- Shout up rope free to the next climber to let them know that they can begin abseiling.
- Thread the end of the pulling rope through the new anchor ready for the next abseil.
- Collect up other rope to make sure that it is not tangled and won't get caught as it is pulled up towards the previous anchor. If there is a knot in the end then clip this into the belay ready to be untied before being pulled through the previous anchor.
- After the final climber is safely attached to the anchor they remove their belay device and prusik loop. Now they start to pull down the pulling rope, and whilst they do this the first climber feeds the rope through the anchor.
- Once the knot reaches the new anchor, the first climber stops feeding and attaches themselves to both strands of rope, ready to set off.
- The second climber continues to pull down the second rope, until they have both ropes to be thrown down. Once these are released the first climber makes their final check and starts abseiling.
Making alpine abseiling safer
Imagine a situation where you have been climbing with a small rack of gear on a large alpine face, and are forced to retreat. You would have to use quite a lot of ingenuity to build lots of abseil anchors with a fairly small amount of gear, which could potentially shave margins of error as less pieces of gear can be left at each anchor. Remember that you can cut pieces off the end of your ropes to use to build anchors. There are a couple of techniques that can be used to make this process a little safer:
Safeguarding the rope for the first person down
This technique should not be used to justify being cheap and trying to leave behind less gear at a station. If in doubt, leave the extra wire. This should purely be used to safeguard anchors when limited amounts of gear mean that you cannot leave lots of pieces at each anchor.
- Build an abseil anchor as usual,
- Place an additional bomber piece of gear. Attach this piece of gear to the abseil rope, but with some slack between it and the rope. The additional piece of gear must not be taking any of the weight of the ropes.
- The last climber has seen the abseil anchors hold the weight of the previous climber(s) as they abseiled, so can now remove the back-up before descending.
- If there is any doubt about the anchors, the last person should equalise the backup to the anchor, rather than removing it.

© Will Harris
Attaching the ends of the rope to the new anchor to protect the last person down
In the alpine climbing scenario above, the first person down should attach the ends of the ropes to the new abseil anchors. This way, should the anchors fail for the last person down they will at least be prevented from falling all the way from the mountain. See chapter 10 of Beyond the Mountain by Steve House for a real-life example of how this technique saved the life of Barry Blanchard, when the anchor he was abseiling on failed.
Abseiling top tips:
- Before setting off on an abseil always make a final check to make sure that you are correctly attached to the rope.
- Double check that you have threaded both ropes through the abseil device, not the short tails coming from the knot.

© Will Harris
- Never abseil past ropes that have been caught up on spikes or ledges after you threw them down. If they get stuck above you it can be difficult to retrieve them.
- Similarly, if thrown ropes end up hanging off to one side of where you plan to abseil, then stop to pull them up before dropping them across into the correct line.
- Always carry a knife and spare cord for backing up stations if you know that you will be abseiling off a route. If alpine or winter climbing carry a threader for making abalakovs.
- Wear your chalk bag on a loop of 5mm or 6mm cord, so this can be used to set up an abseil anchor if unexpectedly abseiling from a route.
- If you know that you will be abseiling back down a route then pay attention to the location and quality of abseil stations on the way up; these might not always be where you belayed whilst climbing.
- Don't abseil past a good anchor 40m down your ropes in the hope that you can stretch down to a lower anchor. Making two shorter abseils will be quicker than solving the problem of hanging at the end of your ropes with no anchor in sight.
- If you are planning on abseiling down a different route or face then try to carry a photo, topo or description of where you are going to make route finding in descent easier.
- Be vigilant when pulling down the ropes in case loose rocks are dislodged from above. Get into a sheltered position when pulling the ropes in loose terrain.
- On very loose terrain consider putting away one of the ropes and making a series of shorter, slightly diagonally angled abseils to reduce the chances of being hit by falling rock.
Look out for Will's next article: Problem Solving when Abseiling.
About the author:
Will is a climber and skier based in Chamonix, France. He enjoys everything from bouldering to expedition alpine climbing, and recently began the lengthy process of training to become a British Mountain Guide. He posts on UKClimbing as Will_he_fall.
UKC Articles and Gear Reviews by Will_Thomas_Harris
- My Move to the Mountains: Life in Chamonix 25 Sep, 2023
- SKILLS: Problem Solving when Abseiling 15 Dec, 2016
- DESTINATION GUIDE: Canadian Rockies: Ice & Mixed climbing 3 Nov, 2016


Comments