
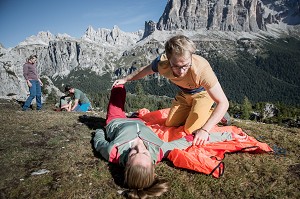
In the second part of the safety academy Ortovox show you how to safely build belays and use bolted anchors whilst climbing. You can read part 1, which teaches about Alpine First Aid, here.
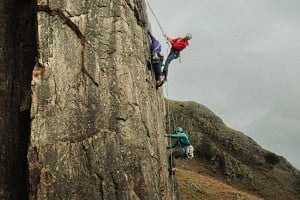
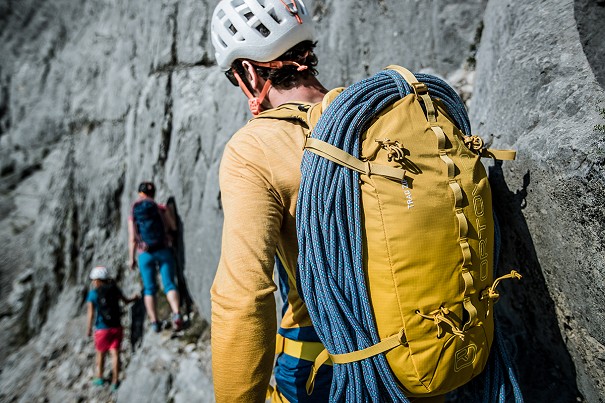
Alpine climbing is the ultimate discipline in climbing, as the huge rock faces really take it to the next level. Navigating high rock faces across several pitches involves dangers that can have disastrous consequences. On the mountains the leading cause of accidents is human error. Self-reflection, caution and thorough training can minimize these dangers. Besides your personal ability and the conditions, you will need a fair amount of high-quality equipment and the knowledge how to use it.

© Hansi Heckmair
Besides the subjective dangers, which are caused by humans, objective dangers such as weather, falling rocks, avalanches and falling ice can occur anywhere during an alpine climb.
With our SAFETY ACADEMY LAB ROCK we want to start right here and prepare mountain enthusiasts for their activities in the mountains. The LAB ROCK consists of videos, interactive quizzes and comprehensively prepared expert knowledge. It serves both beginners and advanced users to acquire and deepen their knowledge.
The LAB ROCK is divided into four chapters. In our first article we dealt with the fourth chapter on alpine first aid. (https://www.ukclimbing.com/news/press/ortovox_safety_academy_alpine_first_aid-12180)
This article is intended to provide an insight into three important components of alpine climbing:
I. How to rappel correctly?
II. How to build a belay station?
III. What kind of anchors are there, how to install and how to remove them?
I. Rappelling
An alpine climbing tour does not end when one has reached the summit, but only when one has safely returned to the starting point. Therefore, one should know how to abseil safely. One should keep in mind that one third of all fatal climbing accidents occur when abseiling due to inattentiveness. It is therefore important to use a short prusik as a self-belay when rappelling. Checking your partner and careful preparation are also key aspects of rappelling. In the video, we introduce the rappelling variant with tube.
In the LAB ROCK we introduce eight steps for safe rappelling.
1. HOOKING IN SELF-BELAY
2. THREADING ROPE AND CONNECTING WITH OFFSET WATER KNOT
3. SECURING AND CASTING THE ENDS OF THE ROPES
4. TYING A PRUSIK AND HOOKING IT INTO A HARNESS
5. INSERTING RAPPELLING DEVICE / TUBER
6. PULL ON THE BELAY DEVICE
7. DESCEND WITH LEGS HIP WIDTH APART
8. REACHING THE NEXT ABSEIL POINT
For in-depth information to the eight points visit the ORTOVOX LAB ROCK.
II. Belay Station

© Hansi Heckmair
The anchor is the "safe haven" for a rope team. It should hold during any potential fall – whether it's the lead climber or the follower. It therefore plays a central role in alpine climbing.
At first glance, anchor building appears quite complex: the climber must use different systems depending upon the quality of the anchor and the belay method. The climber typically chooses between either a series connection or a distribution of load. In other regions, different anchors such as the South Tyrolean method are widespread. The reasons for these different systems are the various circumstances, such as the number and quality of anchors, the pulling direction, the position in relation to each other as well as the belay methods.
Irrespective of the system that is used, every anchor has a central point where the personal anchor and the partner's belay meet. It is important that this is properly and clearly arranged so that the climber can work quickly and effectively.
The videos of the SAFETY ACADEMY LAB ROCK give a first insight in how to build anchors safely, quickly and clearly.
1. Find out how to set up a belay station with load distribution on two unsecure anchors such as normal pitons, nuts, or friends.
2. Belaying on several removable anchors: Load distribution
3. Guide to belaying: Series connection with 2 bolts
III. Anchors
Unlike in sport climbing regions, on alpine routes there are normally no solid bolts at regular intervals. Particularly on easier alpine climbs, the distances between bolts are big, there are no bolts at all, or are of questionable quality. Additionally, in certain routes there may be a conscious decision made not to use bolts in order to maintain the classic, alpine character of the climb.
In such routes the climber must protect themselves independently – or additional anchors must be placed to complement questionable pitons. This applies to protection points just as much as to proper anchors. The attaching and evaluation of available anchors are therefore extremely important in alpine climbs.
A good alpine climber is able to quickly recognize possible anchors and has mastered the use of traditional climbing equipment.
ORTOVOX's LAB ROCK presents various methods for securing yourself in alpine terrain. These are the most important videos:
1. When alpine climbing, bolts make for reliable anchors if correctly placed in solid rock. Find out how to identify secure bolts.
2. Friends & camalots are camming devices that can function as anchors for belaying. Find out how to place friends and cams safely for alpine climbing in the video.
3. Nuts are removable securing devices that act as an anchor for alpine climbing. Find out how to position and remove nuts safely in the video.
4. When alpine climbing, natural anchors are used as protection points or for belaying. Find out what you need to know in the video:


Comments
The video showing "Belaying on several removable anchors: Load distribution" (3rd video) has an interesting method of bringing together the sling to the master-point (larks foot but with about 6 strands). looks like it could be useful in some scenarios. I might have a play with it in a safe place and see what its like, try out some modes of failure etc
has anyone here ever used this method? any obvious limitations/benefits?
Is there not a possibility that it one piece to fail the girth hitch could slip and cause the whole system to fail. I use a similar method but with an overhand knot to prevent this from happening.
I was wondering exactly the same thing - the girth hitch looks extremely elegant and fast and was immediately appealing, but if for example a stand was cut would it not just pull through the girth hitch, making everything unravel? An overhand knot isn't much more tricky to tie, and is more robust against failure in my mind. BUT, requires a great big knot, which has been playing on my mind recently (having found the DMM videos) when tied in Dyneema.
I'm more and more inclined to carry a long 7 mm cordelette for such uses these days, rather than knotting long slings, especially when cams are in the belay.
This was my first thought, along with what happens if a single piece fails. with an overhand all should be fine but a girth hitch...well I'll have a play with it one evening and see what happens.
I can see the advantages of it but it certainly isn't anything I've ever seen before so I have a gut feeling that there is a reason its not a commonly documented method of anchor building.
I echo the concerns of the others who have posted. This seems very unconventional from both UK and North American norms. The terminology does not translate well. I do not understand why cord is being passed directly through the eye of a piton which is not cord or tape compatible. pitons tend to be in situ fixed gear and not assessable for strength and security unless placed oneself. The large larks foot on crab approach as well as being potentially extendable can capsize over the gate and produce a pinch opening pressure on the krab. The 2 point anchors shown have a very high inner anchor angle which greatly increases the load on each point. (look up wikipedia on anchors for basic physics-120° max!) If one reads definitive texts such as John Longs book on anchors or similar UK texts (Rockfax Trad) the techniques shown are not seen. If one watches the excellent and free BMC, Glenmore Lodge, American Alpine Club and SIET You Tube videos no such language or techniques are used. This is not what is taught nor done usually and I dont see how it is quicker. If the aim here is to initiate the inexperienced then it is highly unconventional, loses meaning in translation and a few established standard simple techniques are better for introductory skill teaching.