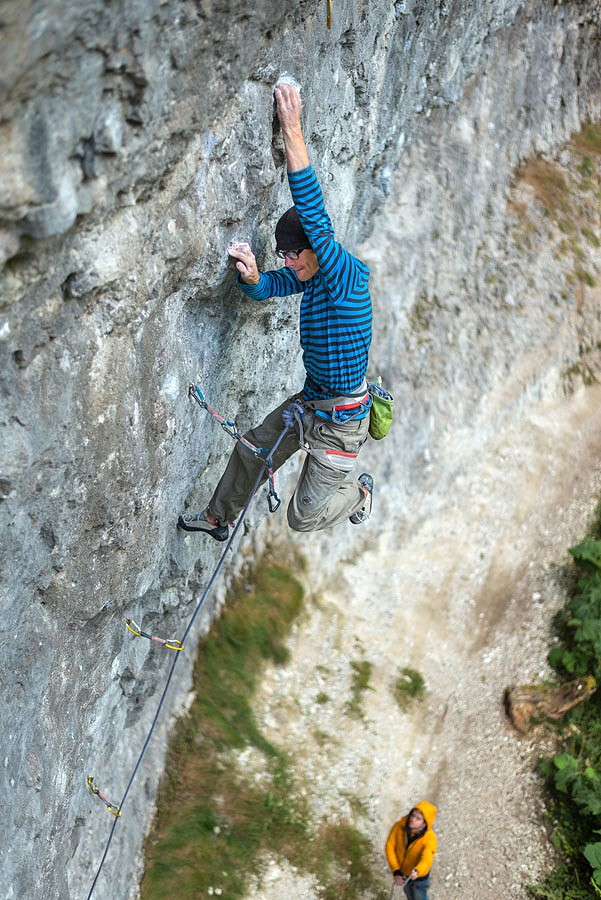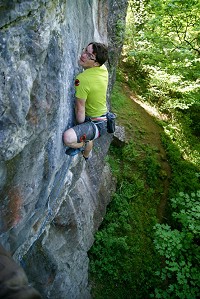
The red-point. All of a sudden you find yourself at that daunting yet exciting stage of your sport project. All of the sessions and time you may have put into working out all the individual, intricate sequences has brought you to this point. You know by now that you can do all the moves, you’ve meticulously memorised every clipping position, you’ve maybe (and hopefully) even done some big links and all that is left to do is climb from the bottom to the top, connecting all the dots in one solid, perfectly rehearsed, piece of fluid climbing.
Sounds simple? In theory it should be, however the red point is renown for being far from it. It can affect even the strongest climbers among us. No matter what grade you climb at, whether it be 4a+ or 9a+, everyone ends up in the exact same position eventually. Every climber can relate to that red point struggle in some form. It is a crazy and sometimes bizarre phenomenon.
The difference between success and failure no longer boils down to something physical but a mental war that intensifies and escalates with each failed attempt.
Of course some people are better at dealing with it than others. Some people perform better under the pressure and stress and use it as a tool in its own right to fire them up the wall. Others go from being super confident to a gibbering nervous wreck the minute they realise that “its on”.
“If you don't let go, you can't fall off!” - Jerry Moffatt
It is a true fact that most of us enjoy the actual process of red pointing a route more, rather than the eventual success. We’ll quite often remember the journey and hardships it took to achieve that success rather than the actual moment we clip the belay.
Here are a few pointers and techniques, a few of which may seem simple and obvious to some, but should hopefully serve to give you that extra edge and make the difference when it really matters.
THE MOVES
1. Refining your sequences to the most efficient method for you. Gather as much knowledge and beta for the route as possible and try every method before choosing the method that works for you. However, never be afraid to change sequence if you keep on suffering repeated failure.
Watch others on the route, one slight change in how you grab a hold, or twist your body, may make all the difference when it really matters.
2. Perfectly memorise the moves so that you do not forget any hand or foot placements mid-red-point. I have seen people draw detailed sketches and maps of their project on the back of cereal boxes before. Write sequences down bolt by bolt, this will aid the process of memorising.
Maybe have somebody video your attempts so you can see for yourself what did and maybe didn’t go right.
Also make sure your belayer is absolutely clear on clipping positions and if you plan on skipping any bolts, so they can quickly pay out the adequate amount of slack for you.
3. Put a strategy together by breaking the route down into small chunks. Easy manageable sections will make the task seem far less daunting and provide an easy way to measure progress and keep motivation levels up.
4. Do you know where the most effective resting positions are? If there are none obvious then try to think outside the box. Maybe there is a deep drop knee that takes the weight off your arms a little, or maybe a hidden knee bar which has the potential for a hands off rest. Again, practise these rests and have them memorised just as much as the moves.
5. Try to climb efficiently, smoothly and as quickly as possible without hindering sequences. The more time spent on the rock, the more pumped you'll be.
6. Treat every burn as another lesson learned.
7. Control your breathing. Take deep breaths and try to slow your heart rate right down during resting positions on the route.
8. Never fail to neglect the easy parts of the routes, make sure you practise them just as much as other parts of the route, as it will be a huge help in conserving energy for the crux sections.
AND BE SURE TO KNOW THE FINISH/EXIT MOVES LIKE CLOCKWORK!
9. Remember to make 'links' on the route. These are great for confidence, gaging progression, route fitness, muscle memory as well as providing excellent motivational boosts!
At the end of the session when you have nothing left in the tank for another real effort, go for a link. This could be trying the route in overlapping sections, or from the crux and seeing how far you get. Even just a few laps on the easier sections can be useful. Every bit of time spent on the rock is rarely wasted. All of this will only serve to prepare the body and mind more.
TACTICS
1. Warm up well, get the power up and recruit those fingers. Put a decent routine together that you can carry out without too much thinking. Low level traversing, pull-ups, press-ups and a good old fashioned jog are all excellent ways to get the body going first thing.
2. Some people choose to warm up on the route itself. They’ll treat the first go of the day as a way of adjusting the body to the style again. Maybe do all the individual moves bolt to bolt and some small links to get a slight pump going. This will hopefully keep the dreaded ‘flashpump’ out of the way!
3. Pick a trustworthy belayer. Somebody that knows you and how you climb almost as well as yourself is ideal but obviously not always possible. Know who your belayer will be in advance to eliminate uncertainty and allow your mind to focus on the job in hand. Stressing over and searching around for a belayer is never fun and will only serve to throw your mind off the task ahead.
4. Be disciplined by eating well for several days before a big red-point, plenty of carbs and protein. All our bodies are different but it goes without saying that sticking to a healthy and well balanced diet will only serve to improve your performance. At the end of the day it is up to you to discover what your body needs and to find that right balance.
While I am certainly no nutritionist, what we eat immediately post session is just as important for ensuring we get maximum recovery. Do some research and find something that works for you.
5. Don't be too fussy about conditions. All climbers, particularly British, moan about conditions. It’s something that seems programmed in our makeup. “Oh its looking a little damp” “That crimp is greasy” “The rock feels smeggy” “It’s too hot”. These are all phrases that we are all very familiar with. Try anyway, you may surprise yourself. I have had some of my best sessions and sends when the weather has been unbelievably dire, with the rain and wind lashing it down behind my back. Of course this is not always the case but no one can say you didn’t try!
6. Breathe!
7. Breathe!
8. Keep on pushing and climbing even if you feel terrible and the holds grim. You just never know…
9. When back on the ground, have someone analysis your attempt with you. Discuss what you both feel went wrong and work out ways to improve for next time. Never be afraid to question anything. Even something so simple as the way you clip a quickdraw can have a huge affect on how you perform. It has quite often even been known that a fresh pair of boots with a solid edge can be the defining factor between sending and falling! Something worth bearing in mind…
10. Ensure that you get the adequate amount of rest in between attempts. Everyone recovers at different speeds, it is up to you to decide when your body (and mind) is ready for another attempt. Before setting off up the wall, pick a few easy boulder problems to get the muscles moving and go for a gentle jog to get the blood flowing again.
It might even be worth considering another bolt to bolt burn on the route to ensure you are fully recruited.
PREPARATION
1. The importance of sleep cannot be emphasised enough. This is the time when that all important muscle recovery can really begin to take affect. Get to bed early the night before your red point. It is worth keeping in mind that the hours we sleep before midnight are by far the more beneficial. Try and aim for at least 8 hours sleep every night, especially the night before climbing.
2. Don’t be afraid to take more than 2 days off. Getting that right amount of rest and down time between sessions is a crucial thing and something that can easily be overlooked when you are so psyched and caught up in the battles of your project. Take even a week off if you feel you its necessary. Ignore those thoughts of “Oh, but I might lose some fitness” because you won’t.
3. Limit your alcohol intake to a bare minimum the day before your send day.
4. Remain focussed but relaxed on the drive to the crag and during your warm ups. Treat the day as just another climbing session with friends and do your best to just enjoy being in the outdoors.
5. Keep yourself hydrated and energy stores up during resting periods. But DON’T eat or drink too much! It can be a fine line, as we are all different but the old phrase of ‘little and often’ is a good one to adhere to. Fruit (especially bananas), energy bars, nuts are all excellent ‘crag fodder’ that are easy to digest and will keep your system continuously boosted but not sit too heavily in your stomach. The last thing you want is a huge sandwich with all the trimmings gurgling away inside your gut!
6. Try your best to not get dragged into epic belaying sessions just before your red-point. There is no worse preparation than standing around getting cold right before your burn. Your partner will understand, you will get a chance to repay your belay debt soon enough!

ATTITUDE
1. Visualise success! Control your mind. Think positive thoughts.
2. Always remain positive, even if you fall, there is no need to be too disappointed. Yes we are all guilty of getting caught up in the moment immediate post fall, and sometimes rightly so!
Recognised even the smallest of gains and if nothing else keep in mind you have just put in another burn that will make you fitter and stronger for future efforts. It is all apart of the progression and whole process. Have a little faith!
The good thing about red-pointing is that there is always a next time!
3. Try to put it all into perspective. For most this is a hobby and not the be all and end all. Having patience is another simple thing, but very often hard to maintain. If what you are striving for in your climbing is to reach your full potential then keep in mind that if it was easy then it wouldn't be hard… You would never push it to the limit and never discover just what you’re actually capable of.
4. Try hard, dig deep, be like Ondra! Put your maximum effort in and never say 'take' on a full blooded red-point, you will limit your progress otherwise. You will feel so much better back on the ground knowing you literally gave it your all, rather than left wondering what might have been if you had just hung on a little longer.
5. Never give up. Only if you are failing to make any progress at all is it time to regroup and go back to the drawing board. The smallest incremental gains are worth noting and treasuring.
It could be that in reality you are just not strong enough at present to send the route. It is important to recognise this if so and to not be down hearted by it.
Be honest with yourself, isolate and analyse your weaknesses and set about working on them until they become your strengths. Are you getting too pumped? Is your core the first to give out? Try to accept that setbacks are going to be inevitable at some point along the way. Once your mind eliminates the fear of failure, success will hopefully not be too far behind.
6. Remember to have fun!
Good luck with all your projects!
About Ethan Walker:

He takes pride in trying to take on all disciplines of the sport, which has yielded redpoints of up to F8c, headpoints of E9’s and V14 boulder problems. All of these ticks have been within the Peak District and all have been accomplished in the last year or so. These achievements have placed this ever keen youth in an extremely small and very select group of UK climbers.
- You can read more about Ethan on his BLOG
Ethan is sponsored by: Mammut


Comments