Restricted Access
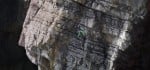
Abseil from the top of Brazen Butress.
This crag is not in the MoD range. There are some bird nests in the Chimney area ( behind Brazen Buttress) but climbing is normally unrestricted as long as climbers minimise disturbance - i.e. don't hang around any longer than necessary where birds are flying in and out of the area. New restriction 2024 due to Razorbill Nest in middle of the crux of Deep Space, affecting only that route. Please avoid until birds leave at some point in July - RAD will be updated as soon as we know.
Seasonal Restrictions
Dates: 1 March to 1 August
Reason: Nesting Birds
Please do not climb ‘Deep Space’ due to Razorbill nest in the overhang. Also, Minimise noise and disturbance on adjacent routes (Inner Space, Galaxy and Star Gate).
Rockfax Description
This amazing route follows the inside of the through cave to the lip, eventually popping out onto Deep Space. Start at the left-hand side of the landward wall of the through cave.
1) 4c, 35m. Climb easily up the wall to a large blocky ledge and walk rightwards along this. Move up until you are level with the top roof of the cave and then pull around into a chimneying position. Back and foot to the chockstone near the lip. Wild!
2) 4b, 10m. Squeeze through above a second chockstone (also wild) and climb the corner crack above to the top. © Rockfax
FA. M.Harris, C.Powell 18/Apr/1981.
Ticklists
HVS Adventures , Through Routes! , Unusual and Interesting Routes You Must Do VS- E2 , Ultimate HVS ticklist , Pembroke VDiff-HVS , Orange Spot Pembroke , Type 2 Fun , 100 Best Wales Mid Grade Climbs , Adventure ticklist 2018 , Pembroke Goalz , UK Holiday Plans , Hard Very Silly - wet troglodytes , Wales Trip - 2022 , HS-HVS adventures , Consolidation VS-HVS , Pembs Ticklist , All the climbs UKC said I should do South Wales TM
Feedback
| User | Date | Notes | ||
|---|---|---|---|---|
| Kiddie68 | 10 Jun |
Show βeta
βeta: Wild! Awesome! Almost un-fall-offable. One worrying step across the void after swinging around the rib on the 'smooth horn' (sling it!) but good gear after that, and you can take your time back-and-footing along the roof, admiring the audacity of the situation. | βeta? | |
|
Show beta
βeta: Wild! Awesome! Almost un-fall-offable. One worrying step across the void after swinging around the rib on the 'smooth horn' (sling it!) but good gear after that, and you can take your time back-and-footing along the roof, admiring the audacity of the situation. |
||||
| Misha | 4 Sep, 2023 |
Show βeta
βeta: Recommend setting up a belay in the bay before the rib. The climbing to get round the rib feels fairly serious as it is, without having 20m+ of rope out. Agree with the comments from ipfreely, except that I used the smooth little spike for a sling and a pocket lower down for a handhold to bridge across. Also agree it’s E1 5a. | βeta? | |
|
Show beta
βeta: Recommend setting up a belay in the bay before the rib. The climbing to get round the rib feels fairly serious as it is, without having 20m+ of rope out. Agree with the comments from ipfreely, except that I used the smooth little spike for a sling and a pocket lower down for a handhold to bridge across. Also agree it’s E1 5a. |
||||
| ipfreely | 24 Aug, 2021 |
Show βeta
βeta: We abseiled from the block at the top of South face which roughly drops you down the line of Heroes. A short scramble down left puts you at the cave entrance, go left into back of cave and the route starts on the right wall. I would highly recommend doing the whole route in 3 pitches. There was an in situe stance on the 1st ledge of P1 which would help with rope drag. From there keep a lowish rising traverse along a vague ramp line, you are looking for a very small polished horn on the arête & on the opposite wall across the void is a vertical crack that has a 6 inch square angled foot hold , this is where to bridge across, (do not go higher, even though there is a nut and sling up there, it’s very muddy and it’s a dead end, which you’ll have to down climb, hence the old abandoned gear) then swing around to get into the back & footing, which is a raising traverse under stepped roofs which do offer protection and some above your head, jams / holds, continue to the chocked boulder, there are 2 together. P2 is just shuffling out the hole on good jams in a very exposed brilliant position, for a bit of bridging, udging & crack climbing & brings you up just left (looking out) of your abseil anchor. If the route was split in to 3 I would grade it 4c, 5a, 4b at E1 because of the seriousness of just before getting around the rib | ||
|
Show beta
βeta: We abseiled from the block at the top of South face which roughly drops you down the line of Heroes. A short scramble down left puts you at the cave entrance, go left into back of cave and the route starts on the right wall. I would highly recommend doing the whole route in 3 pitches. There was an in situe stance on the 1st ledge of P1 which would help with rope drag. From there keep a lowish rising traverse along a vague ramp line, you are looking for a very small polished horn on the arête & on the opposite wall across the void is a vertical crack that has a 6 inch square angled foot hold , this is where to bridge across, (do not go higher, even though there is a nut and sling up there, it’s very muddy and it’s a dead end, which you’ll have to down climb, hence the old abandoned gear) then swing around to get into the back & footing, which is a raising traverse under stepped roofs which do offer protection and some above your head, jams / holds, continue to the chocked boulder, there are 2 together. P2 is just shuffling out the hole on good jams in a very exposed brilliant position, for a bit of bridging, udging & crack climbing & brings you up just left (looking out) of your abseil anchor. If the route was split in to 3 I would grade it 4c, 5a, 4b at E1 because of the seriousness of just before getting around the rib |
||||
| olddirtydoggy | 13 Sep, 2020 |
Show βeta
βeta: We found it hard to find the route. Go to the back of the cave and it is on the right hand side looking towards the back wall of the cave, land side. Same side as deep space. Info some guides don\'t include is the traverse under the roof, exposed, well protected and scary if you\'re not used to this type of climbing. | ||
|
Show beta
βeta: We found it hard to find the route. Go to the back of the cave and it is on the right hand side looking towards the back wall of the cave, land side. Same side as deep space. Info some guides don't include is the traverse under the roof, exposed, well protected and scary if you're not used to this type of climbing. |
||||
| Wil Treasure | 3 Apr, 2005 |
Show βeta
βeta: A fantastic esoteric route, the climbing is much better that appearances suggest, and the first move on the second pitch is great! | βeta? | |
|
Show beta
βeta: A fantastic esoteric route, the climbing is much better that appearances suggest, and the first move on the second pitch is great! |
||||
Logged Ascents
Guidebooks for Mother Carey's Kitchen
Not all climbs appear in all guidebooks


Please Login to view more details on the logged ascents
Space
Grade: HVS 5a ***
(Space Buttress)