

Technique - Heel Hooking
Neil Gresham takes a look at another fundamental weapon in the climbing armoury: the heel hook. With guest coach - Louis Parkinson.
Everyone wants to be good at climbing overhangs, by which I mean dealing with them skilfully rather than merely trying to pull harder. A technique which is perhaps most synonymous with the craft of overhanging climbing is the good old-fashioned heel-hook. Most climbers are aware of the basic 'hook-and-dangle' method for tackling roofs, which has been around since Don Whillans first hauled his beer-belly around the lip of the Sloth at the Roaches in the 50s. However, heel-hooking has evolved into a sophisticated and complex trick, which has wide applications in modern bouldering. The heel should be regarded as a precision instrument, which should be placed with the same level of accuracy and control as the toe. A multitude of subtle variations exists when it comes to body position, foot angle and so on. We will examine the nuances in this article. I've also recruited the services of Louis Parkinson, the colourful rising star of the British bouldering competition circuit and a key player on the coaching scene. I believe that he has much to offer on the subject of technique, not least because he had to work hard to improve his own game. When strength oozes from every pour, other climbers don't tend to have sympathy, yet Louis hit a dead-end with his climbing. He made the tough decision to put his pride to one side and focus on technique in the interest of becoming more skilful and versatile.

Heel hooking - Range of applications
Fundamentally a heel-hook can be used to lighten the load on your arms. The applications for steep climbing are obvious – when you're hanging in a roof, or grappling with slopers on a steep wall, a deft heel-hook can turn an incredibly strenuous position into a virtual rest.


A heel-hook or series of heel-hooks can be used to make progress across a roof or very steep wall, especially when breaks, rails and large projecting footholds are available. This will mean that you can avoid cutting-loose and literally use your leg as a third arm. A heel-hook may also provide the only option if you need to take off a hand to clip or chalk up.
Turning the lip
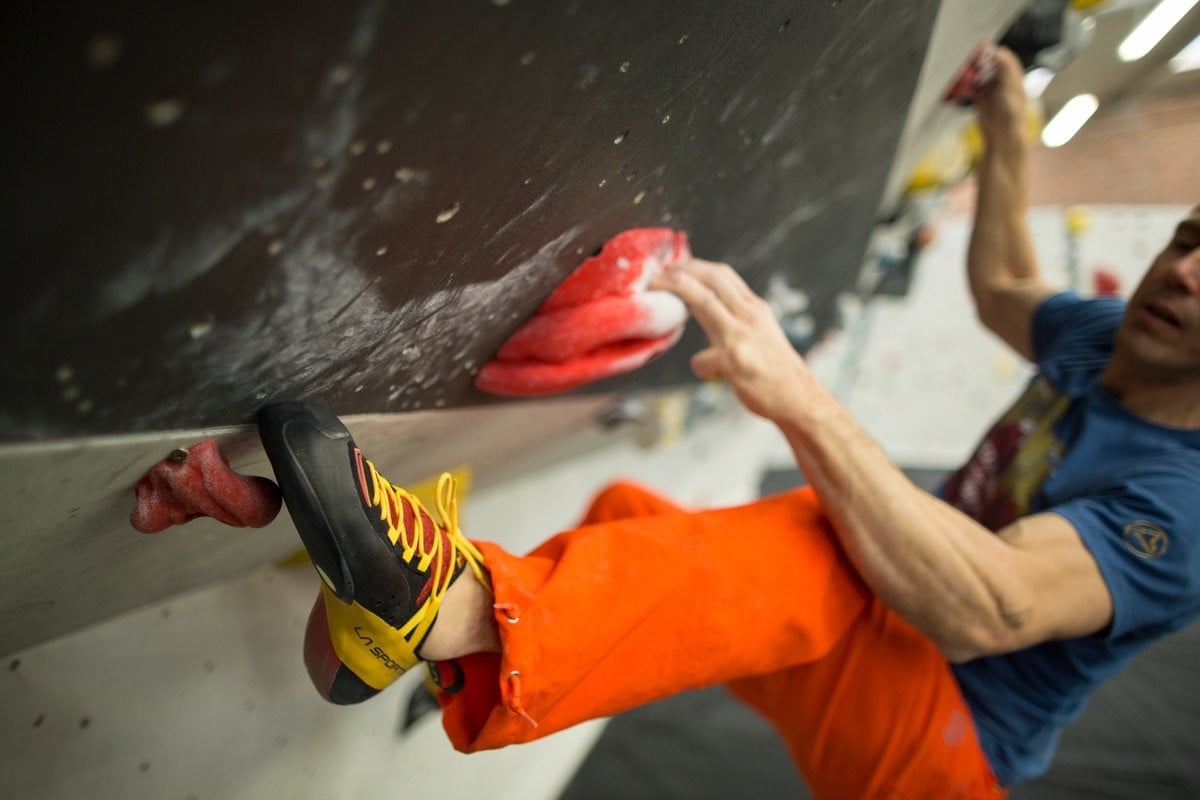
Invariably, the easiest way to turn the lip of a roof is to use a heel-hook. It always pays to read the route or problem first, so that you can avoid hanging desperately from your arms whilst searching for options. A horizontal rail, projecting jug or sloping feature on the lip will provide the clue. The usual sequence is to bring a foot round, preferably without cutting loose, or if you need to cut loose, then use momentum and try to snag the target hold first time with your heel. Then flag with the other leg by passing it behind you and dangling it at the balance point (we'll cover this in detail later in the series). The key is to pull actively with the hamstring in order to take the load from the arms, then, having gained height, the heel can be repositioned as a toe.
Heel-hooks invariably provide the easiest method for turning the lip of a roof.


Volumes
Volumes are heel-hook magnets. Whether it's a tiny screw-on hold on the side or top face, or whether you're simply dragging your heel flat against the smooth profile, there is usually plenty of scope to make these inherently awkward features feel easier if you're good with your heels. Again, the key is to identify the best place for the heel-hook beforehand, as it may be obscured from vision when you're climbing.

Arêtes and low angled terrain
A common misconception is that heel-hooks are only of use on steep ground and the result is that many climbers miss the opportunities to use them on slabs or vertical walls. A classic situation would be a ledge or sloping feature that is above you or out to the side, or an arête, to kill the dreaded 'barn-door'.

The sides of boulders
One of the most common errors with heel-hooks is simply to miss opportunities to use them, seeing as they often lie outside our normal field of vision for foothold selection, which is typically from the waist downwards and relatively close to our body. A classic example would be the arête of a boulder. There are no prizes for spending hours with tunnel vision, scrabbling around on the steep face when a heel around the arête would have been a giveaway.

Sloping rails
Heel-hooks and slopers are made for each other. There will be countless occasions when you are unable to hold your weight or make progress along a sloping break or series of slopers, yet a heel will suddenly make everything possible. The key is not to make too many hand moves, without 'tracking' your heel along, or you will have no choice but to cut loose and swing off.

Rounded top-outs
Few situations in bouldering are more demoralising than getting your hands on top of the bloc, then thrashing around like a beached whale before being spat off. When the top of the boulder is rounded and sloping, and especially when it is steeply undercut, the first priority is always to swing up a heel. This will immediately lighten the load and enable you to re-group. The next step is usually to perform a 'heel-hook rock-over', which is the go-to top-out method for most steep boulders. The idea is to simultaneously pull on the heel, whilst pushing with the lower-leg and mantleshelving with your arms, before standing up to do a muscle pose for the camera.

Heel-toe cams
A key variation is to place the heel then to rotate the toe sideways so that it cams under a projecting feature and locks the foot into place. Heel-toes may be tricky to spot and scary to execute. Always ask for careful spotting when bouldering or if you're sport climbing then try to make sure you have a bolt clipped above you!

Compression heel-hooks
A crucial technique in modern bouldering is using the heel to create a 'counter-force', to keep you pinned in close to a steep, bulging prow or arête. We will revisit this technique when we look at compression climbing later in the series, so this is not a comprehensive guide to compression but rather a detailed look at the heel-hooking component.
I see a lot of people making the same mistake with heel-hooking, which is that they just plonk their heel into place and hope that it'll stay… It rarely does, because the foot needs to be held at the correct angle and the leg has to be engaged to keep pressure on the heel. Something which has really helped me over the last few years is trying to think of my limbs not just as "arms, for pulling" and "legs, for pushing" but as four completely interchangeable limbs. You're just as likely to need to pull with your legs as you are to push with your arms
i) Spotting compression heel-hooks

ii) Locating the best and/or best positioned part of the feature
If you're heel-hooking on a large feature which is deeply incut, then you won't need to worry too much about this part. Simply place your heel around the back (noting the foot angle considerations given below) and take up the tension with your hamstring muscle. If the feature is more sloping and marginal then there may be a delicate trade-off between the most incut part and the best positioned part – for example, if the most incut part is too awkward to locate or it takes your body into an off-balance or unfeasibly strenuous position. If this is the case, then you may need to settle for a more sloping part with the caveat that you're going to need to pull that much harder with your hamstring to make the heel stick.

iii) Foot angle
The angle of your foot is everything during compression heel-hook moves and a few degrees can turn the impossible into the straightforward. The sensation of a slipping heel can be unnerving and many will be too quick to blame their shoes or lack of ability and walk away. Yet the heel doesn't have to feel totally secure for you to do the move - it only needs to stick for a second or two. Much of the guesswork about heel-angle can be removed if you understand the biomechanics, which are as follows:
Short or long move?
If you're not gaining much height during the move then it's unlikely that your foot will need to change position, so you will simply need to focus on holding the foot still and maintaining a fixed angle. However if you need to gain a significant amount of height using a compression heel then it's likely that your foot will need to go through a full 180-degree rotation using the following sequence.
Position 1: High heel - toe up
When the heel-hook is relatively high above you, place it as for a 'conventional' heel-hook using the ball of your heel, with the toe pointing upwards.

Position 2: Side heel - Toe-to-the-side
This is the classic 'compression' position, which is used when the target feature is level to your hips and out to the side (or at the mid point during a big compression move). The foot is rotated so that the toe points outwards.

Position 3: Low heel - Toe down
When the heel-hook is lower down or at the end point of a big compression move, the toe may need to be pointed downwards in order to maintain contact.

There are of course micro-variations on each of these key three stages and your ability to explore them may well determine your success on a particular move or problem.
The key with compression heel-hooks is not to lose faith. There are many occasions when we will feel unable to turn our foot outwards and point the toe down, yet the act of trying will draw our hips towards the hold and guide us into the best position.
Double compression heels
In many cases, two opposing compression heels can be used to maintain position on a steep arête or prow.

More heel-hook tips and tricks
1) 'Foot to hand' moves - releasing your heel
'There have been too many occasions when I was certain I was about to finish a problem during a competition, only to whack my heel-hook straight onto my fingers. It's painful, you get stuck, then you fall off. Move your hand out of the way first.' Louis Parkinson
i) 'Spreading'
When performing foot-to-hand heel-hooks, an awkward challenge is to get your fingers out of the way of your heel. This can be achieved either by shuffling them to one side, or in the case of narrower holds, by spreading your thumb and fingers and then placing the heel between them.


ii) 'Heel over the hand'
Another solution when heel-hooking ledges or broad features which are close to your body, is to place your leg over your arm and to heel-hook inside your hand, and then to slide your hand out to make the reach. If you are unfamiliar with this technique it can feel disconcerting, as if you're tying yourself in knots, but it comes together with practice.

2) Lower leg position
On roofs, the lower leg is likely to be flagging free and the key is to make sure it comes through far enough in order to find the balance point, such as in this extreme case.


3) Shoe selection
If you're hoping to perform anything other than basic heel-hooks on jug-rails, shoe selection is crucial. Once again, this is a personal subject and climbers will have wildly different views. For the majority, dead-space in the heel is a definite 'no', as it will cause the heel to slip and feel insecure (however a tiny minority of elite boulderers may deliberately opt for shoes, which have dead-space in the heel, yet which fit the profile of certain holds on very specific problems). Most will favour heel-cups with full rubber coverage so you are guaranteed rubber contact regardless of the angle at which you place your heel. However, some climbers find these a bit rigid and prefer the softness of heel-cups that are part rubber and part leather. My personal recommendation, provided the shoe fits, is La Sportiva's 'S-Heel' system, which stabilises the heel-cup during extreme compression heel-hook moves.

Supportive Strength and Flexibility
To be a good climber your technique and strength must progress roughly in unison. It's no good talking about a certain technique if you don't have the physical strength to perform it. It requires a certain degree of core strength to swing a heel up level with your hands, and it also takes strong hamstrings to maintain a compression heel-hook. As such, many climbers will benefit from doing supportive exercises such as straight leg raises for the core and hamstring curls, using either exercise bands, a leg-press machine or better still, suspension straps. This is not a comprehensive guide, but here are some ideas:
1) Suspension lying hamstring curl
Start lying on your back with your feet in the straps. Push your legs up and out in front of you so your body is straight at an angle of approximately 45 degrees. Now curl your legs up, bringing your heels as close to your backside as possible, tensing your glutes and maintaining stable posture. Hold for a few seconds and return to the starting position, then repeat. Do 3 – 5 sets of 6 – 12 reps, three times a week. Use one leg to make it harder.


2) Dynamic hamstring stretch
This is a superb exercise for gaining flexibility for heel-hooking. It is well worth performing it when warming up for bouldering to 'activate' your hamstrings and minimise the chance of injury during aggressive heel-hooks. Stand up straight, bend one leg up and clasp the foot with the same hand. Now bring the leg out to the side and try to straighten it, keeping hold of the foot. Do 'reps' in and out of the position.


3) Hanging straight-leg raises
Hang from a bar or jugs on a fingerboard (with arms very slightly bent and lats and scapulas engaged). Bend your knees and bring them up to your chest or - harder - raise straight legs out in front to 90 degrees. Do 3 or 4 sets to failure with 2 minutes' rest in-between at the end of climbing sessions. Don't swing and use controlled form. Once you can do 3 sets of 10 with straight legs, then try lifting your legs higher and twisting them from side to side to work the obliques as well as the abdominals. The next stage is to attempt a front-lever (where the entire body is raised and held out straight, horizontally (initially with one or both legs bent) but this is beyond the scope of a technique article!


4) Louis Parkinson's The "Charlie Chaplin" exercise
Pick an easy boulder problem and climb it using heels on footholds only. Even if the hold was obviously intended for use with the toe, use your heel. You must keep one heel-hook in place at all times; no cutting loose to place your next heel-hook! Prepare to feel absolutely ridiculous whilst rapidly improving your heel-hooking ability!
And finally….'The mental link'
Heel-hooking is a technique that requires commitment and confidence and this will only come if you practise regularly and do the supportive training. If you only tend to climb routes and avoid bouldering then you simply won't gain sufficient practice. Most modern bouldering walls will offer countless examples at all grades, so roll up your sleeves and get stuck in. Above all else, don't give up in the heat of the moment, as a heel-hook can turn things round at the flick of a switch.
Parting words on technique from Louis Parkinson:
'For the first few years of my climbing, all I focused on was strength. I assumed that if I got stronger and stronger, I'd be able to do anything. Eventually, I realised that in order to complete certain hard moves, I either needed to be a thousand times stronger, or learn more about technique to make better use of my strength. Since then, I have focused entirely on improving my technique and mindset for climbing. I've had a lot of catching up to do, and I'm sure I have become slightly weaker as a result, but I now use my strength so much more efficiently and can climb much harder than I was able to before and with far more grace.'
A special thanks to Boulder UK, The Depot Manchester and Louis Parkinson from Catalyst Climbing.

Neil Gresham is widely regarded as one of the world's leading voices in performance coaching for climbing. He has been coaching and writing regular training articles for national magazines since 1993 and has pioneered many of the methods that are used widely by coaches today. Neil is the current training columnist for UKClimbing.com and Rock & Ice in the USA.
He has climbed E10 trad, WI 7 on ice and in 2016 he climbed his first 8c+ at the age of 45 when he made the first ascent of Sabotage 8c+ at Malham Cove. Neil puts all his successes down to hard work, motivation and refinement of his game. He believes that work and family commitments don't need to limit our climbing goals provided we are focused and make the best possible use of our training time.
Key components of Neil's training programmes
- All programmes are based on response to a detailed questionnaire and are aimed at the ability level, weaknesses, strengths, goals and lifestyle constraints of each individual.
- Programmes can also be based on the results of optional benchmarking tests. See 'benchmarking' on this site.
- Programmes can be for all-round performance or geared towards different climbing styles: bouldering, sport, trad or competitions. They can also be targeted towards goals, weaknesses, trips or projects.
- You can choose between a full training programme (which includes all aspects of training) or a 'fingerboard-only' training programmes. Fingerboard programmes include advice on how to fit the sessions in with other climbing and training.